Fisher & Paykel DD24DTX6PX1 - Manuals
Fisher & Paykel DD24DTX6PX1 Dishwasher – User Manual in PDF format online.
Manuals:
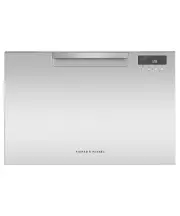
User Manual Fisher & Paykel DD24DTX6PX1


Summary
3 CONTENTS Safety and warnings 5 First use 8 Loading suggestions 10 Wash programs 11 Wash modifiers 13 Delayed start 15 Keylock 16Detergent 18Rinse aid 21 Water softener (some models only) 22 Preferences 24Wi-Fi connection & remote mode 26 Racking features 28 Maintenance 33Maintenance alerts 37 ...
5 READ AND SAVE THIS GUIDE When using your DishDrawer™ Dishwasher, follow basic precautions, including the following: General z The information in this guide must be followed to minimise the risk of fire or explosion or to prevent property damage, personal injury or loss of life. z Use the DishDrawe...
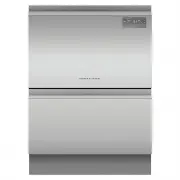
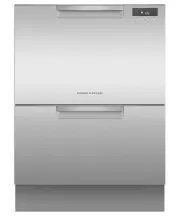
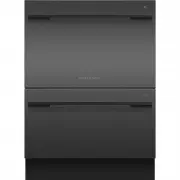
6 SAFETY AND WARNINGS z Integrated models only: Always knock on the front of the drawer to pause and wait until you hear four beeps before opening the drawer. z The DishDrawer™ Dishwasher must be used with the motor assembly, filter plate, filter, wire rack and spray arm in place. To identify what t...
Fisher & Paykel Dishwashers Manuals
-
 Fisher & Paykel DD24DAX9 N
User Manual
Fisher & Paykel DD24DAX9 N
User Manual
-
Fisher & Paykel DD24DCTX9N
User Manual
-
 Fisher & Paykel DD24DT4NX9
User Manual
Fisher & Paykel DD24DT4NX9
User Manual
-
 Fisher & Paykel DD24DTX6HI1
User Manual
Fisher & Paykel DD24DTX6HI1
User Manual
-
Fisher & Paykel DD24DTX6I1
User Manual
-
Fisher & Paykel DD24SAX9N
User Manual
-
Fisher & Paykel DD24STX6I1
User Manual
-
Fisher & Paykel DD24STX6PX1
User Manual
-
 Fisher & Paykel DD60D2NX9
User Manual
Fisher & Paykel DD60D2NX9
User Manual
-
 Fisher & Paykel DD60DCX9
User Manual
Fisher & Paykel DD60DCX9
User Manual
-
 Fisher & Paykel DD60DDFB9
User Manual
Fisher & Paykel DD60DDFB9
User Manual
-
 Fisher & Paykel DD60DI7
Manual
Fisher & Paykel DD60DI7
Manual
-
 Fisher & Paykel DD60DI9
User Manual
Fisher & Paykel DD60DI9
User Manual
-
 Fisher & Paykel DD60SCX9
User Manual
Fisher & Paykel DD60SCX9
User Manual
-
 Fisher & Paykel DD60SI9
User Manual
Fisher & Paykel DD60SI9
User Manual
-
 Fisher & Paykel DW24UNT4X2
User Manual
Fisher & Paykel DW24UNT4X2
User Manual
-
Fisher & Paykel DW24UT4I2
User Manual
-
 Fisher & Paykel DW60FC1X1
User Manual
Fisher & Paykel DW60FC1X1
User Manual
-
 Fisher & Paykel DW60FC1X2
User Manual
Fisher & Paykel DW60FC1X2
User Manual
-
 Fisher & Paykel DW60FC2W1
User Manual
Fisher & Paykel DW60FC2W1
User Manual