Electrolux EWF1041ZDWA - Manuals
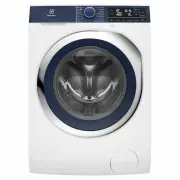
User Manual Electrolux EWF1041ZDWA


Summary
2 www.electrolux.com Visit our website to: Warning / Caution-Safety information. General information and tips Environmental information. Subject to change without notice. CUSTOMER CARE AND SERVICE Thank you for purchasing an Electrolux appliance. You’ve chosen a product that brings with it decades o...
4 www.electrolux.com In the interest of your safety and to ensure the correct use, before installing and first using the appliance, read this user manual carefully, including its hints and warnings. This appliance is intended to be used in household and similar applications such as: farm houses;by c...
7 Detergent/Softener Dispenser Cabinet Front Panel Door Drain Pump Filter Level Adjustment Feet (Front) Level Adjustment Feet (Back) Water Inlet Hose Transit Bolts & Hose Support Transit Bolts & Hose Support Mains Cable Water Drain Hose Worktop Control Panel Transit Bolts 2.1 Parts 2. PRODUC...
Electrolux Washing Machines Manuals
-
 Electrolux E4WMSTPN1
User Manual
Electrolux E4WMSTPN1
User Manual
-
 Electrolux ELFW4222AW
User Manual
Electrolux ELFW4222AW
User Manual
-
Electrolux ELFW4222AW
Manual
-
 Electrolux ELFW7337AW
User Manual
Electrolux ELFW7337AW
User Manual
-
Electrolux ELFW7337AW
Manual
-
 Electrolux ELFW7437AG
User Manual
Electrolux ELFW7437AG
User Manual
-
 Electrolux ELFW7437AW
User Manual
Electrolux ELFW7437AW
User Manual
-
Electrolux ELFW7437AW
Manual
-
 Electrolux ELFW7537AT
User Manual
Electrolux ELFW7537AT
User Manual
-
Electrolux ELFW7537AT
Installation Manual
-
Electrolux ELFW7537AT
Manual
-
 Electrolux ELFW7537AW
User Manual
Electrolux ELFW7537AW
User Manual
-
Electrolux ELFW7537AW
Manual
-
 Electrolux ELFW7637AT
User Manual
Electrolux ELFW7637AT
User Manual
-
Electrolux ELFW7637AT
Manual
-
 Electrolux ELFW7637AW
User Manual
Electrolux ELFW7637AW
User Manual
-
Electrolux ELFW7637AW
Manual
-
 Electrolux ELTE7300AW
User Manual
Electrolux ELTE7300AW
User Manual
-
 Electrolux ELTE7600AT
User Manual
Electrolux ELTE7600AT
User Manual
-
 Electrolux ELTE7600AW
User Manual
Electrolux ELTE7600AW
User Manual