Electrolux ESL69200RO - Manuals

User Manual Electrolux ESL69200RO


Summary
CONTENTS 1. SAFETY INFORMATION....................................................................................3 2. SAFETY INSTRUCTIONS.................................................................................. 4 3. PRODUCT DESCRIPTION..........................................................
Environmental information Subject to change without notice. 1. SAFETY INFORMATION Before the installation and use of the appliance, carefully read the supplied instructions. The manufacturer is not responsible for any injuries or damage that are the result of incorrect installation or usage. Always ...
– by clients in hotels, motels, bed & breakfast and other residential type environments. • Do not change the specification of this appliance. • The operating water pressure (minimum and maximum) must be between 0.5 (50) / 8 (800) bar (kPa) • Obey the maximum number of 15 place settings. • If the...
Electrolux Dishwashers Manuals
-
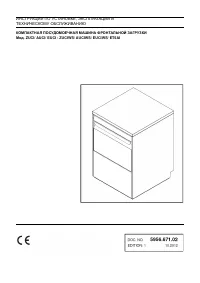 Electrolux 502036 Medical Line
User Manual
Electrolux 502036 Medical Line
User Manual
-
 Electrolux ESF 235
User Manual
Electrolux ESF 235
User Manual
-
Electrolux ESF 235
Manual
-
 Electrolux ESF 237
User Manual
Electrolux ESF 237
User Manual
-
Electrolux ESF 245
User Manual
-
 Electrolux ESF 43005
User Manual
Electrolux ESF 43005
User Manual
-
 Electrolux ESF 4513 LOX
User Manual
Electrolux ESF 4513 LOX
User Manual
-
 Electrolux ESF 46010
Manual
Electrolux ESF 46010
Manual
-
 Electrolux ESF 5511 LOX
User Manual
Electrolux ESF 5511 LOX
User Manual
-
 Electrolux ESF 5512 LOW
User Manual
Electrolux ESF 5512 LOW
User Manual
-
Electrolux ESF 5512 LOX
User Manual
-
 Electrolux ESF6700ROW
User Manual
Electrolux ESF6700ROW
User Manual
-
 Electrolux ESF6767KXA
User Manual
Electrolux ESF6767KXA
User Manual
-
 Electrolux ESF6768KXA
User Manual
Electrolux ESF6768KXA
User Manual
-
 Electrolux ESF6800ROX
User Manual
Electrolux ESF6800ROX
User Manual
-
 Electrolux ESF8725RKX
User Manual
Electrolux ESF8725RKX
User Manual
-
 Electrolux ESF8725ROX
User Manual
Electrolux ESF8725ROX
User Manual
-
 Electrolux ESF8735RKX
User Manual
Electrolux ESF8735RKX
User Manual
-
 Electrolux ESF8735ROX
User Manual
Electrolux ESF8735ROX
User Manual
-
 Electrolux ESF97400RKX
User Manual
Electrolux ESF97400RKX
User Manual