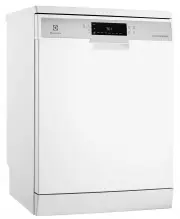
Page 2 - Contents; For the user; For the installer
- 2 - Contents For the user Safety information 3 Description of the appliance 4-5 - Spray arm- Coarse strainer/microfilter- Fine filter- Detergent dispenser- Rinse aid dispenser- Water softener The control panel 6 - Switching the buzzer off- Setting the delay start Adjusting the water softener 7 Pro...
Page 4 - Description of the appliance
Page 6 - The control panel; Switching the buzzer off
- 6 - Combination buttons ”A” In addition to selecting a programme, you can bypressing these two buttons adjust the setting of the water softener, switch off the buzzer and cancel aprogramme in progress. Control lamps: Shows that • Refilling of salt is necessary • Refilling of the rinse aid is neces...
Page 7 - Adjusting the water softener
- 7 - Water hardness level °d 1) mmol/l 2) Setting on the water softener Number of light and sound signals > 24 > 4,2 18 - 24 3,2 - 4,2 12 - 18 2,1 - 3,2 4 - 12 0,7 - 2,1 below 4 below 0,7 5 4 3* 2 1 5 4 3 2 1 no salt is needed 1. Press in the On/Off button. 2. Press the combination buttons si...
Page 8 - Programme chart
13 minutes - 8 - Programme chart Type ofdishes Type of soil: • normally soiled • dried-on food remnants • heavily soiled • dried-on food remnantsespecially egg-white and starch • normally soiled • lightly soiled • lightly soiled Washingtime withdrying: 92 minutes 112 minutes 150 minutes 35 minutes 3...
Page 9 - Loading and unloading the dishwasher; How to load the dishes
- 9 - Loading and unloading the dishwasher How to load the dishes The illustration shows the dishwasher loaded with sixplace settings. Your own dishes are not likely to beidentical to this load, but if you follow the advice belowwe are sure you will be pleased with the results. ● Always place glasse...
Page 10 - Using the appliance
- 10 - Starting the programme 1. Scrape or rinse off solid food remnants. 2. Load the dishwasher. (See the basket and loading). 3. Put the correct amount of detergent into the detergent dispenser and close the lid. 4. Press in the On/Off button. All programme indicator lamps are lit. 5. Press in the...
Page 11 - Maintenance and cleaning; Cleaning the filters
- 11 - Maintenance and cleaning Cleaning the filters There are two filters, a coarse one and a fine one whichshould be cleaned after every wash. Lift out these filterswhich are in the base of the dishwasher and wash underrunning water. The dishwasher must not be used without thefilters. Incorrect re...
Page 12 - Something Not Working; Fault
- 12 - Something Not Working The programme will not start. The dishwasher is not filling with water. Water not discharged at end of cycle. Dishes not washed satisfactorily. Visible lime deposits or white filmon the dishes. The dishwasher is noisy. The dishes are not quite dry and arenot shiny. • Is ...
Page 13 - Service; Service and Spare Parts; Customer Care Department
- 13 - Never attempt to repair the dishwasher yourself. Repairs carried out by unauthorized or inexperiencedpersons can cause injury or serious malfunctioning. Service Service and Spare Parts In the event of your appliance requiring service, or if youwish to purchase spare parts, please contact your...
Page 14 - Guarantee Conditions; Standard guarantee conditions; European Guarantee
- 14 - Guarantee Conditions Standard guarantee conditions We, Electrolux, undertake that if within 12 months from the date of the purchase this ELECTROLUX appliance or anypart thereof is proved to be defective by reason only of faulty workmanship or materials, we will, at our option repair or replac...
Page 16 - Unpacking; Damages; Use
- 16 - Unpacking 3 4 5 1 Damages If the dishwasher has been damaged during transport,you should immediately notify the company responsiblefor delivering it.If you discover any damage, faults or that anything ismissing, you should notify your retailer immediately. Never leave packaging material in a ...
Page 17 - Installation
- 17 - Position The machine is basically designed to be built into a cup-board. It is vital to ensure that the machine is positionedon a horizontal level in order for it to function properly andso that the door can be properly closed. Make sure that the shelf for the dishwasher isproperly secured in...
Page 18 - Preparing the outer door
- 18 - Installation Preparing the outer door Screw the guide rods and hinges on the door into placeusing the predrilled holes. Mount plate Before installing the dishwasher and adjusting the dooronto the cupboard, put the mount plate into its correctposition on the shelf. 1. Place the mount plate in ...
Page 19 - Fitting the outer door
- 19 - Installation Fitting the outer door 1. Unscrew the screws on the mounting plate. Lift the plate off together with the door. 2. Lay the machine down on its back. Check that none of the hoses are trapped. Insert the guide rods into the plastic door guides. 3. Slot the tabs on the mounting plate...
Page 20 - Installing the dishwasher
- 20 - Installation Installing the dishwasher 1. Put the dishwasher into the cupboard and screw the mounting plate into position from underneathwith 2 screws, with the washers between. 2. Put the spacers provided at the sides of the machine and screw the machine into place in the cupboard. Check tha...
Page 21 - Water inlet
- 21 - Installation Water inlet The dishwasher is equipped with safety featureswhich are to prevent the water from going back to the fresh water system. These features are ac-cording to current water technical safety regulations. The dishwasher should be permanently plumbed into aseparate cold water...
Page 22 - Power supply
- 22 - Power supply The dishwasher is supplied with a lead and electricalplug for connection to a 230 V, 13 A earthed wallsocket. Before any work is carried out on thedishwasher, it must be isolated from the electricmains supply, for example by removing the plugfrom the wall socket. Permanent electr...
Page 23 - Information for test centres
- 23 - The salt container and rinse aid dispenser shall be filled in accordance with this instruction manual. Before conducting the measurements the dishwasher shall be operated for one or two complete cycles usingdetergent and a clean load. Test standard: EN 50242 and EN 60704 Rated capacity: 6 pla...