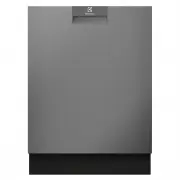
Electrolux ESF6700ROW - Manuals
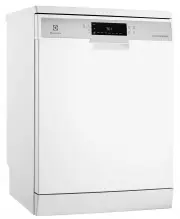
User Manual Electrolux ESF6700ROW


Summary
CONTENTS 1. SAFETY INSTRUCTIONS . . . . . . . . . . . . . . . . . . . . . . . . . . . . . . . . . . . . . . . . . . . . . . . . . . 3 2. PRODUCT DESCRIPTION . . . . . . . . . . . . . . . . . . . . . . . . . . . . . . . . . . . . . . . . . . . . . . . . . 5 3. CONTROL PANEL . . . . . . . . . . . . . ...
1. SAFETY INSTRUCTIONS Before the installation and use of the ap-pliance, carefully read the supplied in-structions. The manufacturer is not re-sponsible if an incorrect installation anduse causes injuries and damages. Alwayskeep the instructions with the appliancefor future reference. 1.1 Children ...
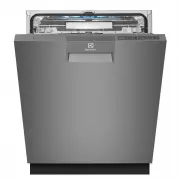
2. PRODUCT DESCRIPTION 1 2 3 4 5 8 6 7 12 9 10 11 1 Worktop 2 Upper spray arm 3 Lower spray arm 4 Filters 5 Rating plate 6 Salt container 7 Air vent 8 Rinse aid dispenser 9 Detergent dispenser 10 Cutlery basket 11 Lower basket 12 Upper basket ENGLISH 5
Electrolux Dishwashers Manuals
-
 Electrolux 502036 Medical Line
User Manual
Electrolux 502036 Medical Line
User Manual
-
 Electrolux ESF 235
User Manual
Electrolux ESF 235
User Manual
-
Electrolux ESF 235
Manual
-
 Electrolux ESF 237
User Manual
Electrolux ESF 237
User Manual
-
Electrolux ESF 245
User Manual
-
 Electrolux ESF 43005
User Manual
Electrolux ESF 43005
User Manual
-
 Electrolux ESF 4513 LOX
User Manual
Electrolux ESF 4513 LOX
User Manual
-
 Electrolux ESF 46010
Manual
Electrolux ESF 46010
Manual
-
 Electrolux ESF 5511 LOX
User Manual
Electrolux ESF 5511 LOX
User Manual
-
 Electrolux ESF 5512 LOW
User Manual
Electrolux ESF 5512 LOW
User Manual
-
Electrolux ESF 5512 LOX
User Manual
-
 Electrolux ESF6767KXA
User Manual
Electrolux ESF6767KXA
User Manual
-
 Electrolux ESF6768KXA
User Manual
Electrolux ESF6768KXA
User Manual
-
 Electrolux ESF6800ROX
User Manual
Electrolux ESF6800ROX
User Manual
-
 Electrolux ESF8725RKX
User Manual
Electrolux ESF8725RKX
User Manual
-
 Electrolux ESF8725ROX
User Manual
Electrolux ESF8725ROX
User Manual
-
 Electrolux ESF8735RKX
User Manual
Electrolux ESF8735RKX
User Manual
-
 Electrolux ESF8735ROX
User Manual
Electrolux ESF8735ROX
User Manual
-
 Electrolux ESF97400RKX
User Manual
Electrolux ESF97400RKX
User Manual
-
 Electrolux ESF97400ROX
User Manual
Electrolux ESF97400ROX
User Manual