Electrolux EFR31223 - Manuals
User Manual Electrolux EFR31223


Summary
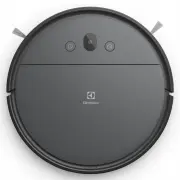
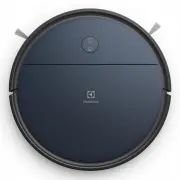
2 www.electrolux.com Overview of the robot * Accessories may vary from model to model. 1 2 13 14 12 16 17 19 20 21 23 22 11 15 18 5 4 3 6 8 9 10 7 Description of your robot vacuum cleaner 1 2 3 4 5 6 7 8 9 10 11 12 13 14 15 16 17 18 19 20 21 22 23 24 Power button / Off button (long press) Home butto...
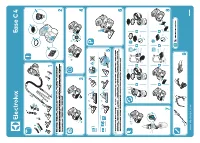
3 www.electrolux.com How to use the robot vacuum cleaner Installation of the robot vacuum cleaner Preparing the mopping function 0.5 m 1.5 m 0.5 m 1. Place the Charging base on the floor against the wall. Plug the adaptor to the power jack on the bottom of the base. Connect the Power cord plug to th...
4 www.electrolux.com How to use the robot vacuum cleaner 2. To preserve the battery life and performance: - Always keep the robot charging when not in use.- Charge it as soon as possible in the charging base after the cleaning cycle. Waiting too long mightaffect the batteries. How to connect to the ...
Electrolux Vacuums Manuals
-
 Electrolux Clario
User Manual
Electrolux Clario
User Manual
-
 Electrolux EC31-2IW
User Manual
Electrolux EC31-2IW
User Manual
-
 Electrolux EC41-2SW
User Manual
Electrolux EC41-2SW
User Manual
-
 Electrolux EC41-4T
User Manual
Electrolux EC41-4T
User Manual
-
Electrolux EC41-ANIM
User Manual
-
 Electrolux ECC21-2IW
User Manual
Electrolux ECC21-2IW
User Manual
-
Electrolux ECC21-4SB
User Manual
-
 Electrolux EER73DB
User Manual
Electrolux EER73DB
User Manual
-
 Electrolux EER73IGM
User Manual
Electrolux EER73IGM
User Manual
-
 Electrolux EER77MBM
User Manual
Electrolux EER77MBM
User Manual
-
 Electrolux EER7ALLRGY
User Manual
Electrolux EER7ALLRGY
User Manual
-
 Electrolux EER87MBM
User Manual
Electrolux EER87MBM
User Manual
-
 Electrolux EFC71622GG
User Manual
Electrolux EFC71622GG
User Manual
-
 Electrolux EFP91813
User Manual
Electrolux EFP91813
User Manual
-
 Electrolux EFP91824UG
User Manual
Electrolux EFP91824UG
User Manual
-
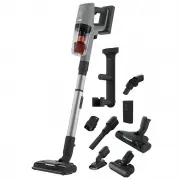
 Electrolux EFR31221
User Manual
Electrolux EFR31221
User Manual
-
 Electrolux EHVS2510AW
User Manual
Electrolux EHVS2510AW
User Manual
-
Electrolux EHVS2510AW
Manual
-
 Electrolux EHVS3510AR
User Manual
Electrolux EHVS3510AR
User Manual
-
Electrolux EHVS3510AR
Manual