DeLonghi DEGLSC24SS- Manuals
DeLonghi DEGLSC24SS– Manual in PDF format online.
Manuals:
Manual DeLonghi DEGLSC24SS


Summary
2 WARNING • ALL RANGES CAN TIP • INJURY TO PERSON COULD RESULT • INSTALL ANTI-TIP DEVICE PACKED WITH RANGE • SEE INSTALLATION INSTRUCTIONS
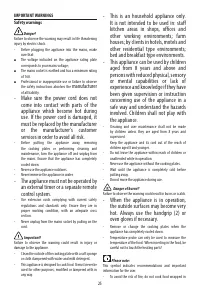
4 U S E R I N S T R U C T I O N S GENERAL INFORMATION WARNING!! 1. This appliance shall not be used for space heating. This information is based on safety considerations. 2. AlI openings in the wall behind the appliance and in the floor under the appliance shall be sealed. 3. K e e p a p p l i a n c...
5 IMPORTANT PRECAUTIONS AND RECOMMENDATIONS FORUSE OF ELECTRICAL APPLIANCES Use of any electrical appliance implies the necessity to follow a series of fundamental rules.In particular: ✓ Never touch the appliance with wet hands or feet; ✓ Do not operate the appliance barefooted; ✓ Do not allow child...
DeLonghi Manuals
-
 DeLonghi EN640 B
User Manual
DeLonghi EN640 B
User Manual
-
 DeLonghi EN640 W
User Manual
DeLonghi EN640 W
User Manual
-
 DeLonghi ENV95
User Manual
DeLonghi ENV95
User Manual
-
 DeLonghi HF3030IBK
User Manual
DeLonghi HF3030IBK
User Manual
-
 DeLonghi EXAM440 55 B
Manual
DeLonghi EXAM440 55 B
Manual
-
 DeLonghi KG210
User Manual
DeLonghi KG210
User Manual
-
DeLonghi KG210
Manual
-
 DeLonghi CGH1112DP
User Manual
DeLonghi CGH1112DP
User Manual
-
 DeLonghi NSM 11 XL
User Manual
DeLonghi NSM 11 XL
User Manual
-
DeLonghi NSM 7 NL
User Manual
-
 DeLonghi ENV90
Manual
DeLonghi ENV90
Manual
-
DeLonghi ENV90
User Manual
-
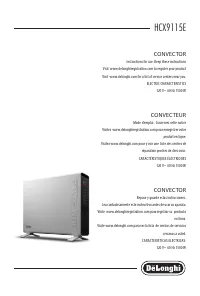 DeLonghi HCX9115E
User Manual
DeLonghi HCX9115E
User Manual
-
DeLonghi HCX9115E
Manual
-
DeLonghi HCX9115E
Installation Manual
-
 DeLonghi HFX60O15L
Manual
DeLonghi HFX60O15L
Manual
-
 DeLonghi TRLS0715EL
Manual
DeLonghi TRLS0715EL
Manual
-
 DeLonghi PAC EM93
User Manual
DeLonghi PAC EM93
User Manual
-
 DeLonghi EC230 BK
Manual
DeLonghi EC230 BK
Manual
-
DeLonghi EC230 BK
User Manual