DeLonghi DEDW60SI - Manuals
DeLonghi DEDW60SI – Manual in PDF format online.
Manuals:
Manual DeLonghi DEDW60SI


Summary
Contents Warranty Information Page 27 The De’Longhi Dishwasher is warranted against faults resulting from manufacturing or material defects. The warranty period for normal domestic installation and use is two years from the date of purchase. In non-domestic use De’Longhi limits the voluntary warrant...
Help us Help You Parts and Features Model: DEDW60SI Read this guide carefully, it is intended to help you operate and maintain your new Dishwasher properly. Keep it handy to answer your questions. If you don't understand something or you need more assistance, please call the De’Longhi Helpline. To h...
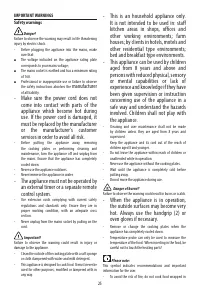
De’Longhi’s Safety Precautions Troubleshooting De’Longhi pride themselves on their innovative range of the highest quality consumer products. De’Longhi ensures all of its products are 100% safe through quality design and manufacture. All products meet or exceed stringent laboratory-tested safety req...
DeLonghi Manuals
-
 DeLonghi EN640 B
User Manual
DeLonghi EN640 B
User Manual
-
 DeLonghi EN640 W
User Manual
DeLonghi EN640 W
User Manual
-
 DeLonghi ENV95
User Manual
DeLonghi ENV95
User Manual
-
 DeLonghi HF3030IBK
User Manual
DeLonghi HF3030IBK
User Manual
-
 DeLonghi EXAM440 55 B
Manual
DeLonghi EXAM440 55 B
Manual
-
 DeLonghi KG210
User Manual
DeLonghi KG210
User Manual
-
DeLonghi KG210
Manual
-
 DeLonghi CGH1112DP
User Manual
DeLonghi CGH1112DP
User Manual
-
 DeLonghi NSM 11 XL
User Manual
DeLonghi NSM 11 XL
User Manual
-
DeLonghi NSM 7 NL
User Manual
-
 DeLonghi ENV90
Manual
DeLonghi ENV90
Manual
-
DeLonghi ENV90
User Manual
-
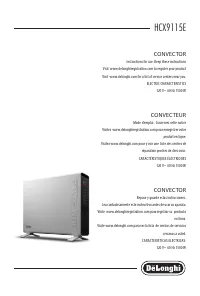 DeLonghi HCX9115E
User Manual
DeLonghi HCX9115E
User Manual
-
DeLonghi HCX9115E
Manual
-
DeLonghi HCX9115E
Installation Manual
-
 DeLonghi HFX60O15L
Manual
DeLonghi HFX60O15L
Manual
-
 DeLonghi TRLS0715EL
Manual
DeLonghi TRLS0715EL
Manual
-
 DeLonghi PAC EM93
User Manual
DeLonghi PAC EM93
User Manual
-
 DeLonghi EC230 BK
Manual
DeLonghi EC230 BK
Manual
-
DeLonghi EC230 BK
User Manual