DeLonghi 5500- Manuals
DeLonghi 5500– User Manual, Manual in PDF format online.
Manuals:
User Manual DeLonghi 5500


Summary
INDEX IMPORTANT SAFEGUARDS ................7 INTRODUCTION ..................................8 Symbols used in these instructions ...........8Letters in brackets......................................8Troubleshooting and repairs ......................8 DESCRIPTION.....................................9...
7 EN SHORT CORD INSTRUCTIONS - A short power cord is provided to reduce risks resulting from becoming entangled in or tripping over alonger cord. - Longer, detachable power supply cords or extension cords are available and may be used if care is exer-cised in their use. - If an extension cord is use...
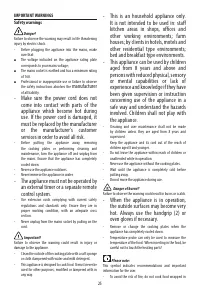
8 INTRODUCTION Thank you for choosing the ESAM 5500 automat-ic coffee maker.We hope you enjoy using your new appliance. Take a few minutes to read these instructions. This will avoid all risks and damage to themachine. Symbols used in these instructions Important warnings are identified by these sym...
Manual DeLonghi 5500


Summary
INDEX IMPORTANT SAFEGUARDS ................7 INTRODUCTION ..................................8 Symbols used in these instructions ...........8Letters in brackets......................................8Troubleshooting and repairs ......................8 DESCRIPTION.....................................9...
7 EN SHORT CORD INSTRUCTIONS - A short power cord is provided to reduce risks resulting from becoming entangled in or tripping over alonger cord. - Longer, detachable power supply cords or extension cords are available and may be used if care is exer-cised in their use. - If an extension cord is use...
8 INTRODUCTION Thank you for choosing the ESAM 5500 automat-ic coffee maker.We hope you enjoy using your new appliance. Take a few minutes to read these instructions. This will avoid all risks and damage to themachine. Symbols used in these instructions Important warnings are identified by these sym...
DeLonghi Manuals
-
 DeLonghi EN640 B
User Manual
DeLonghi EN640 B
User Manual
-
 DeLonghi EN640 W
User Manual
DeLonghi EN640 W
User Manual
-
 DeLonghi ENV95
User Manual
DeLonghi ENV95
User Manual
-
 DeLonghi HF3030IBK
User Manual
DeLonghi HF3030IBK
User Manual
-
 DeLonghi EXAM440 55 B
Manual
DeLonghi EXAM440 55 B
Manual
-
 DeLonghi KG210
User Manual
DeLonghi KG210
User Manual
-
DeLonghi KG210
Manual
-
 DeLonghi CGH1112DP
User Manual
DeLonghi CGH1112DP
User Manual
-
 DeLonghi NSM 11 XL
User Manual
DeLonghi NSM 11 XL
User Manual
-
DeLonghi NSM 7 NL
User Manual
-
 DeLonghi ENV90
Manual
DeLonghi ENV90
Manual
-
DeLonghi ENV90
User Manual
-
 DeLonghi HCX9115E
User Manual
DeLonghi HCX9115E
User Manual
-
DeLonghi HCX9115E
Manual
-
DeLonghi HCX9115E
Installation Manual
-
 DeLonghi HFX60O15L
Manual
DeLonghi HFX60O15L
Manual
-
 DeLonghi TRLS0715EL
Manual
DeLonghi TRLS0715EL
Manual
-
 DeLonghi PAC EM93
User Manual
DeLonghi PAC EM93
User Manual
-
 DeLonghi EC230 BK
Manual
DeLonghi EC230 BK
Manual
-
DeLonghi EC230 BK
User Manual