De Dietrich DTI 1105 WE - Manuals
User Manual De Dietrich DTI 1105 WE


Summary
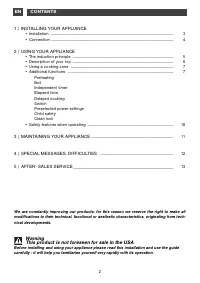
2 EN CONTENTS 1 / INSTALLING YOUR APPLIANCE • Installation _________________________________________________________ 3 • Connection _________________________________________________________ 4 2 / USING YOUR APPLIANCE • The induction principle _______________________________________________ 5 • Descr...
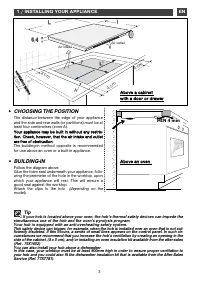
3 EN 1 / INSTALLING YOUR APPLIANCE • • CHOOSING THE POSITION The distance between the edge of your applianceand the side and rear walls (or partitions) must be atleast four centimetres (zone A).Y Yo ou urr a ap pp plliia an nc ce e m ma ay y b be e b bu uiilltt iin n w wiitth ho ou utt a an ny y rre...
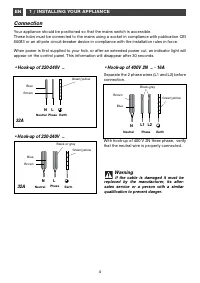
4 EN 1 / INSTALLING YOUR APPLIANCE Separate the 2 phase wires (L1 and L2) beforeconnection. N L Green/yellow Blue Black or grey Brown Neutral Earth Phase N L1 L2 Blue Green/yellow Black-grey Brown •Hook-up of 220-240V ~ Warning If the cable is damaged it must be replaced by the manufacturer, its aft...
De Dietrich Hobs Manuals
-
 De Dietrich DPE7549XF
User Manual
De Dietrich DPE7549XF
User Manual
-
 De Dietrich DPE7610B
User Manual
De Dietrich DPE7610B
User Manual
-
 De Dietrich DPE7620XF
User Manual
De Dietrich DPE7620XF
User Manual
-
 De Dietrich DPE7649XF
User Manual
De Dietrich DPE7649XF
User Manual
-
 De Dietrich DPE7729XF
User Manual
De Dietrich DPE7729XF
User Manual
-
 De Dietrich DPE7929XF
User Manual
De Dietrich DPE7929XF
User Manual
-
 De Dietrich DPG7449B
User Manual
De Dietrich DPG7449B
User Manual
-
 De Dietrich DPI7360X
User Manual
De Dietrich DPI7360X
User Manual
-
 De Dietrich DPI7540B
User Manual
De Dietrich DPI7540B
User Manual
-
 De Dietrich DPI7572G
User Manual
De Dietrich DPI7572G
User Manual
-
 De Dietrich DPI7572W
User Manual
De Dietrich DPI7572W
User Manual
-
 De Dietrich DPI7572X
User Manual
De Dietrich DPI7572X
User Manual
-
 De Dietrich DPI7580B
User Manual
De Dietrich DPI7580B
User Manual
-
 De Dietrich DPI7584X
User Manual
De Dietrich DPI7584X
User Manual
-
 De Dietrich DPI7602BM
User Manual
De Dietrich DPI7602BM
User Manual
-
 De Dietrich DPI7670G
User Manual
De Dietrich DPI7670G
User Manual
-
 De Dietrich DPI7670W
User Manual
De Dietrich DPI7670W
User Manual
-
 De Dietrich DPI7670X
User Manual
De Dietrich DPI7670X
User Manual
-
 De Dietrich DPI7670XU
User Manual
De Dietrich DPI7670XU
User Manual
-
 De Dietrich DPI7682X
User Manual
De Dietrich DPI7682X
User Manual