Page 2 - Welcome; Visit; Read this owner’s manual:; will help you solve common problems that may occur.
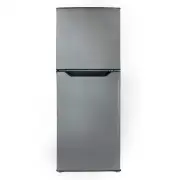
1 Welcome Welcome to the Danby family. We are proud of our quality products and we believe in dependable service. We suggest that you read this owner’s manual before plugging in your new appliance as it contains important operation information, safety information, troubleshooting and maintenance tip...
Page 3 - Do not connect your appliance to extension; Important Safety Information; READ AND FOLLOW ALL SAFETY INSTRUCTIONS; SAVE THESE INSTRUCTIONS!
2 SAFETY REQUIREMENTS DANGER: Risk of fi re or explosion. Flammable refrigerant used. Do not puncture refrigerant tubing. • Do not use mechanical devices to defrost refrigerator. • Ensure that servicing is done by factory authorized service personnel, to minimize product damage or safety issues. • If...
Page 4 - FEATURES; Freezer Temperature Control; LOCATION; OPERATING INSTRUCTIONS
FEATURES 1. Magnetic Gasket 2. Freezer Shelf 3. Freezer Temperature Control 4. Freezer Door Bins. 5. Refrigerator Temperature Control 6. Refrigerator Shelves 7. Refrigerator Door Bins. 8. Crisper 9. Leveling Legs 3 1 3 4 5 6 7 8 9 2 LOCATION • Two people should be used when moving the appliance. • R...
Page 5 - TEMPERATURE SELECTION; Turn the leveling leg counter-clockwise as far as; HUMIDITY CONTROL
OPERATING INSTRUCTIONS TEMPERATURE SELECTION The refrigerator control panel is located on the rear wall of the refrigerator compartment. This dial controls the temperature of both the refrigerator and freezer compartment. The dial in the freezer compartment is used to balance the cold air distributi...
Page 6 - DOOR REVERSAL INSTRUCTIONS; If the appliance is placed on its back or side during
5 OPERATING INSTRUCTIONS DOOR REVERSAL INSTRUCTIONS If the appliance is placed on its back or side during this process it must be allowed to stand upright for 6 hours before plugging in to avoid damage to internal components. 1. Remove the screw hole cover from the top left side of the cabinet. Remo...
Page 7 - • Short; MOVING
CLEANING • To clean the inside of the appliance, use a soft cloth and a solution made of a tablespoon of baking soda to one quart of water or some mild detergent. • Wash removable shelves in a mild detergent solution, then dry and wipe with a soft cloth. • Clean the outside with a soft, damp cloth a...
Page 8 - TROUBLESHOOTING
PROBLEM POSSIBLE CAUSE No power • A fuse may be blown or the circuit breaker tripped • Plug not fully inserted into the wall outlet Internal temperature not cold enough • Temperature setting is too warm • Door is not shut properly or opened excessively • Recently added a large quantity of warm food ...
Page 9 - LIMITED IN-HOME APPLIANCE WARRANTY; LIMITED “IN HOME” WARRANTY
LIMITED IN-HOME APPLIANCE WARRANTY This quality product is warranted to be free from manufacturer’s defects in material and workmanship, provided that the unit is used under the normal operating conditions intended by the manufacturer.This warranty is available only to the person to whom the unit wa...
Page 10 - Bienvenue; Visitez; ser vice sous garantie.; aider à mieux vous servir.; Lire ce manuel du propriétaire :
Bienvenue Bienvenue à la famille Danby. Nous sommes fi ers de la qualité de nos produits et nous croyons au service fi able. Nous vous suggérons de lire ce manuel d’utilisation avant de brancher votre nouvel appareil, car il contient des informations inportantes sur l’utilisation, la sécurité, le dépa...
Page 11 - Ne branchez pas votre appareil à des rallonges; Consignes de sécurité importantes; LIRE ET SUIVRE TOUTES LES INSTRUCTIONS DE SÉCURITÉ; GARDEZ CES INSTRUCTIONS!
10 EXIGENCES DE SÉCURITÉ DANGER : Risque d’incendie ou d’explosion. Liquide frigorigène infl ammable utilisé. Ne pas percer les tubes de réfrigérant. • N’utilisez pas de dispositifs mécaniques pour dégivrer le réfrigérateur. • Assurez-vous que l’entretien est effectué par le personnel de service auto...
Page 12 - EMPLACEMENT; INSTRUCTIONS D’INSTALLATION; CARACTÉRISTIQUES; Etagère congélateur
EMPLACEMENT • Deux personnes doivent être utilisées pour déplacer l’appareil. • Retirer l‘emballage intérieur et extérieur avant l’installation. Essuyez l’extérieur de l’appareil avec un chiffon doux et sec et à l’intérieur avec un chiffon humide tiède. • Placez votre appareil sur un plancher qui es...
Page 13 - CONSIGNES D’UTILISATION; CONTRÔLE DE L’HUMIDITÉ; Tournez la jambe de nivellement dans le sens; SÉLECTION DE LA TEMPÉRATURE
CONSIGNES D’UTILISATION CONTRÔLE DE L’HUMIDITÉ Il y a une jauge de contrôle d’humidité sur le bac à légumes qui peut être utilisée pour contrôler le niveau d’humidité à l’intérieur du bac à légumes. La goutte d’eau unique indique des conditions moins humides. Les trois larmes indiquent des condition...
Page 14 - INSTRUCTIONS D’INVERSION DE PORTE; Si l’appareil est placé sur le dos ou sur le côté
CONSIGNES D’UTILISATION 13 INSTRUCTIONS D’INVERSION DE PORTE Si l’appareil est placé sur le dos ou sur le côté pendant ce processus, il doit être laissé debout pendant 6 heures avant de le brancher pour éviter d’endommager les composants internes. 1. Retirez le couvercle du trou de vis du côté supér...
Page 15 - SOINS ET ENTRETIEN; NETTOYAGE; • Courtes vacances :; DÉMÉNAGER
SOINS ET ENTRETIEN NETTOYAGE • Pour nettoyer l’intérieur de l’appareil, utilisez un chiffon doux et une solution composée d’une cuillère à soupe de bicarbonate de soude et d’un litre d’eau ou un peu de détergent doux. • Lavez les étagères amovibles dans une solution détergente douce, puis séchez et ...
Page 16 - DÉPANNAGE
15 PROBLÈME CAUSE POSSIBLE L’appareil n’est pas alimenté • Un fusible de votre panneau de distribution peut être grillé ou le disjoncteur déclenché • La fi che n’est pas complètement insérée dans prise murale La température interne n’est pas assez froide • Le réglage de la température est trop chaud ...
Page 17 - GARANTIE LIMITÉE « À DOMICILE »
LIMITED IN-HOME APPLIANCE WARRANTY This quality product is warranted to be free from manufacturer’s defects in material and workmanship, provided that the unit is used under the normal operating conditions intended by the manufacturer.This warranty is available only to the person to whom the unit wa...
Page 18 - Bienvenido; Visite; Lea este manual del propietario:
17 1-800-26- Danby (1-800-263-2629) Bienvenido Bienvenido a la familia Danby. Estamos orgullosos de nuestros productos de calidad y creemos en un servicio confi able. Sugerimos que lea este manual del propietario antes de conectar el nuevo aparato ya que contiene información importante sobre la opera...
Page 19 - No conecte el aparato a los cables de extensión ni; Importantes Instrucciones de Seguridad; LEA Y SIGA TODAS LAS INSTRUCCIONES DE SEGURIDAD; ¡GUARDE ESTAS INSTRUCCIONES!
18 REQUERIMIENTOS DE SEGURIDAD PELIGRO: Riesgo de incendio o explosión. Refrigerante infl amable usado. No perforar la tubería del refrigerante. • No utilice dispositivos mecánicos para descongelar el refrigerador. • Asegúrese de que el personal de mantenimiento autorizado por la fábrica haga el mant...
Page 20 - UBICACIÓN; INSTRUCCIONES DE INSTALACIÓN; CARACTERISTICAS
19 UBICACIÓN • Se deben utilizar dos personas al mover el aparato. • Retire el embalaje interior y exterior antes de la instalación. Limpie el exterior del aparato con un paño suave y seco y el interior con un paño húmedo tibio. • Coloque el aparato en un piso que sea lo sufi cientemente fuerte como ...
Page 21 - INSTRUCCIONES DE NIVELACIÓN; Gire la pierna de nivelación en el sentido de; INSTRUCCIONES DE OPERACIÓN; CONTROL DE HUMEDAD
20 INSTRUCCIONES DE NIVELACIÓN Hay una pata ajustable en la parte inferior del aparato que se puede subir o bajar para asegurarse de que el aparato esté nivelado. 1. Gire la pierna de nivelación en el sentido de las agujas del reloj hasta el tope, hasta que la parte superior del pie toque la parte i...
Page 22 - INSTRUCCIONES DE REVERSIÓN DE LA PUERTA; Si el electrodoméstico se coloca de espaldas o
INSTRUCCIONES DE OPERACIÓN 21 INSTRUCCIONES DE REVERSIÓN DE LA PUERTA Si el electrodoméstico se coloca de espaldas o de costado durante este proceso, se debe dejar en posición vertical durante 6 horas antes de enchufarlo para evitar dañar los componentes internos. 1. Retire la tapa del orifi cio del ...
Page 23 - CUIDADO Y MANTENIMIENTO; • Vacaciones
22 CUIDADO Y MANTENIMIENTO LIMPIEZA • Para limpiar el interior del aparato, use un paño suave y una solución hecho de una cucharada de bicarbonato de sodio con un litro de agua o un poco de detergente suave. • Lave los estantes extraíbles en una solución de detergente suave, luego seque y limpie con...
Page 24 - SOLUCIÓN SUGERIDA
PROBLEMA POSSIBLE CAUSA No funciona • Un fusible en su casa puede soplarse o el interruptor de circuito disparado • El enchufe no está completamente insertado en la toma de corriente La temperatura interna no es lo sufi cientemente fría • La temperatura está demasiado alta • La puerta no se cierra co...
Page 25 - GARANTÍA LIMITADA “A DOMICILIO”
LIMITED IN-HOME APPLIANCE WARRANTY This quality product is warranted to be free from manufacturer’s defects in material and workmanship, provided that the unit is used under the normal operating conditions intended by the manufacturer.This warranty is available only to the person to whom the unit wa...
Page 28 - MODEL • MODÈLE • MODELO
MODEL • MODÈLE • MODELO Printed in ChinaImprimé en Chine Impreso en China Danby Products Limited, Guelph, ON, Canada N1H 6Z9 Danby Products Inc., Findlay, Ohio, USA 45840 DFF070B1BSLDB-6