Cuisinart SS10P1 - Manuals
Cuisinart SS10P1 Coffee Machine – User Manual in PDF format online.
Manuals:
User Manual Cuisinart SS10P1


Summary
2 IMPORTANT SAFEGUARDS When using electrical appliances, basic safety precautions should always be taken to reduce the risk of fire, electric shock and/or injury to persons, including the following: 1. READ ALL INSTRUCTIONS. 2. Do not touch hot surfaces. Use handles and knobs. 3. To protect against ...
WARNING R I S K O F F I R E O R E L E C T R I C S H O C K D O N OT O P E N WARNING: TO REDUCE THE RISK OF FIRE OR ELECTRIC SHOCK, DO NOT REMOVE COVER (OR BACK) NO USER-SERVICEABLE PARTS INSIDE REPAIR SHOULD BE DONE BY AUTHORIZED SERVICE PERSONNEL ONLY A. Circuit Grounding Conductor Connected Properl...
4 Important Safeguards . . . . . . . . . . . . . . . . . . . . . 2 Important Unpacking Instructions . . . . . . . . . . . . 3 The Quest for the Perfect Cup . . . . . . . . . . . . . . 5 Features and Benefits. . . . . . . . . . . . . . . . . . . . . 6 Set-Up & First Brew . . . . . . . . . . . . ....
Cuisinart Coffee Machines Manuals
-
 Cuisinart CHW16
User Manual
Cuisinart CHW16
User Manual
-
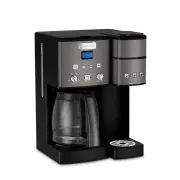
 Cuisinart DCC-1200BKSP1
User Manual
Cuisinart DCC-1200BKSP1
User Manual
-
 Cuisinart DCC-1200L
User Manual
Cuisinart DCC-1200L
User Manual
-
 Cuisinart DCC-2650P1
User Manual
Cuisinart DCC-2650P1
User Manual
-
 Cuisinart DCC3000P1
User Manual
Cuisinart DCC3000P1
User Manual
-
 Cuisinart DCC-450BK
User Manual
Cuisinart DCC-450BK
User Manual
-
 Cuisinart DGB-2
User Manual
Cuisinart DGB-2
User Manual
-
 Cuisinart DGB-800
User Manual
Cuisinart DGB-800
User Manual
-
 Cuisinart DGB-850
User Manual
Cuisinart DGB-850
User Manual
-
 Cuisinart DTC-975BKN
User Manual
Cuisinart DTC-975BKN
User Manual
-
 Cuisinart EM-100NP1
User Manual
Cuisinart EM-100NP1
User Manual
-
 Cuisinart EM-200
User Manual
Cuisinart EM-200
User Manual
-
Cuisinart EM-200
Manual
-
 Cuisinart EM-200NP1
User Manual
Cuisinart EM-200NP1
User Manual
-
 Cuisinart EM-25
User Manual
Cuisinart EM-25
User Manual
-
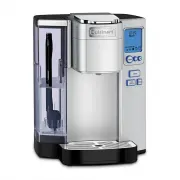 Cuisinart SS-10P1
User Manual
Cuisinart SS-10P1
User Manual
-
 Cuisinart SS-15BKSP1
User Manual
Cuisinart SS-15BKSP1
User Manual
-
 Cuisinart SS-15P1
User Manual
Cuisinart SS-15P1
User Manual
-
 Cuisinart SS16
User Manual
Cuisinart SS16
User Manual
-
 Cuisinart SS-20
User Manual
Cuisinart SS-20
User Manual