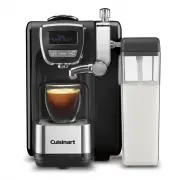
Cuisinart SS-20 - Manuals
User Manual Cuisinart SS-20


Summary
3 WARNING: RISK OF FIRE OR ELECTRIC SHOCK The lightning flash with arrowhead symbol within an equilateral triangle is intended to alert the user to the presence of uninsulated dangerous voltage within the product’s enclosure that may be of sufficient magnitude to constitute a risk of fire or electri...
4 CONTENTS Important Safeguards . . . . . . . . . . . . . . . . . . .2 Unpacking Instructions . . . . . . . . . . . . . . . . . .4 The Quest for the Perfect Cup of Coffee . . . .4 Features and Benefits . . . . . . . . . . . . . . . . 5 – 6 Control Panel . . . . . . . . . . . . . . . . . . . . . . . ...
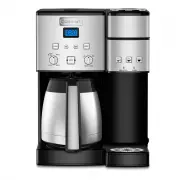
5 1. Coffeemaker Reservoir Cover Flips back for easy filling. 2. Coffeemaker Water Reservoir (not shown) With water level indicator window. 3. Showerhead (not shown) Distributes water evenly over coffee, reducing temperature loss as water passes through grounds. 4. Coffeemaker Control Panel See deta...
Cuisinart Coffee Machines Manuals
-
 Cuisinart CHW16
User Manual
Cuisinart CHW16
User Manual
-
 Cuisinart DCC-1200BKSP1
User Manual
Cuisinart DCC-1200BKSP1
User Manual
-
 Cuisinart DCC-1200L
User Manual
Cuisinart DCC-1200L
User Manual
-
 Cuisinart DCC-2650P1
User Manual
Cuisinart DCC-2650P1
User Manual
-
 Cuisinart DCC3000P1
User Manual
Cuisinart DCC3000P1
User Manual
-
 Cuisinart DCC-450BK
User Manual
Cuisinart DCC-450BK
User Manual
-
 Cuisinart DGB-2
User Manual
Cuisinart DGB-2
User Manual
-
 Cuisinart DGB-800
User Manual
Cuisinart DGB-800
User Manual
-
 Cuisinart DGB-850
User Manual
Cuisinart DGB-850
User Manual
-
 Cuisinart DTC-975BKN
User Manual
Cuisinart DTC-975BKN
User Manual
-
 Cuisinart EM-100NP1
User Manual
Cuisinart EM-100NP1
User Manual
-
 Cuisinart EM-200
User Manual
Cuisinart EM-200
User Manual
-
Cuisinart EM-200
Manual
-
 Cuisinart EM-200NP1
User Manual
Cuisinart EM-200NP1
User Manual
-
 Cuisinart EM-25
User Manual
Cuisinart EM-25
User Manual
-
 Cuisinart SS10P1
User Manual
Cuisinart SS10P1
User Manual
-
 Cuisinart SS-10P1
User Manual
Cuisinart SS-10P1
User Manual
-
 Cuisinart SS-15BKSP1
User Manual
Cuisinart SS-15BKSP1
User Manual
-
 Cuisinart SS-15P1
User Manual
Cuisinart SS-15P1
User Manual
-
 Cuisinart SS16
User Manual
Cuisinart SS16
User Manual