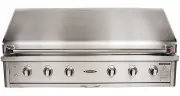
Capital ACG52RBIN - Manuals
User Manual Capital ACG52RBIN


Summary
Dear Valued Customer, Congratulations on making a smart choice! You have joined an elite group of cookingenthusiasts who demand only the very best from their appliances. A Capital Cooking appliancepromises years of enjoyment and maximum pleasure, allowing cooks everywhere to createculinary memories ...
WARNING! FOR OUTDOOR USE ONLY! WARNING! DO NOT attempt to light grill without reading the LIGHTING INSTRUCTIONS section inthis manual. WARNING! If the information in this manual is not followed exactly, a fire or explosion may result,causing property damage, personal injury or death. Please read the...
SAFETY PRACTICES AND PRECAUTIONS WARNING! When in use, portions of this grill get hot enough to cause severe burns. Children and petsshould never be left alone or unattended in an area where the grill is being used. Never allowchildren to sit, stand, or play on or around the grill at any time. When ...
Capital BBQs Manuals
-
 Capital ACG40RBI1L
User Manual
Capital ACG40RBI1L
User Manual
-
 Capital ACG40RBI1N
User Manual
Capital ACG40RBI1N
User Manual
-
 Capital ACG40RBIN
User Manual
Capital ACG40RBIN
User Manual
-
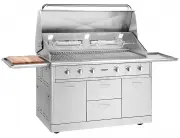
 Capital ACG40RFS1L
User Manual
Capital ACG40RFS1L
User Manual
-
 Capital ACG40RFS1N
User Manual
Capital ACG40RFS1N
User Manual
-
 Capital ACG52RBI1L
User Manual
Capital ACG52RBI1L
User Manual
-
 Capital ACG52RBI1N
User Manual
Capital ACG52RBI1N
User Manual
-
 Capital ACG52RFS1L
User Manual
Capital ACG52RFS1L
User Manual
-
 Capital ACG52RFS1N
User Manual
Capital ACG52RFS1N
User Manual
-
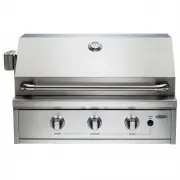 Capital PRO32RBIL
User Manual
Capital PRO32RBIL
User Manual
-
 Capital PRO32RBIN
User Manual
Capital PRO32RBIN
User Manual
-
 Capital PRO36RBIL
User Manual
Capital PRO36RBIL
User Manual
-
 Capital PRO36RBIN
User Manual
Capital PRO36RBIN
User Manual