Page 2 - THANK YOU FOR MAKING GE APPLIANCES A PART OF YOUR HOME.; card included in the packing material.
2 49-2000708 Rev. 6 THANK YOU FOR MAKING GE APPLIANCES A PART OF YOUR HOME. Whether you grew up with GE Appliances, or this is your first, we’re happy to have you in the family. We take pride in the craftsmanship, innovation and design that goes into every GE Appliances product, and we think you wil...
Page 3 - CAUTION; CAUTION; WARNING
49-2000708 Rev. 6 3 SAFETY INFORMATION IMPORTANT SAFETY INFORMATIONREAD ALL INSTRUCTIONS BEFORE USING READ AND SAVE THESE INSTRUCTIONS WARNING TO REDUCE THE RISK OF FIRE, ELECTRIC SHOCK OR INJURY TO PERSONS, OBSERVE THE FOLLOWING: A. Use this unit only in the manner intended by the manufacturer. If ...
Page 4 - How to Remove Protective Shipping Film and Packaging Tape
4 49-2000708 Rev. 6 SAFETY INFORMATION IMPORTANT SAFETY INFORMATIONREAD ALL INSTRUCTIONS BEFORE USING READ AND SAVE THESE INSTRUCTIONS WARNING TO REDUCE THE RISK OF A RANGE TOP GREASE FIRE: A. Never leave surface units unattended at high settings. Boilovers cause smoking and greasy spillovers that m...
Page 5 - Controls; Chef Connect Operation Bluetooth; Chef Connect
49-2000708 Rev. 6 5 Controls USING THE HOOD: Controls Chef Connect Operation Bluetooth ® Connection To pair with another device: To start the pairing process on the hood, press and hold the Light button for 3 seconds. The backlight for all the icons will flash until the hood is paired with the range...
Page 7 - Grease Filter; Filters; Charcoal Filter (for recirculation installation only)
49-2000708 Rev. 6 7 Be sure the circuit breaker is off and all surfaces are cool before cleaning or servicing any part of the vent hood. Grease Filter The filter traps grease released by foods from cooking. The filters must ALWAYS be in place when the hood is in use. The grease filters are dishwashe...
Page 8 - Stainless Steel Surfaces (on some models); Surfaces
8 49-2000708 Rev. 6 Stainless Steel Surfaces (on some models) Do not use a steel wool pad; it will scratch the surface. To clean the stainless steel surface, use warm sudsy water or a stainless steel cleaner or polish. Always wipe the surface in the direction of the brush line. Follow the cleaner in...
Page 9 - BEFORE YOU BEGIN; IMPORTANT; FOR YOUR SAFETY; Range Hoods
49-2000708 Rev. 6 9 Installation Instructions “If you have questions, call GE Appliances at 800.GE.CARES (800.432.2737) or visit our website at: GEAppliances.com” INST ALLA TION INSTRUCTIONS BEFORE YOU BEGIN Read these instructions completely and carefully. Ŷ IMPORTANT — Save these instructions for ...
Page 10 - PRODUCT DIMENSIONS
10 49-2000708 Rev. 6 Installation Preparation INSTALLATION PREPARATION PRODUCT DIMENSIONS 30” Models Requires a 30” opening. 36” Models Requires a 36” opening. TOOLS AND MATERIALS REQUIRED (NOT SUPPLIED) Wire cutter/stripper Level Aluminized duct tape Safety glasses Phillips screwdriver with at leas...
Page 11 - PLAN THE INSTALLATION; PARTS PROVIDED; HARDWARE PACKAGE
49-2000708 Rev. 6 11 INST ALLA TION PREP ARA TION Installation Preparation PLAN THE INSTALLATION CAUTION To reduce risk of fire and to properly exhaust air, be sure to duct the air outside. Do not vent exhaust air into spaces within walls or ceilings or into attics, crawl spaces, or garages. PARTS S...
Page 12 - INSTALLATION DIMENSIONS; Installation Preparation; DUCT COVER REQUIREMENTS
12 49-2000708 Rev. 6 INSTALLATION DIMENSIONS The hood duct covers can be adjusted for different ceiling heights depending on the distance between the bottom of the hood and the cooktop (distance X). See Installation Height Table on the next page. Installation Preparation INSTALLATION PREPARATION DUC...
Page 14 - ADVANCE PLANNING; POWER SUPPLY
14 49-2000708 Rev. 6 Installation Preparation INSTALLATION PREPARATION ADVANCE PLANNING Duct Install Planning Ŷ This hood is designed to be vented vertically through the ceiling with a 8” round duct or backwall using an 90º elbow and 8” round duct. Ŷ Use metal ductwork only. Ŷ Plan the route for ven...
Page 15 - DETERMINE HOOD, DUCTWORK AND WIRING LOCATIONS
49-2000708 Rev. 6 15 INST ALLA TION PREP ARA TION Installation Preparation NEW CONSTRUCTION, PRE-PLANNING, OR REMODELING NOTE: For existing construction, skip to the section below. Ŷ For ducted installation through the top, the 8" diameter hole for the duct in the ceiling must be centered 6-1/4&...
Page 17 - INSTALL HOOD SUPPORT; INST; INSTALL DAMPER
49-2000708 Rev. 6 17 1 INSTALL HOOD SUPPORT IMPORTANT: Framing must be capable of supporting 100 lbs. • Locate at least 2 vertical studs for the installation bar by tapping drywall with a hammer or use a stud finder. • Level the installation bar and center left to right above the marked line. Hold b...
Page 18 - (Alternate Mounting Method) INSTALL HOOD TO SOFFIT OR CABINET
18 49-2000708 Rev. 6 INST ALLA TION INSTRUCTIONS Installation Instructions 4 (Alternate Mounting Method) INSTALL HOOD TO SOFFIT OR CABINET SKIP THIS STEP IF USING WALL MOUNTING METHOD IMPORTANT: Soffit or cabinet framing must be capable of supporting 100 lbs. When necessary the hood may be installed...
Page 19 - Installation Instructions; INSTALL MOTOR
49-2000708 Rev. 6 19 Installation Instructions 5 INSTALL MOTOR 1. Align the motor exhaust with the top damper as shown in figure below. 2. Secure the motor to motor mounting plate using screws (D). 3. Plug the motor connector into the mating connector on top of the control housing. 6 CONNECT ELECTRI...
Page 20 - CONNECT DUCTWORK
20 49-2000708 Rev. 6 INST ALLA TION INSTRUCTIONS Installation Instructions 7 CONNECT DUCTWORK A. Vented Installation • Connect the house ducting to the top damper as shown in image below. • Seal all connections with duct tape. CAUTION Do not use sheet metal screws at the transition to ductwork conne...
Page 21 - INSTALL DUCT COVERS
49-2000708 Rev. 6 21 Installation Instructions 8 INSTALL DUCT COVERS • Duct Cover Accessories are available at GEApplianceparts.com or by calling 877.959.8688. See Accessories on page 27. • Follow instructions included with the duct cover accessory to install duct covers. 9 I NSTALL FILTERS • Follow...
Page 22 - MAKE UP AIR TECHNOLOGY
22 49-2000708 Rev. 6 Installation Instructions MAKE UP AIR TECHNOLOGY This operation must be performed by a qualified technician or installer. Note to Installers and Inspectors : This product comes equipped with a simple installation feature that limits maximum CFM levels in order to comply with cer...
Page 23 - Notes
Page 25 - Before you call for service; TROUBLESHOOTING TIPS; Problem
49-2000708 Rev. 6 25 Troubleshooting Tips ... Before you call for service Save time and money! Review the charts on the following pages first and you may not need to call for service. TROUBLESHOOTING TIPS Problem Possible Cause What To Do Fan/Light does not operate when button is turned ON A house f...
Page 26 - What GE Appliances will not cover:; LIMITED W; GE Appliances Vented Range Hood Warranty; EXCLUSION OF IMPLIED WARRANTIES; Warrantor: GE Appliances, a Haier company
26 49-2000708 Rev. 6 Staple your receipt here. Proof of the original purchase date is needed to obtain service under the warranty . GEAppliances.com All warranty service is provided by our Factory Service Centers, or an authorized Customer Care ® technician. To schedule service online, visit us at G...
Page 27 - ACCESSORIES; Looking For Something More?; Accessories; Parts
49-2000708 Rev. 6 27 ACCESSORIES Looking For Something More? GE Appliances offers a variety of accessories to improve your cooking and maintenance experiences! Refer to the Consumer Support page for phone numbers and website information. The following products and more are available: Accessories Par...
Page 29 - USO DE LA CAMPANA; MANUAL DEL; CAMPANAS DE COCINA CON VENTILACIÓN; Con Extractor QuietBoostTM
49-2000708 Rev. 6 10-23 INFORMACIÓN DE SEGURIDAD . . . . 3 USO DE LA CAMPANA Controles . . . . . . . . . . . . . . . . . . . . . . . . . . . . . . . . . 5Conexión Wi-Fi . . . . . . . . . . . . . . . . . . . . . . . . . . . . 6Filtros . . . . . . . . . . . . . . . . . . . . . . . . . . . . . . . . . ...
Page 30 - GRACIAS POR HACER QUE GE APPLIANCES SEA PARTE DE SU HOGAR.; tenerlo en la familia.
2 49-2000708 Rev. 6 GRACIAS POR HACER QUE GE APPLIANCES SEA PARTE DE SU HOGAR. Ya sea que haya crecido usando GE Appliances, o que ésta es su primera vez, nos complace tenerlo en la familia. Sentimos orgullo por el nivel de arte, innovación y diseño de cada uno de los electrodomésticos de GE Applian...
Page 31 - ADVERTENCIA
49-2000708 Rev. 6 3 INFORMACIÓN DE SEGURIDAD INFORMACIÓN IMPORTANTE DE SEGURIDADLEA TODAS LAS INSTRUCCIONES ANTES DE USAR LEA Y GUARDE ESTAS INSTRUCCIONES ADVERTENCIA PARA REDUCIR EL RIESGO DE INCENDIO, DESCARGA ELÉCTRICA O LESIONES A PERSONAS, CUMPLA CON LOS SIGUIENTES PUNTOS: A. Utilice esta unida...
Page 32 - FORMA ADECUADA DE DESCARTAR SU ELECTRODOMÉSTICO
4 49-2000708 Rev. 6 Cómo Retirar la Película Protectora de Envío y la Cinta de Embalaje Con cuidado tome un extremo de la película protectora de envío con los dedos y lentamente retire la misma de la superficie del electrodoméstico. No utilice ningún producto filoso para retirar la película. Retire ...
Page 33 - Controles; Conexión de Bluetooth; Panel de Control de la Campana Extractora:
49-2000708 Rev. 6 5 Controles USO DE LA CAMP ANA : Controles Conexión de Bluetooth ® al Funcionamiento de Chef Connect Para emparejar con otro dispositivo: A fin de iniciar el proceso de emparejamiento con la campana, mantenga presionado el botón Light (Luz) durante 3 segundos. La luz de fondo de to...
Page 35 - Filtros; Filtro de grasa; Filtro de carbón (Sólo Para Instalación con Recirculación)
49-2000708 Rev. 6 7 Filtros USO DE LA CAMP ANA: Filtros Asegúrese de que la energía eléctrica esté apagada y que todas las superficies estén frías antes de limpiar o arreglar cualquier pieza de la campana de ventilación. Filtro de grasa El filtro atrapa la grasa liberada por las comidas durante su c...
Page 36 - Superficies de acero inoxidable (en algunos modelos); Superficies; Lámparas
8 49-2000708 Rev. 6 Superficies de acero inoxidable (en algunos modelos) No utilice almohadillas de acero porque rayan la superficie. Para limpiar la superficie de acero inoxidable, utilice agua tibia jabonosa o un limpiador o lustrador de acero inoxidable. Siempre limpie la superficie en dirección ...
Page 37 - ANTES DE COMENZAR; IMPORTANTE; PARA SU SEGURIDAD; INSTRUCCIONES DE INSTALACIÓN
49-2000708 Rev. 6 9 “Ante cualquier duda, llame a GE Appliances al 800.GE.CARES (800.432.2737) o visite nuestro sitio Web en: GEAppliances.com” ANTES DE COMENZAR Lea estas instrucciones por completo y con detenimiento. Ŷ IMPORTANTE — Guarde estas instrucciones para el uso de inspectores locales. Ŷ I...
Page 38 - Preparación para la instalación; QUITE EL ENVOLTORIO; PRODUCTO
10 49-2000708 Rev. 6 Preparación para la instalación PREP ARACIÓN P ARA LA INST ALACIÓN HERRAMIENTAS Y MATERIALES REQUERIDOS (NO SUMINISTRADOS) QUITE EL ENVOLTORIO PRECAUCIÓN Se guantes para protegerse de los bordes afilados. Ŷ Quite la bolsa de piezas, el paquete de instrucciones y otras piezas en ...
Page 39 - PLAN DE INSTALACIÓN; PAQUETE DE MATERIALES
49-2000708 Rev. 6 11 PREP ARACIÓN P ARA LA INST ALACIÓN Preparación para la instalación PLAN DE INSTALACIÓN ADVERTENCIA A fin de reducir riesgos de incendios y para que el aire salga de forma apropiada, asegúrese de que el aire sea conducido hacia fuera.No ventile el aire de la salida hacia espacios...
Page 40 - DIMENSIONES DE LA INSTALACIÓN
12 49-2000708 Rev. 6 Preparación para la instalación PREP ARACIÓN P ARA LA INST ALACIÓN REQUISITOS SOBRE LA TAPA DEL CONDUCTO Los kits para la tapa del conducto se deberán adquirir aparte. Le recomendamos que la campana de ventilación y la tapa del conducto (de ser usadas) estén en sus posiciones an...
Page 42 - PLANIFICACIÓN PREVIA
14 49-2000708 Rev. 6 Preparación para la instalación PREP ARACIÓN P ARA LA INST ALACIÓN PLANIFICACIÓN PREVIA Planificación para la Instalación con Conducto Ŷ Esta campana fue diseñada para ventilar de forma vertical a través del cielorraso con un conducto cilíndrico de 8” o a través de una pared tra...
Page 43 - NUEVA CONSTRUCCIÓN, PLANIFICACIÓN PREVIA O REMODELACIÓN; DETERMINE LAS UBICACIONES DE LA CAMPANA, EL CONDUCTO Y EL CABLEADO
49-2000708 Rev. 6 15 PREP ARACIÓN P ARA LA INST ALACIÓN Preparación para la instalación NUEVA CONSTRUCCIÓN, PLANIFICACIÓN PREVIA O REMODELACIÓN NOTA: Para acceder a las instrucciones existentes, vaya a la siguiente sección. Ŷ Para una instalación con conducto a través de la parte superior, el agujer...
Page 45 - INSTALACIÓN DEL REGULADOR; INSTALE LA CAMPANA EN LA PARED
49-2000708 Rev. 6 17 INSTRUCCIONES DE INST ALACIÓN Instrucciones de Instalación 1 INSTALACIÓN DEL SOPORTE DE LA CAMPANA IMPORTANTE: El marco deberá poder sostener 100 lbs • Ubique mínimamente 2 vigas verticales para la barra de instalación, golpeando la pared de yeso con un martillo o usando un dete...
Page 47 - Instrucciones de Instalación; INSTALE EL MOTOR; INSTRUCCIONES DE INST
49-2000708 Rev. 6 19 Instrucciones de Instalación 5 INSTALE EL MOTOR 1. Alinee la ventilación del motor con el regulador superior, como se muestra en la siguiente figura. 2. Asegure el motor a la placa de montaje del mismo usando los tornillos (D). 3. Enchufe el motor en la conexión correspondiente ...
Page 48 - CONECTE EL CONDUCTO
20 49-2000708 Rev. 6 7 CONECTE EL CONDUCTO A. Instalación de la Ventilación • Conecte el conducto hogareño al regulador superior, como se muestra en la siguiente imagen. • Selle todas las conexiones con cinta para conductos. PRECAUCIÓN No use tornillos metálicos para planchas en la transición a la c...
Page 50 - TECNOLOGÍA DE REPOSICIÓN DE AIRE
22 49-2000708 Rev. 6 INSTRUCCIONES DE INST ALACIÓN Instrucciones de Instalación TECNOLOGÍA DE REPOSICIÓN DE AIRE Esta operación deberá ser realizada por un técnico o instalador calificado. Nota para los Instaladores e Inspectores: Este producto está equipado con una función de instalación simple que...
Page 51 - Antes de solicitar el servicio técnico; CONSEJOS PARA LA SOLUCIÓN DE PROBLEMAS; Problema
49-2000708 Rev. 6 23 ¡Ahorre tiempo y dinero! Primero revise los cuadros que aparecen en las siguientes páginas y es posible que no necesite solicitar reparaciones. Consejos para la Solución de Problemas... Antes de solicitar el servicio técnico CONSEJOS PARA LA SOLUCIÓN DE PROBLEMAS Problema Causas...
Page 52 - Qué no cubrirá GE Appliances:; GARANTÍA; Garantía Limitada de la Cocina Eléctrica de GE Appliances; EXCLUSIÓN DE GARANTÍAS IMPLÍCITAS
24 49-2000708 Rev. 6 Abroche su recibo aquí. Para acceder al servicio técnico de acuerdo con la garantía deberá contar con la prueba de la fecha original de compra. GEAppliances.com Todo el servicio de garantía es provisto por nuestros Centros de Servicio de Fabricación, o un técnico autorizado de C...
Page 53 - Piezas
49-2000708 Rev. 6 25 ACCESORIOS ¿Busca Algo Más? GE Appliances ofrece una variedad de accesorios para mejorar sus experiencias de cocción y mantenimiento! Para acceder a números telefónicos e información de sitios Web, consulte la página de Soporte para el Consumidor. Estos y otros productos están d...


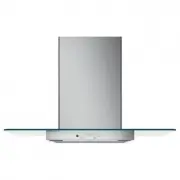 Cafe CVW73012MSS
User Manual
Cafe CVW73012MSS
User Manual
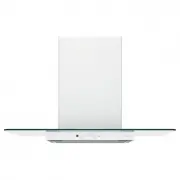 Cafe CVW73014MWM
User Manual
Cafe CVW73014MWM
User Manual
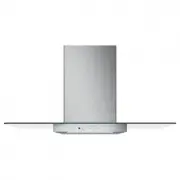 Cafe CVW73612MSS
User Manual
Cafe CVW73612MSS
User Manual
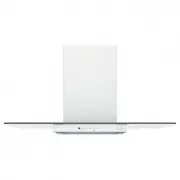 Cafe CVW73614MWM
User Manual
Cafe CVW73614MWM
User Manual
 Cafe CVW93043PDS
User Manual
Cafe CVW93043PDS
User Manual
 Cafe CVW93044PWM
User Manual
Cafe CVW93044PWM
User Manual
 Cafe CVW93644PWM
User Manual
Cafe CVW93644PWM
User Manual
 Cafe UVW93042PSS
User Manual
Cafe UVW93042PSS
User Manual
 Cafe UVW9484SPSS
User Manual
Cafe UVW9484SPSS
User Manual