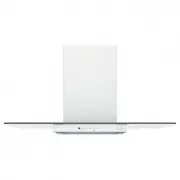
Page 2 - THANK YOU FOR MAKING CAFÉ A PART OF YOUR HOME.
2 49-2000706 Rev. 5 THANK YOU FOR MAKING CAFÉ A PART OF YOUR HOME. We take pride in the craftsmanship, innovation and design that goes into every Café product, and we think you will too. Among other things, registration of your appliance ensures that we can deliver important product information and ...
Page 3 - WARNING
49-2000706 Rev. 5 3 SAFETY INFORMATION IMPORTANT SAFETY INFORMATION READ ALL INSTRUCTIONS BEFORE USING READ AND SAVE THESE INSTRUCTIONS WARNING TO REDUCE THE RISK OF FIRE, ELECTRIC SHOCK OR INJURY TO PERSONS, OBSERVE THE FOLLOWING: A. Use this unit only in the manner intended by the manufacturer. If...
Page 4 - How to Remove Protective Shipping Film and Packaging Tape; PROPER DISPOSAL OF YOUR APPLIANCE
4 49-2000706 Rev. 5 SAFETY INFORMATION IMPORTANT SAFETY INFORMATION READ ALL INSTRUCTIONS BEFORE USING READ AND SAVE THESE INSTRUCTIONS How to Remove Protective Shipping Film and Packaging Tape Carefully grasp a corner of the protective shipping film with your fingers and slowly peel it from the app...
Page 5 - Controls; Controls / Chef Connect; Chef Connect Operation Bluetooth; Chef Connect; Off
49-2000706 Rev. 5 5 Controls USING THE HOOD: Controls / Chef Connect Chef Connect Operation Bluetooth ® Connection To pair with another device: To start the pairing process on the hood, press and hold the Light button for 3 seconds. The backlight for all the icons will flash until the hood is paired...
Page 7 - Baffle Grease Filter; Filters; Grease Drip Tray
49-2000706 Rev. 5 7 CARE AND CLEANING: Filters Baffle Grease Filter The baffle filters channel grease released by foods on the cooktop into the drip trays. The baffle filters also help prevent flaming foods on the cooktop from damaging the inside of the hood.The baffle filters must ALWAYS be in plac...
Page 8 - Painted Surfaces; CAUTION
8 49-2000706 Rev. 5 Lights To change the LED lamps, schedule a service appointment. See Consumer Support page in the front of this manual for a list of websites and contact information. Surfaces CARE AND CLEANING: Surfaces / Lights / Filters Charcoal Filter (for recirculation installation on select ...
Page 9 - BEFORE YOU BEGIN; IMPORTANT; FOR YOUR SAFETY; OPTIONAL POWER CORD KIT JXHC1
49-2000706 Rev. 5 9 INST ALLA TION INSTRUCTIONS Installation Instructions If you have questions, visit us at cafeappliances.com or visit our website at: cafeappliances.ca. BEFORE YOU BEGIN Read these instructions completely and carefully. ■ IMPORTANT — Save these instructions for local inspector’s u...
Page 10 - PRODUCT DIMENSIONS
10 49-2000706 Rev. 5 Installation Preparation INST ALLA TION PREP ARA TION PRODUCT DIMENSIONS 30” Models Requires a 30” opening. 36” Models Requires a 36” opening. 18” 12-1/4” 21” 36” 18” 21” 30” 12-1/4”
Page 11 - TOOLS AND MATERIALS; Strain Relief I; Wire Nuts; PLAN THE INSTALLATION; REMOVE THE PACKAGING
49-2000706 Rev. 5 11 Installation Preparation INSTALLATION PREPARATION TOOLS AND MATERIALS REQUIRED (NOT SUPPLIED) Wire cutter/stripper Level Aluminized duct tape Safety glasses Phillips screwdriver with at least 6" shank Strain relief for junction box, 1” diameter knockout Strain Relief I Elect...
Page 12 - PARTS PROVIDED; HARDWARE PACKAGE
12 49-2000706 Rev. 5 INST ALLA TION PREP ARA TION Installation Preparation PARTS PROVIDED Locate the parts packed with the hood. HARDWARE PACKAGE Locate and check contents. Top Damper 761Dia28 Grease Drip Trays Motor Hood Body Metal Installation Bracket 2 Baffle Filters (3 with 36” models) (QTY: 2) ...
Page 13 - INSTALLATION DIMENSIONS
49-2000706 Rev. 5 13 Installation Preparation INSTALLATION PREPARATION INSTALLATION DIMENSIONS The hood duct covers can be adjusted for different ceiling heights depending on the distance between the bottom of the hood and the cooktop (distance X). See Installation Height Table on the next page. DUC...
Page 14 - INSTALLATION HEIGHT TABLE
14 49-2000706 Rev. 5 INST ALLA TION PREP ARA TION Installation Preparation INSTALLATION HEIGHT TABLE CX10DC9SPDS OR CX10DC9SPWM High Ceiling Duct Cover up to 10 ft. Installation over Gas Range Installation over Electric Range Ceiling Height (ft./in.) Recirc Installation Height Vented Installation He...
Page 15 - Installation Preparation; POWER SUPPLY; INST
49-2000706 Rev. 5 15 Installation Preparation POWER SUPPLY IMPORTANT – (Please read carefully) WARNING FOR PERSONAL SAFETY, THIS APPLIANCE MUST BE PROPERLY GROUNDED.Remove house fuse or open circuit breaker before beginning installation.Do not use an extension cord or adapter plug with this applianc...
Page 16 - FOR TOP VENTING; FOR BACK VENTING
16 49-2000706 Rev. 5 Installation Preparation NEW CONSTRUCTION, PRE-PLANNING, OR REMODELING NOTE: For existing instruction, skip to the next section. FOR TOP VENTING ■ For ducted installation through the top, the 8” diameter hole for the duct in the ceiling must be centered 6-1/4” away from the fini...
Page 17 - DETERMINE HOOD, DUCTWORK AND WIRING LOCATIONS
49-2000706 Rev. 5 17 INST ALLA TION INSTRUCTIONS Installation Instructions DETERMINE HOOD, DUCTWORK AND WIRING LOCATIONS • This hood can be installed onto the wall or underneath the soffit or cabinet. • For installing the hood to soffit or cabinet, refer to page 19 for alternate mounting method. • A...
Page 18 - INSTALL HOOD SUPPORT; INSTALL DAMPER
18 49-2000706 Rev. 5 INST ALLA TION INSTRUCTIONS Installation Instructions 1 INSTALL HOOD SUPPORT IMPORTANT: Framing must be capable of supporting 100 lbs.• Locate a minimum of 2 vertical studs for the installation bar by tapping drywall with a hammer or use a stud finder. • Level the installation b...
Page 19 - INSTALL HOOD ONTO WALL; Installation Instructions; INSTALL HOOD TO SOFFIT OR
49-2000706 Rev. 5 19 3 INSTALL HOOD ONTO WALL • Pull house wiring through knockout at the back or top of the hood. • Lift the hood and place over the hooks on the installation bar. Allow the hood to slide down into position. • Check to be sure the hood is level and centered.• Tighten wall anchor scr...
Page 20 - (Alternate Mounting Method) INSTALL HOOD TO SOFFIT OR CABINET
20 49-2000706 Rev. 5 INST ALLA TION INSTRUCTIONS Installation Instructions 4 (Alternate Mounting Method) INSTALL HOOD TO SOFFIT OR CABINET (Cont.) • Drill two 1/8” pilot holes at a distance of 10” from the back wall in the horizontal wood supports. This is the vertical distance between mounting keyh...
Page 21 - INSTALL MOTOR
49-2000706 Rev. 5 21 Installation Instructions 5 INSTALL MOTOR I) Align the motor exhaust with the top damper as shown in the Figure A for top venting. In case of back venting, rotate the motor 90° to align with the back damper as shown in Figure B. II) Secure the motor to motor mounting plate using...
Page 22 - CONNECT DUCTWORK; A. Vented Installation
22 49-2000706 Rev. 5 INST ALLA TION INSTRUCTIONS 7 CONNECT DUCTWORK A. Vented Installation • Connect the house ducting to the top damper as shown in Figure A. • For back venting, connect the transition piece to the back damper and the house ducting to the transition as shown in Figure B. • Seal all ...
Page 23 - INSTALL DUCT COVERS; INSTALL GREASE TRAYS AND
49-2000706 Rev. 5 23 8 INSTALL DUCT COVERS • Refer to section “Duct Cover Requirements” section for duct cover accessory part numbers. • Follow instructions included with the duct cover accessory to install duct covers. 9 INSTALL GREASE TRAYS AND FILTERS • Remove protective film.• Place grease drip ...
Page 24 - MAKE UP AIR TECHNOLOGY
24 49-2000706 Rev. 5 Installation Instructions MAKE UP AIR TECHNOLOGY This operation must be performed by a qualified technician or installer.Note to Installers and Inspectors: This product comes equipped with a simple installation feature that limits maximum CFM levels in order to comply with certa...
Page 25 - Before you schedule service; Problem; TROUBLESHOOTING TIPS
49-2000706 Rev. 5 25 Troubleshooting tips ... Before you schedule service Save time and money! Review the charts on the following pages first and you may not need to schedule service. Problem Possible Cause What To Do Fan/Light does not operate when button is turned ON A house fuse may be blown or a...
Page 26 - What Café will not cover:; Café Vented Range Hood Limited Warranty; EXCLUSION OF IMPLIED WARRANTIES; company; LIMITED W
26 49-2000706 Rev. 5 Staple your receipt here. Proof of the original purchase date is needed to obtain service under the warranty . cafeappliances.com All warranty service is provided by our Factory Service Centers, or an authorized service technician. To schedule service online, visit us at cafeapp...
Page 27 - Parts; Looking For Something More?
49-2000706 Rev. 5 27 ACCESSORIES Accessories Parts Baffle Filters Grease Drip trays Duct Covers Remote Control Charcoal Filters Recirculation Kit Back Venting Damper 15” Cabinet Filler Panel Power Cord Kit Cleaning Supplies CitruShine™ Stainless Steel Wipes Stainless Steel Appliance Cleaner Bar Keep...


 Cafe CVW73012MSS
User Manual
Cafe CVW73012MSS
User Manual
 Cafe CVW73014MWM
User Manual
Cafe CVW73014MWM
User Manual
 Cafe CVW73612MSS
User Manual
Cafe CVW73612MSS
User Manual
 Cafe CVW73614MWM
User Manual
Cafe CVW73614MWM
User Manual
 Cafe CVW93043PDS
User Manual
Cafe CVW93043PDS
User Manual
 Cafe UVW8364SPSS
User Manual
Cafe UVW8364SPSS
User Manual
 Cafe UVW93042PSS
User Manual
Cafe UVW93042PSS
User Manual
 Cafe UVW9484SPSS
User Manual
Cafe UVW9484SPSS
User Manual