Page 2 - IMPORTANT SAFETY INSTRUCTIONS; DANGER; SAVE THESE INSTRUCTIONS
IMPORTANT SAFETY INSTRUCTIONS When using this machine, basic safety precautions should always be taken, including the following: Read all instructions before using. DANGER - To reduce the risk of electric shock: 1. The machine should never be left unattended while plugged in. Always unplug the machi...
Page 3 - OR COLOURED GREEN OR GREEN AND; Blue
1 FOR USERS IN THE UK, EIRE, MALTA AND CYPRUS ONLY If this machine is fitted with a three-pin non-rewireable BS plug then please read the following. IMPORTANT If the available socket outlet is not suitable for the plug supplied with this equipment, it should be cut off and an appropriate three pin p...
Page 4 - To use the machine safely; the machine near a heater, iron, halogen lamp or other hot objects.; To repair or adjust the machine; IMPORTANT
2 UNPACKING/REPACKING INSTRUCTIONS Keep the carton and packing materials. You may have to take or send the machine to be repaired. If you do not pack it properly, or do not use the right packing material, the machine could be damaged. Please follow the diagram below to unpack and repack the machine....
Page 5 - CONTENTS
3 CONTENTS 1. KNOWING YOUR SEWING MACHINE ..........................................................5 THE MAIN PARTS ............................................................................................................... 5ACCESSORIES .............................................................
Page 7 - KNOWING YOUR SEWING MACHINE; THE MAIN PARTS
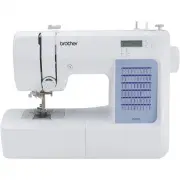
5 1 KNOWING YOUR SEWING MACHINE THE MAIN PARTS 1 Bobbin winder (Page 16) This winds the thread onto the bobbin for use as the lower thread. 2 Spool pin (Page 16, 21) This holds the spool of thread. 3 Thread guide (Page 16, 21) This is used when winding the thread onto the bobbin and then threading t...
Page 8 - ACCESSORIES; Note; Optional Accessories
KNOWING YOUR SEWING MACHINE —————————————————————————————————————————————— 6 ACCESSORIES The following accessories are stored in the flat bed attachment. We have designed these accessories to help you be able to carry out most sewing tasks. Note ● The included accessories vary depending on the machi...
Page 9 - USING YOUR SEWING MACHINE; Connecting Plugs; Do not touch the plug with wet hands. Electric shock may result.; WARNING
7 1 USING YOUR SEWING MACHINE Connecting Plugs 1 Connect the foot controller plug to the machine. 2 Connect the power supply plug to a wall outlet. Note ● When leaving the machine unattended, the main switch of the machine should be switched off or the plug must be removed from the wall outlet. ● Wh...
Page 10 - Foot Controller; Checking the Needle; Checking the Needle Correctly; Replacing the Needle; Remove the power supply plug from the outlet.; CAUTION
KNOWING YOUR SEWING MACHINE —————————————————————————————————————————————— 8 Main Power and Sewing Light Switch This switch turns the main power and sewing light on or off. 1 Turn on (toward the ‘I’ mark) 2 Turn off (toward the ‘O’ mark) Foot Controller When you press the foot controller down lightl...
Page 11 - Changing the Presser Foot
9 1 4 Hold the needle with your left hand, and then use a screwdriver to turn the needle clamp screw counterclockwise to remove the needle. 1 Screwdriver 2 Needle clamp screw • Do not use excessive force when loosening or tightening the needle clamp screw, otherwise certain parts of the sewing machi...
Page 12 - Presser Foot Installation Orientation; Flat Bed Attachment; Using a Free-arm Style
KNOWING YOUR SEWING MACHINE —————————————————————————————————————————————— 10 3 Put a different presser foot on the needle plate so that the bar on the presser foot is in line with the slot on the shank. 4 Lower the presser foot lever and fix the presser foot onto the shank. If the presser foot is i...
Page 13 - THE CONTROLS; Pattern Selection Dial; 5 Stitches (only available on certain models)
11 1 THE CONTROLS Pattern Selection Dial To choose a stitch, simply turn the pattern selection dial in either direction. The next section shows recommended stitch lengths and widths. 1 Pattern selection dial 2 Chosen pattern number ■ 35 Stitches (only available on certain models) ■ 25 Stitches ● Whe...
Page 14 - Patterns and Stitch Names
KNOWING YOUR SEWING MACHINE —————————————————————————————————————————————— 12 Patterns and Stitch Names * The stitch can also be sewn when the stitch length dial is set to . Pattern Stitch Name Recommended Width (mm (inch)) Recommended Length (mm (inch)) Instruction Manual Page 35 Stitches 25 Stitch...
Page 16 - Stitch Length Dial
KNOWING YOUR SEWING MACHINE —————————————————————————————————————————————— 14 Stitch Length Dial Depending on the selected stitch, you may need to adjust the stitch length for best results.The numbers marked on the stitch length dial represent the stitch length in millimeters (mm) (1/25 inch).THE HI...
Page 17 - Stretch Stitching; Selecting a Stretch Stitch; Stitch Width Dial; Reverse Sewing Lever
15 1 Stretch Stitching ■ 35 Stitches Selecting a Stretch Stitch Setting the stitch length dial to “ ” or “ ” changes the selected pattern to a stretch stitch. ■ 25 Stitches Selecting a Stretch Stitch Setting the stitch length dial to “ ” changes the selected pattern to a stretch stitch. Stitch Width...
Page 18 - THREADING THE MACHINE; Winding the Bobbin
KNOWING YOUR SEWING MACHINE —————————————————————————————————————————————— 16 THREADING THE MACHINE Winding the Bobbin 1 Pre-tension disk 2 Bobbin winder shaft 1 Put the spool of thread on the spool pin and pass the thread around the pre-tension disk. 2 Pass the end of the thread through the hole on...
Page 20 - Lower Threading; Slide the button and open the cover.
KNOWING YOUR SEWING MACHINE —————————————————————————————————————————————— 18 Lower Threading • For more details on using the quick-set bobbin, see page 19. 1 Raise the needle to its highest position by turning the handwheel toward you (counterclockwise) and raise the presser foot lever. 2 Slide the...
Page 21 - the right side (see arrow; This feature is only available on certain models.
19 1 4 Hold the end of the thread, push the bobbin down with your finger, and then pass the thread through the slit, as shown. 5 Reattach the bobbin cover. Put the left tab in place (see arrow 1 ), and then press lightly on the right side (see arrow 2 ) until the cover clicks into place. • Replace t...
Page 22 - Follow steps
KNOWING YOUR SEWING MACHINE —————————————————————————————————————————————— 20 1 Follow steps 1 and 2 from “Lower Threading”. 2 Put the bobbin in, feed the end of the thread through the slit, and then pull the thread to cut it. • Only use bobbins that were designed to be used with this machine. 1 Cut...
Page 23 - Upper Threading; • If the needle is not correctly raised, the
21 1 Upper Threading 1 Spool pin 2 Thread guide (back) 3 Thread guide (front) 4 Thread take-up lever 5 Mark on the handwheel 1 IMPORTANT: Raise the presser foot using the presser foot lever. 1 Presser foot lever 2 Raise the needle to its highest position by turning the handwheel toward you (counterc...
Page 24 - • The thread can easily be passed behind
KNOWING YOUR SEWING MACHINE —————————————————————————————————————————————— 22 6 Put the thread behind the guide above the needle. • The thread can easily be passed behind the needle bar thread guide by holding the thread in your left hand, then feeding the thread with your right hand. 1 Needle bar t...
Page 26 - Drawing up the Lower Thread; to; Sewing with a Twin Needle
KNOWING YOUR SEWING MACHINE —————————————————————————————————————————————— 24 Drawing up the Lower Thread 1 While lightly holding the end of the upper thread, slowly turn the handwheel toward you (counterclockwise) by hand to lower and then raise the needle. 2 Pull on the upper thread to draw up the...
Page 27 - Thread Tension; Memo
25 1 ■ Attaching the Twin Needle Attach the twin needle in the same way as a single needle (see page 8). The flat side of the needle should face toward the back and the rounded side should face toward you. ■ Attaching the Extra Spool Pin Put the extra spool pin in the hole on the top of the machine....
Page 28 - Fabric Type
KNOWING YOUR SEWING MACHINE —————————————————————————————————————————————— 26 FABRIC, THREAD, AND NEEDLE COMBINATIONS Memo ● For clear nylon thread, always use needle 90/14 - 100/16. ● You can also use the same thread for the bobbin thread and upper threading. Fabric Type Thread Size of Needle Type ...
Page 29 - STRAIGHT AND ZIGZAG STITCHING; Please Read Before Sewing; Starting Sewing; Do not use bent or broken needles, otherwise you may be injured.; Straight Stitch
27 2 STRAIGHT AND ZIGZAG STITCHING Please Read Before Sewing Straight Stitching * Turn the stitch width dial to adjust the needle position. Setting the dial to 5 selects the left needle position; setting the dial to 0 selects the right needle position. ■ Starting Sewing 1 Turn the pattern selection ...
Page 30 - Zigzag Stitching
STRAIGHT AND ZIGZAG STITCHING ——————————————————————————————————————————————— 28 ■ Changing Sewing Direction 1 Stop the machine at the point where you want to change direction with the needle still in the fabric. 2 Raise the presser foot and turn the fabric to its new direction using the needle as a...
Page 31 - Blind Hem Stitching; Shell Tuck Stitching
29 3 BUILT-IN STITCHES Blind Hem Stitching You can use the Blind Hem Stitch to finish the edge of a project, like the hem of a pair of trousers, without the stitch showing. Use the Blind Hem Stitch when sewing on non-stretch fabrics, and the Stretch Blind Hem Stitch for stretch fabrics. 1 Both threa...
Page 32 - Elastic Stitching; Stitch Name Pattern
BUILT-IN STITCHES —————————————————————————————————————————————————————— 30 4 Sew at a slow speed. Elastic Stitching You can use the Elastic Stitch for mending, sewing elastic or joining fabric. Each is explained below. Set the pattern selection dial to the Elastic Stitch. ■ Mending 1 Set the stitch...
Page 33 - Overedge Stitching
31 3 Double Action Stitching These stitches are used for joining two pieces of fabric, such as when making patchwork. Set the pattern selection dial to the Double Action Stitch, Bridging Stitch, or Rampart Stitch. Patchworking These stitches are used to join two pieces of fabric while leaving a spac...
Page 34 - Feather Stitching; Trim close to the stitching.; Triple Zigzag Stretch Stitching; Feather Stitch; Triple Zigzag
BUILT-IN STITCHES —————————————————————————————————————————————————————— 32 You can use these stitches to join together seams and finish them in one operation. The Overlock Stitches are also useful for sewing stretch materials while the Arrowhead Stitch is ideal for sewing the edge of a blanket. 1 S...
Page 35 - Decorative Stitching
33 3 Decorative Stitching These stitches can be used for decorative top stitching and for smocking. Set the pattern selection dial to the Triangle Stitch, Leaf Stitch, etc. Stitch Name Pattern Stitch Length [mm (inch)] Stitch Width [mm (inch)] Triangle Stitch F-1.5 (1/64-1/16) 3-5 (1/8-3/16) Decorat...
Page 36 - SEWING BUTTONHOLES AND BUTTONS; Making a Buttonhole; Making a Buttonhole; Step
SEWING BUTTONHOLES AND BUTTONS ———————————————————————————————————————————— 34 SEWING BUTTONHOLES AND BUTTONS Making a Buttonhole Memo ● We recommend that you practice making a buttonhole on a scrap piece of fabric before you try it on an actual garment. ● When making buttonholes on soft fabrics, pl...
Page 37 - Adjusting Buttonholes
35 4 3 Cut an opening in the middle of the buttonhole with the seam ripper tool. Be careful not to cut through any stitches. Adjusting Buttonholes If the stitching on the two sides of the buttonhole is not the same, you can make the following adjustments. 1 Set the stitch length dial between "F&...
Page 38 - Sewing Buttons; Change the foot to the button sewing foot.
SEWING BUTTONHOLES AND BUTTONS ———————————————————————————————————————————— 36 Sewing Buttons 1 Measure the distance between the buttonholes and set the pattern selection dial to the Zigzag Stitch, and set the width you want. 2 Remove the power supply plug from the outlet. 3 Change the foot to the b...
Page 39 - USING ATTACHMENTS AND APPLICATIONS; Zipper Insertion; Straight
37 5 USING ATTACHMENTS AND APPLICATIONS Zipper Insertion You can use the zipper foot to sew different types of zippers, and can easily position it to the right or left side of the needle. When sewing the right side of the zipper, attach the shank to the left pin of the zipper foot. When sewing the l...
Page 40 - Gathering; Pull the lower threads to gather the material.; Darning; Lower the presser foot.
USING ATTACHMENTS AND APPLICATIONS ——————————————————————————————————————————— 38 Gathering 1 Set the pattern selection dial to Straight Stitch. 2 Loosen the tension of the upper thread so that the lower thread lies on the underside of the material. 3 Sew a single row (or many rows) of straight stit...
Page 41 - Appliqués
39 5 Appliqués You can create an applique by cutting a different piece of fabric into a shape and using it as a decoration. 1 Baste the cut design to the fabric. 2 Carefully sew around the edge of the design with a zigzag stitch. 3 Cut away any fabric that is left outside the stitching. 4 Remove the...
Page 42 - Monogramming
USING ATTACHMENTS AND APPLICATIONS ——————————————————————————————————————————— 40 7 Grip the hoop with your thumbs and forefingers while pressing the fabric with your middle and third fingers and supporting the outside of the hoop with your little fingers. ■ Monogramming 1 Sew by moving the hoop slo...
Page 43 - OPTIONAL ACCESSORIES; Using the Walking Foot; Raise the needle and the presser foot.
41 5 OPTIONAL ACCESSORIES Using the Walking Foot This foot is very useful for sewing materials such as vinyl cloth, synthetic leather, thin leather, etc. These materials are difficult to feed when sewing. The walking foot prevents these materials from crumpling, slipping or sticking between the pres...
Page 44 - Using the Quilting Foot; Attach the quilting foot, making sure that part
USING ATTACHMENTS AND APPLICATIONS ——————————————————————————————————————————— 42 Note ● When sewing with the walking foot, sew at medium to low speeds. Using the Quilting Foot The Quilting Foot is useful for darning andfree-motion machine quilting. 1 Remove the power supply plug from the outlet. 2 ...
Page 46 - APPENDIX; MAINTENANCE; Changing the Light Bulb; Replace the sewing light bulb.; Put the light cover back on and fasten the screw.; Cleaning; Switch the machine off and unplug it.
APPENDIX —————————————————————————————————————————————————————————— 44 APPENDIX MAINTENANCE Changing the Light Bulb 1 Remove the power supply plug from the outlet. 2 Loosen the screw on the back of the sewing head. Then remove the light cover from the machine. 3 Replace the sewing light bulb. 1 Bulb...
Page 48 - Troubleshooting; Symptom
APPENDIX —————————————————————————————————————————————————————————— 46 Troubleshooting If the machine stops working properly, check the following possible problems.If the problem is still there, contact your retailer or the nearest authorized service center. Symptom Possible cause How to put it righ...
Page 51 - INDEX
49 INDEX Numerics 1/4-inch quilting foot .................................................... 43 A Accessories ..................................................................... 6 optional .............................................................. 6 , 41 Appliqués ...............................


 Brother 1034D
User Manual
Brother 1034D
User Manual
 Brother 2340CV
Manual
Brother 2340CV
Manual
 Brother 3034D
Manual
Brother 3034D
Manual
 Brother Boutique 27 / 37
User Manual
Brother Boutique 27 / 37
User Manual
 Brother CP60X
User Manual
Brother CP60X
User Manual
 Brother CS5055
User Manual
Brother CS5055
User Manual
 Brother CS-8060
Manual
Brother CS-8060
Manual
 Brother Innov-is 150 (SE)
User Manual
Brother Innov-is 150 (SE)
User Manual
 Brother Innov-is 200
User Manual
Brother Innov-is 200
User Manual
 Brother Innov-is 250
User Manual
Brother Innov-is 250
User Manual
 Brother Innov-is 300
User Manual
Brother Innov-is 300
User Manual
 Brother Innov-is 550 (SE)
User Manual
Brother Innov-is 550 (SE)
User Manual
 Brother Innov-is 900
User Manual
Brother Innov-is 900
User Manual
 Brother JS-23
User Manual
Brother JS-23
User Manual
 Brother LS 2150
User Manual
Brother LS 2150
User Manual
 Brother LS-3125
User Manual
Brother LS-3125
User Manual