Brother 2340CV - Manual

Brother 2340CV Sewing Machine – Manual, read for free online in PDF format. We hope this helps you resolve any issues you may have. If you have further questions, please contact us through the contact form.


Table of Contents:
- Page 2 – DANGER –; WARNING –; CAUTION –
- Page 3 – ENGLISH
- Page 4 – Notes on the motor
- Page 5 – I. Names of parts and their functions; Accessories included; H I
- Page 6 – Powering the machine; Turning direction of motor
- Page 7 – Instructions for the differential feed mechanism
- Page 8 – Presser foot pressure
- Page 10 – II. Preparation before threading; Thread spool; Type A; Thread tree
- Page 11 – B C
- Page 12 – Looper threading
- Page 13 – IV. Types of stitches
- Page 14 – Two needles three threads cover stitch
- Page 16 – Chain stitch sewing (One needle two threads double chain stitch)
- Page 17 – Removing the fabric from the machine
- Page 19 – Sewing a cover stitch
- Page 21 – VII. Machine specifications
- Page 22 – NOTAS SOBRE EL MOTOR
- Page 23 – I. Nombres de las partes y sus funciones; Accesorios incluidos
- Page 24 – Encendido de la máquina; Para cambiar la dirección del motor
- Page 26 – Presión del prensatelas
- Page 28 – II. Preparación antes del enhebrado; Carrete de hilo; Tipo A; Arbol del hilo
- Page 30 – Enhebrado del áncora
- Page 31 – IV. Tipos de puntadas
- Page 32 – Puntada de recubierto de dos agujas con tres hilos
- Page 35 – Retirada del tejido de la máquina
- Page 37 – Costura de puntada de recubierto
- Page 39 – VII. Especificaciones de la máquina
Cover Stitch Machine Operation Manual
Manual de instrucciones de la máquina de
puntada de recubierto
CONTENTS: ENGLISH
I. Names of parts and their functions ............. 3
II. Preparation before threading ..................... 8
III. Threading .................................................. 9
IV. Types of stitches ..................................... 11
Tri-cover stitch ............................................. 11
Two needle three threads cover stitch ........ 12
Chain stitch sewing ..................................... 14
V. Sewing ..................................................... 15
VI. Maintenance ........................................... 19
VII. Machine specifications .......................... 19
INDICE: ESPAÑOL
I. Nombres de las partes y sus funciones .... 21
II. Preparación antes del enhebrado ............ 26
III. Enhebrado .............................................. 27
IV. Tipos de puntadas ................................... 29
Puntada de recubierto triple ....................... 29
Puntada de recubierto de
dos agujas con tres hilos ................. 30
Costura de puntada de cadena .................. 32
V. Costura .................................................... 33
VI. Mantenimiento ........................................ 37
VII. Especificaciones de la máquina ............ 37
ENGLISH
ESP
AÑOL
"Loading the manual" means you need to wait until the file loads and becomes available for online reading. Some manuals are very large, and the time they take to appear depends on your internet speed.
Was this manual helpful?
About this manual
- Brand
- Brother
- Model
- 2340CV
- Document type
- Manual
- Category
- Sewing Machine
- Language(s)
- English, Spanish
- Pages
- 40
- File size
- 1.2 MB
- Format
Summary
"IMPORTANT SAFETY INSTRUCTIONS" When using the sewing machine, basic safety precautions should always be followed, including the following. "Read all instructions before using." DANGER – To reduce the risk of electric shock. 1. The sewing machine should never be left unattended when ...
1 ENGLISH FOR USERS IN THE UK, EIRE, MALTA AND CYPRUS ONLY. If your sewing machine is fitted with a 3 pin non rewireable BS plug then please read the following. IMPORTANT If the available socket outlet is not suitable for theplug supplied with this equipment, it should be cut offand an appropriate t...
2 CONGRATULATIONS ON CHOOSING THIS COMPACT COVER STITCH MACHINE Your machine is a high quality, easy-to-use product. To fully enjoy all the features, we suggest thatyou study this booklet.If you need more information regarding the use of your machine, your nearest authorized dealer isalways happy to...
Ask a question
Related manuals
Popular Brother Sewing Machines
More Brother Sewing Machines models
 Brother XL-3500 Manual
 Brother XL-5700 Manual
 Brother XR9550 User Manual
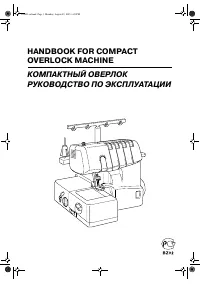 Brother 1034D User Manual
 Brother 3034D Manual
 Brother CP60X User Manual
 Brother CS-8060 Manual
 Brother CS5055 User Manual
 Brother Innov-is 200 User Manual
 Brother Innov-is 900 User Manual
 Brother JS-23 User Manual
- Brother LS-1520 Manual
- Brother LS-2125 Manual
 Brother LS-3125 User Manual
 Brother LS 2150 User Manual
- Brother SL-7 User Manual
 Brother SM1400 User Manual