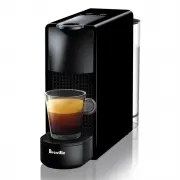
Breville BNE600BTR - Manuals
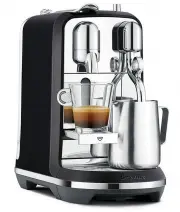
User Manual Breville BNE600BTR
1

2

3

4

5

6

7

8

9

10

11

12

13

14

15

16

17

18

19

20

21

22

23

24

25

26

27

28

29

30

31

32

Summary
Page 2 - CREATISTA; MY MACHINE
Page 5 - When you see this sign, please refer to the; Packaging Content; Creatista
CREATISTA MY MACHINE Welcome EN 3 220-240 V, 50 Hz, 1300-1600 W max 19 bar / 1.9 MPa ~5.2 kg / 11.4 lbs 1.5 L / 50 oz 17.0 cm 30.9 cm 40.9 cm 6.7 in 12.2 in 16.1 in USER MANUAL Nespresso is an exclusive system creating the perfect Espresso, time after time. Each parameter has been calculated with gr...
Page 6 - Content
EN 4 Content Nespresso Creatista 2 Packaging Content 3 Creatista 3 Specifications 3 Safety Precautions 5-7 Machine Overview 8 First Use 9-10 Navigation 11 Regular Coffee Preparation 12 Milk Coffee Preparation - Single Cup 13-14 Milk Coffee Preparation - Two Cup 15-17 Latte Macchiato Preparation 18-1...
Breville Coffee Machines Manuals
-
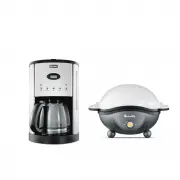 Breville BCM600BLKBEG100
User Manual
Breville BCM600BLKBEG100
User Manual
-
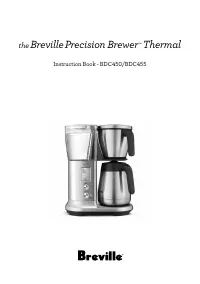 Breville BDC450BSS1BUS1
User Manual
Breville BDC450BSS1BUS1
User Manual
-
Breville BDC450BSS1BUS1
Manual
-
 Breville BDC650BSS
User Manual
Breville BDC650BSS
User Manual
-
 Breville BEC200XW
User Manual
Breville BEC200XW
User Manual
-
 Breville BEC220BLK
User Manual
Breville BEC220BLK
User Manual
-
 Breville BEC250SIL
User Manual
Breville BEC250SIL
User Manual
-
 Breville BEC500XT
User Manual
Breville BEC500XT
User Manual
-
 Breville BEC630CRO
User Manual
Breville BEC630CRO
User Manual
-
 Breville BEC650MC
User Manual
Breville BEC650MC
User Manual
-
 Breville BEP920BKS
User Manual
Breville BEP920BKS
User Manual
-
 Breville BEP920BSS
User Manual
Breville BEP920BSS
User Manual
-
 Breville BES030BSSBCG200BSS
User Manual
Breville BES030BSSBCG200BSS
User Manual
-
 Breville BES250
User Manual
Breville BES250
User Manual
-
 Breville BES250BSS
User Manual
Breville BES250BSS
User Manual
-
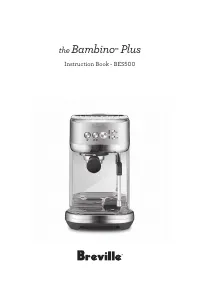
 Breville BES500BSS
User Manual
Breville BES500BSS
User Manual
-
 Breville BES500BSS1BUS1
User Manual
Breville BES500BSS1BUS1
User Manual
-
 Breville BES500BTR
User Manual
Breville BES500BTR
User Manual
-
 Breville BES500SST
User Manual
Breville BES500SST
User Manual
-
 Breville BES810BSS
User Manual
Breville BES810BSS
User Manual