Bosch DWB96BC60A - Manuals
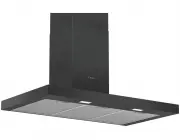
User Manual Bosch DWB96BC60A


Summary
en Safety 2 Table of contents INFORMATION FOR USE 1 Safety .................................................................... 2 2 Avoiding material damage................................... 4 3 Environmental protection and saving en-ergy ............................................................
en Avoiding material damage 4 WARNING ‒ Risk of injury! Improper repairs are dangerous. ▶ Repairs to the appliance should only becarried out by trained specialist staff. ▶ If the appliance is defective, call CustomerService. WARNING ‒ Risk of electric shock! Penetrating moisture may cause an electr...
Operating modes en 5 4 Operating modes You can use your appliance in air extraction mode orcirculating-air mode. 4.1 Air extraction mode The air which is drawn in is cleaned by the grease fil-ters and conveyed to the exterior by a pipe system. The air must not be discharged into aflue that is used...
Bosch Range Hoods Manuals
-
 Bosch DBB67AM60A
User Manual
Bosch DBB67AM60A
User Manual
-
Bosch DBB67AM60A
Installation Manual
-
 Bosch DBB97AM60A
User Manual
Bosch DBB97AM60A
User Manual
-
Bosch DBB97AM60A
Installation Manual
-
 Bosch DDW88MM66
User Manual
Bosch DDW88MM66
User Manual
-
 Bosch DFL064W50A
User Manual
Bosch DFL064W50A
User Manual
-
 Bosch DFM064W50A
User Manual
Bosch DFM064W50A
User Manual
-
 Bosch DFM064W54A
User Manual
Bosch DFM064W54A
User Manual
-
 Bosch DFR067A50A
User Manual
Bosch DFR067A50A
User Manual
-
 Bosch DFR097A50A
User Manual
Bosch DFR097A50A
User Manual
-
 Bosch DFR097E50A
User Manual
Bosch DFR097E50A
User Manual
-
 Bosch DFS067A50A
User Manual
Bosch DFS067A50A
User Manual
-
 Bosch DFS067A51A
User Manual
Bosch DFS067A51A
User Manual
-
 Bosch DFS097A50A
User Manual
Bosch DFS097A50A
User Manual
-
 Bosch DFS097A51A
User Manual
Bosch DFS097A51A
User Manual
-
 Bosch DFS097E50A
User Manual
Bosch DFS097E50A
User Manual
-
 Bosch DHI645NAU
User Manual
Bosch DHI645NAU
User Manual
-
 Bosch DHL555BAU
User Manual
Bosch DHL555BAU
User Manual
-
 Bosch DHL575CAU
User Manual
Bosch DHL575CAU
User Manual
-
 Bosch DHL755BUC
User Manual
Bosch DHL755BUC
User Manual