Beko CWB9503X - Manuals
User Manual Beko CWB9503X


Summary
Complies with the WEEE Directive. This product was manufactured using the latest technology in environmentally friendly conditions. Please read this user manual first! Dear Customer, Thank you for purchasing this Beko product. We hope that you get the best results from your product which has been ma...
3 / 13 EN TABLE OF CONTENTS 1 General 4 2 Safety Precaution 5 1.1 Before connecting the model to the electricity network: . . . . . . . . . . . . . . . . . . . . . . . . . . . 5 1.2 Warning! . . . . . . . . . . . . . . . . . . . . . . . . . . . . 5 3 Your Hood 6 2.1 Technical Specifications . . . . ...
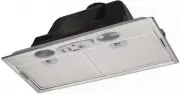
4 / 13 EN 1 General Carefully read the following important information regarding installation safety and maintenance. Keep this information booklet accessible for further con-sultations. The appliance has been designed for use in the ducting version (air exhaust to the outside – Fig.1B), filtering v...
Beko Range Hoods Manuals
-
 Beko BHCB61632XH
User Manual
Beko BHCB61632XH
User Manual
-
 Beko BRH52UX
User Manual
Beko BRH52UX
User Manual
-
 Beko BRH60CX
User Manual
Beko BRH60CX
User Manual
-
 Beko BRH60TW
User Manual
Beko BRH60TW
User Manual
-
 Beko BRH70UX
User Manual
Beko BRH70UX
User Manual
-
 Beko BRH90CB
User Manual
Beko BRH90CB
User Manual
-
 Beko BRH90CX
User Manual
Beko BRH90CX
User Manual
-
 Beko BRH90TW
User Manual
Beko BRH90TW
User Manual
-
 Beko BRH90UX
User Manual
Beko BRH90UX
User Manual
-
 Beko CCB5140XA
User Manual
Beko CCB5140XA
User Manual
-
 Beko CCB7140XA
User Manual
Beko CCB7140XA
User Manual
-
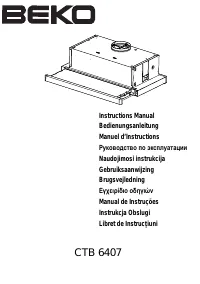 Beko CTB 6407 W (X)
User Manual
Beko CTB 6407 W (X)
User Manual
-
 Beko CTB6250XA
User Manual
Beko CTB6250XA
User Manual
-
 Beko CTB6407X
User Manual
Beko CTB6407X
User Manual
-
 Beko CTB9250XA
User Manual
Beko CTB9250XA
User Manual
-
 Beko CWB 6420 W
User Manual
Beko CWB 6420 W
User Manual
-
 Beko CWB 6420 X
User Manual
Beko CWB 6420 X
User Manual
-
 Beko CWB 6550 X
User Manual
Beko CWB 6550 X
User Manual
-
 Beko CWB 6660 X
User Manual
Beko CWB 6660 X
User Manual
-
Beko CWB 9550 X
User Manual