Avalon A9-2 - Manuals
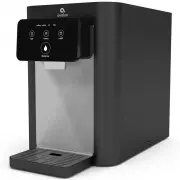
User Manual Avalon A9-2


Summary
www.avalonh2o.com We’re Here to Help Let’s Connect Call Us: 1.800.256.0695 Email Us: [email protected] [email protected] Live Chat: Monday-Thursday: 9 a.m.-5:30 p.m. Friday: 9 a.m.-4:30 p.m. @avalon_h2o Avalon Water Coolers Avalonh2o Follow our social media accounts and stay up to date on the latest...
Use and Care Guide MODEL: A9 Registration Please visit the website below to register your new water cooler within the first 30 days of purchase. Registration within the first 30 days will activate your one year warranty. www.avalonh2o.com/register-my-avalon-cooler Please keep your model number, orde...
Contents About Your Water Cooler Meet Your Avalon Product Part Names Control Panel Tech Specs Filter Function Introduction Getting Started Unpacking Installation (Under the Sink) Installation (Refrigerator Water Line) Flushing Filters Finishing Water Cooler Installation Installing and Removing the D...
Avalon Water Dispensers Manuals
-
 Avalon A10-TL
User Manual
Avalon A10-TL
User Manual
-
 Avalon A11BLK
User Manual
Avalon A11BLK
User Manual
-
 Avalon A11-CTTL
User Manual
Avalon A11-CTTL
User Manual
-
 Avalon A12BLK
User Manual
Avalon A12BLK
User Manual
-
 Avalon A12-CTPOU
User Manual
Avalon A12-CTPOU
User Manual
-
 Avalon A13
User Manual
Avalon A13
User Manual
-
 Avalon A13CT
User Manual
Avalon A13CT
User Manual
-
 Avalon A13-S
User Manual
Avalon A13-S
User Manual
-
 Avalon A14
User Manual
Avalon A14
User Manual
-
 Avalon A14BLK
User Manual
Avalon A14BLK
User Manual
-
 Avalon A1CTWTRCLRBLK
User Manual
Avalon A1CTWTRCLRBLK
User Manual
-
 Avalon A1CTWTRCLRWHT
User Manual
Avalon A1CTWTRCLRWHT
User Manual
-
 Avalon A1TLWATERCOOLER
User Manual
Avalon A1TLWATERCOOLER
User Manual
-
 Avalon A1WATERCOOLER
User Manual
Avalon A1WATERCOOLER
User Manual
-
 Avalon A2TLWATERCOOLER
User Manual
Avalon A2TLWATERCOOLER
User Manual
-
 Avalon A3BLK
User Manual
Avalon A3BLK
User Manual
-
 Avalon A3BLOZONEWTRCLR
User Manual
Avalon A3BLOZONEWTRCLR
User Manual
-
 Avalon A3-F
User Manual
Avalon A3-F
User Manual
-
 Avalon A4BLWTRCLR
User Manual
Avalon A4BLWTRCLR
User Manual
-
 Avalon A5BLK
User Manual
Avalon A5BLK
User Manual