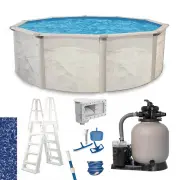
Page 2 - : For your safety, your pool is not designed for diving and/or; Once the installation of the pool is complete, it is important; Dear Customer
I : : For your safety, your pool is not designed for diving and/or jumping in head first. Please do not dive. Diving may result in permanent injury or death. INSTALLER: Once the installation of the pool is complete, it is important to give this document to the customer in person. INSAR 24/01/2018 De...
Page 4 - Read this before installing; General information
1 1 SAFETY AND FUN GO TOGETHER ! Read this before installing Your above-ground pool General information The pool is subject to wear and deterioration if not maintained properly and could lead to failure of the pool’s structure. Failure of the pool structure might release large quantities of water th...
Page 5 - Only one person at a time on the ladder .; NO DIVING; or; JUMPING; from the ladder steps or the ladder’s platform.; SAFETY INFORMATION DURING POOL USE
2 SAFETY EQUIPMENT For your protection and for the safety of others, we recommend that lifesaving equipment be on hand A light, strong and rigid pole, frequently referred to as a Shepherd's Crook, at least twelve feet long or a throwing rope of at least ¼ inch in diameter and as long as 1.5 times th...
Page 7 - TURF REMOVAL
4 19- The pool deck, if installed, should be kept clean and clear of objects in order to avoid tripping or slip- ping. The deck should have a non-slip surface. 20– Keep all toys, chairs, tables, filter, pool heater and any other object that can be used by anyone to gain access to the pool, at least ...
Page 8 - TURF REMOVAL DIAMETER
5 Carefully pack the soil using a tamper tool or vibrating plate (See illustration 4.1 and 4.2), especially on those areas where a lot of soil was added. It is also highly recommended to firm up the edge by adding a 2 cm (3/4”) layer of stone dust (or sand). The center of the circle can then be exca...
Page 9 - Bottom Drain Assembly; FLAT
6 Take one of the two(2) rubber rings and adjust it to the top of the drain, aligning the holes carefully. Secure with strips of adhesive tape to prevent sand from penetrating inside the holes once the drain has been installed. Se-cure one end of the long black or white hose inside the drain spout. ...
Page 10 - POOL DIAMETER
7 5 6 Before uncoiling the wall, make sure the pre-punched holes for the skimmer and pump return are at the top and facing the planned location of your filter. BEAM BAR SAND DETAIL 7.1 Insert the tracks on each side of the bottom plates (see Illustration 6.1). Illustration 6.1 Illustration Assemble ...
Page 11 - Chart; View from the outside of the pool.; ACTUAL LENGTH OF WALL
8 Begin inserting the wall into the bottom wall tracks in the middle of a joiner plate. At first, the wall should be kept in place with one or two support bars (or extra persons). One person should uncoil the wall on a beam or a plank while a second person inserts it in the bottom wall tracks. Do no...
Page 12 - SAND BASE FINISHING
7 You can now spread approximately 10 cm (4") of com-pacting sand all around the inside base of the wall in order to protect the liner from the cutting edges of the bottom wall tracks and the stone dust (if applicable) or install a pre-fabricated cove, if available. Level finishing sand one last...
Page 13 - The Independence/Liberty pools DO NOT have foot collars included.
8 The Independence/Liberty pools DO NOT have foot collars included.
Page 14 - Overlap
10 9 Before pulling the liner up against the wall, insert a vacuum cleaner hose down into the pump return hole to approxi-mately 15 cm (6") from the ground. Maintain the hose in place with adhesive tape. Don't forget to block the skimmer hole with adhesive tape to prevent air from leaking in. Pl...
Page 15 - PUMP RETURN FITTING
11 Fill the pool up to the base of the wall before stopping and removing the vacuum cleaner. PUMP RETURN FITTING After you remove the vacuum cleaner, you may install the return fitting. Place the return fitting ring against the liner and adjust it so that it is perfectly aligned with the hole in the...
Page 17 - It is sometimes necessary to install the laterals.
13 13 Note: See the safety section. As described, all components of the filtration system should be placed to prevent a child to climb on top and gain access to the pool. Using a little bit of stone dust (or sand), level a 61 cm x 76 cm (24” x 30”) patio stone before installing the motor and filter....
Page 18 - A back wash hose may be placed behind the filter head.
14 14 Insert threaded nozzles, if applicable, in order to be able to screw the valve in the skimmer. Connect the drain hose to the bottom nozzle. Con-nect the motor hose to the side nozzle. The threads on all threaded nozzles must be cov-ered with teflon tape prior to installing in order to prevent ...