Page 2 - Please do not dive. Diving may result in permanent injury or death.; SITE PREPARATION
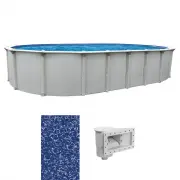
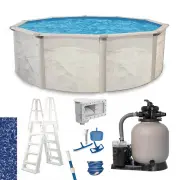
When selecting the site for your pool, take into account city by-laws regarding fences and utilities laws pertaining to electrical cablesas well as the landscaping which you are planning once the pool is installed. Dear Customer Congratulations! You have purchased a pool of superior quality and dura...
Page 3 - SITE LEVELLING
1) Drive a stake into the ground at points A and B respecting the distance of the straight section between those two points (A-B). 2) Draw two half circles respecting the radius (R). 3) Join the two half circles with straight lines respecting the width between these two lines (D). 4) Verify that the...
Page 4 - Bottom Drain Assembly; STRAIGHT SECTION BUTTRESS ASSEMBLY
Dig a hole 30 cm (12") wide by approximately 25 cm (10") deep inthe center of the circumference. From the center hole to the projected location of the pool motor, diga 15 cm (6") wide trench. Place the removed soil aside to be usedlater to cover the hose. Bottom Drain Assembly Place tefl...
Page 6 - TENSION STRAPS ASSEMLBY; Start with round; ROUND SECTION BOTTOM TRACKS ASSEMBLY
1) Study illustrations and char t carefully. You are now ready to as- semble the metallic tension straps. Refer to indications on the char tfor the exact number of tension straps per row according to theirrespective pool size. 2) Refer to Illustration 6.1: If there is more than one metallic strap pe...
Page 7 - WALL INSTALLATION; Choose the filter location beside a round section (never in a; Note: If the wall is attached properly, you should no longer see; nd
WALL INSTALLATION 8 1) Add sand. 2) Choose the filter location beside a round section (never in a straight section). The star ting point should be at that location wherethe skimmer and return holes are, and as close as possible to thefiltration system. 3) Before uncoiling the wall, make sure the pre...
Page 8 - SAND BASE FINISHING
You can now spread approximately 10 cm (4") of compacting sandall around the inside base of the wall in order to protect the linerfrom the cutting edges of the bottom tracks and the stone dust (ifapplicable), or install a prefabricated cove if available. SAND BASE FINISHING Level finishing sand ...
Page 9 - PUMP RETURN FITTING; UPRIGHT POST INSTALLATION; For the round section:; Uprights must be installed inside the bottom plate.; UPRIGHT POST TOP PLATE
VINYL LINER INSTALLATION (continued) 10 Installation detail of a bead liner with top track.Hang the liner on the top of the wall and install the top track to se-cure. Star t the vacuum cleaner to allow the liner to adhere to the wall andcheck for excess tension at the bottom or for wrinkles. Adjust ...
Page 10 - Same installation procedure for the straight section.
TOP SEAT INSTALLATION 13 SEAT CAP INSTALLATION 14 Place the top seats on the top of the uprights. Center the top seatbetween the two the uprights and be cer tain to evenly distribute theledges all around. Be sure to have a ver tical (plumb) upright before fixing the top seat.Secure the top seat in p...
Page 11 - manufacturer’s instructions.; LABEL
SECURITY LABELS INSTALLATION 15 FILTRATION SYSTEM ASSEMBLY 16 Assemble skimmer, inlet, drain, filter, pumps, hoses according to separate manufacturer’s instructions. Note: See 'Safety Information" Manual. Install the four (4) safety labels (DANGER) supplied with your poolas follows: two (2) labe...
Page 12 - PARTS LIST
PARTS LIST 17 * SEE DRAWING PARTS NEXT PAGE NOTE: Please confirm quantities with checklist included in each box. ITE M D E SCR I P TI ON POO L WALL (f i n i shed l enght, i nch) BO LT & N U T F OR 52 " (OR 5 4" ) WALL POO L LINE R P LA S TI C COUP LE R (SO L D S E P A R ATELY ) T OP S EA...
Page 14 - SAFETY AND FUN GO; SAFETY INFORMATION; Read this before installing your above-ground pool.
SAFETY AND FUN GO TOGETHER! SAFETY INFORMATION Read this before installing your above-ground pool. 12 775, Brault Street, Mirabel, Quebec, Canada J7J 0C4 Phone: 1 800 44-TREVI (1 800 448-7384) Fax: 1 866 777-0167
Page 15 - stickers are provided with your pool. These stickers; We recommend that you purchase one of the following:; from the ladder steps or; GENERAL INFORMATION
The pool is subject to wear and deterioration if not maintained prop-erly. Cer tain types of excessive or accelerated deterioration can leadto failure of the pool’s structure, which may release large quantitiesof water that could cause bodily harm, death and proper ty damages. In order to ensure pro...
Page 16 - USAGE SAFETY INFORMATION
USAGE SAFETY INFORMATION 1 • Share safety instructions with family, friends, pool watchers or neighbors. 2 •The installer of the vinyl liner shall affix on the original or re- placement liner, or on the pool structure, all safety signs in accor-dance with the manufacturer’s instructions. The safety ...