Page 3 - CONTENTS
3 CONTENTS S The fomanua Importyour peon how Genera Environ 489 1015162224303774 Safety infoInstallationDescriptionBasic settinSteam funcSpecial FunWhen the OUsage, TabCare and mTechnical CInstallation ollowing symbols a al: tant information con ersonal safety and in w to avoid damaging al informa...
Page 4 - Safet
SAFETY IN Carefully equipmeninstallatiodamage. Aeasily refe Safety of WARN Risk of ch • This apand percapabilgiven sapplian • Childre • Keep pa • Keep choperati • Cleaninwithou Warnings During in • Only quthe cab WARN • The appCare shChildrecontinu NFORMATION read the instr nt. The manufa on and use...
Page 8 - INSTALLAT; Before insta; TION INSTRUCT; efore installing the; allation; TIONS; carefully for your; Installatio; safety and correct; on Instructions; operation of the
INSTALLAT Read the "Saappliance be Before insta CheckvoltagOpen Warnthe ovMake correcdamagDO NOfunctiCentrePut thsourceDuringmoistudamagWarn After instal The ov230 - If the techncircuitWARNThe mcausedThe ovBeforecleaniDurin TION INSTRUCT afety Information" efore installing the allation k tha...
Page 9 - DESCRIPTION OF YOUR OVEN
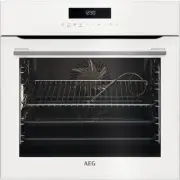
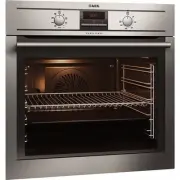
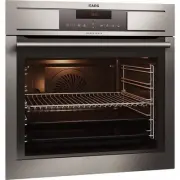
9 Description of your oven DESCRIPTION OF YOUR OVEN Door window glass Perforated baking tray Hinges Baking tray Shelf Support Runners Wire Shelf Control panel Water Tank Confirmation Key Cancel/Safety Block Key Start Key Water Level / Descale lights Parameter selection Keys Function lights Plus an...
Page 10 - Basic Settings; BASIC SETTINGS; Initial Settings
10 Basic Settings BASIC SETTINGS Initial Settings After your steam oven is first plugged in or after a power failure, the clock display will flash to indicate that the time shown is not correct. The oven will not operate until the clock and the water hardness are set. To set the clock and the wate...
Page 11 - Water Hardness setting
11 Basic Settings Water Hardness setting The appliance features a system that automatically indicates when it is time to descale. The system can be optimised for households with very soft water (also through using a water softening appliance) and very hard water, by changing the user settings to t...
Page 12 - Safety blocking; To block the oven, press the Cancel key; Water feeding; Filling the water tank; safe
Basic Settings 12 Safety blocking The oven functioning can be blocked (for example, to stop it being used by children). • To block the oven, press the Cancel key for 3 seconds. You will hear a sound signal and the clock display will show the word ‘‘SAFE’’. The oven is blocked in this state and can...
Page 13 - rES
13 Basi Refilling the The cominutIf, howand th Warndoes n Water tank m Whenmessa To cleauntil t Emptying th Whentank. While This mpump Warn After t‘‘DEP’’ • Rem • Dry and c Settings e water ontents of the watertes. wever, the water tanhe water level light, m ing! Only fill the wa not overflow when...
Page 15 - Steam Function; STEAM FUNCTION
15 Steam Function STEAM FUNCTION Use this function to cook all sorts of vegetables, rice, cereals and meat. It is also suitable for extracting juice from berries and for simultaneous defrosting and cooking of vegetables. • Select the Steam function with the Function selection keys . • Select the T...
Page 16 - Special Functions; SPECIAL FUNCTIONS; Regenerating & Sterilising
16 Special Functions SPECIAL FUNCTIONS Regenerating & Sterilising Use this function to regenerate plate dishes and ready-made meals as well as to sterilise and boil down fruit. • Select the Regenerating and Sterilising function with the Function selection keys . • Select the Food group with Pa...
Page 17 - Spec; Cooking Ve; cial Functions; egetables
17 Spec Cooking Ve Use this func • Sele • Seledisp • Presblin • Pres The intetem Pro WhenanothCut thDo no cial Functions egetables ction cook the veget ect the Cooking Vegeect the Food group w play start blinking. ss the Confirmation king. ss the Start key . T following table show ervals, and cook...
Page 18 - Cooking Fish
18 Special Functions Cooking Fish Use this function cook the fish types described in the table below. • Select the Cooking Fish function with the Function selection keys . • Select the Food group with Parameter selection keys . The respective symbol and display start blinking. • Press the Confirma...
Page 19 - Cooking Meat; Use this function; cook the meat types described in the table below.
19 Special Functions Cooking Meat Use this function cook the meat types described in the table below. • Select the Cooking Meat function with the Function selection keys . • Select the Food group with Parameter selection keys . The respective symbol and display start blinking. • Press the Confirma...
Page 20 - Cooking Side Dishes; cook the foods described in the table below.
20 Special Functions Cooking Side Dishes Use this function cook the foods described in the table below. • Select the Cooking Side Dishes function with the Function selection keys. • Select the Food group with Parameter selection keys . The respective symbol and display start blinking. • Press the ...
Page 21 - Timer; To set the Timer proceed as follows:; Stop
21 Special Functions Timer The timer functions like an egg timer. It can be used at any time and independently of all other functions. To set the Timer proceed as follows: • Select the Timer Symbol with the Function selection keys . • Set the duration with ‘‘+’’ and ‘‘-‘‘keys . • Press the Confirm...
Page 22 - WHEN THE OVEN IS WORKING; Interrupting a cooking cycle; The steam generation is interrupted.; Start; Altering parameters; Cancel; End of a cooking cycle
22 When the oven is working WHEN THE OVEN IS WORKING Interrupting a cooking cycle You can stop the cooking process at any time by pressing the Cancel key once. The oven incorporates a steam-reduction function that is activated when the Cancel key is pressed to gradually release the steam from the ...
Page 23 - When the oven is Working; Steam Flow
23 When the oven is Working Warning! When opening the door during or upon completion of the cooking cycle, be careful of the flow of hot air and/or steam coming out of the cooking chamber. Step back or to the side to avoid burns. The beeps are repeated every 30 seconds until the door is opened or ...
Page 24 - Usage, Tables and Tips; USAGE, TABLES AND TIPS
24 Usage, Tables and Tips USAGE, TABLES AND TIPS When placing the food on the ovenwaretake care to not place the pieces on top of one another. Cut the food in pieces as similar in size as possible. Do not fill the food more than 3 cm high in the ovenware. Fish Fish Quantity Temperature ºC Time min...
Page 25 - Meat
25 Usage, Tables and Tips Meat Meat Quantity Temperature ºC Time min. Container Level Chicken leg 4-10 100 40-45 Perforated 2 Chicken breast 4-6 100 25-35 Perforated 2 Smoked pork loin 500g – 1000 g 100 40-50 Perforated 2 Turkey escalope 4-8 100 20-25 Perforated 2 Pork filet, whole 4-8 100 20-30 P...
Page 26 - Vegetables
26 Usage, Tables and Tips Vegetables Vegetables Temperature ºC Time min. Container Level Eggplant/Aubergine in slices 100 15-20 Perforated 2 Beans 100 35-45 Perforated 2 Broccoli florets with stalk 100 25-30 Perforated 2 Broccoli florets without stalk 100 15-20 Perforated 2 Cauliflower florets 100...
Page 27 - Dumplings
27 Usage, Tables and Tips Dumplings Dumplings Temperature ºC Time min. Container Level Sweet dumpling 100 20-30 Not perforated 2 Sweet yeast dumpling 100 15-20 Not perforated 2 Yeast dumpling 100 15-25 Not perforated 2 Bread dumpling 100 20-25 Not perforated 2 Napkin dumpling 100 25-30 Not perfora...
Page 28 - Blanch
28 Usage, Tables and Tips Blanch Vegetables Quantity Temperature ºC Time min. Container Level e.g. Beans, Leek 100 10-12 Perforated 2 Curly Kale 1000-2000 g 100 12-16 Perforated 2 Savoy cabbage 10-20 100 12-15 Perforated 2 White cabbage, whole 2000-2500 g 100 30-45 Perforated 1 Tomatoes, peeled 80...
Page 29 - Two level cooking; Foods with a shorter cooking time should be placed on the 1st level.; Use of accessories
29 Usage, Tables and Tips Two level cooking Some suggestions: When cooking with two levels the rack always belongs to the 2nd or 3rd level of insertion from the bottom to the top. This way the usual vessels of porcelain, Jena glass or of stainless steel can be put inside the oven. The tray perfora...
Page 30 - Care and Maintenance; CARE AND MAINTENANCE; Cleaning the cooking space
30 Care and Maintenance CARE AND MAINTENANCE Cleaning the cooking space Avoid using abrasive cleaners such as scouring pads, steel wool, etc. as they can damage the surface. Wipe the cooking space clean using a damp cloth whilst the appliance is still warm. Finish off by drying the cooking space. ...
Page 31 - Removing the appliance door; Open the appliance door as far as it will go.
31 Care and Maintenance Removing the appliance door 1. Open the appliance door as far as it will go. 2. Insert 2 pins inside the holes in the hinges. 3. Close the appliance door just enough that it can be lifted out. 4. To reassemble, push the hinges into the holes from the front. 5. Open the appl...
Page 32 - scaling solutions
Descaling When(i.e. thgenerThe tifrequedesca The aphappeIf the light sIf oncthe ov“CAL” IMPOfunct Suitable de For dewhichCusto Warnto theTraditagents never steam is produ he limescale conten rator. me interval betwee ency of use. If steam led (depending on w Water hardness Very soft Medium Very hard...
Page 33 - Care; Descaling p; e and Maintenance; procedure; CAL
33 Care Descaling p WarnThe apmust To run • Presdisp • PresPut tank • Pres • Wheand • Fill t • Pres • Wherem • Fill t • Pres • Whe • Rem e and Maintenance procedure ing: For safety reaso ppliance can be desc be in idle state prior n a descaling cycle p ss the Confirmation play shows ‘‘CAL’’ and ss...
Page 34 - Oven clean; Front surfac; ing
Oven clean Warnof theDo nosharp Do no Front surfac Normfew dwith aImmeunderDo no Oven interio After Leave To removen Alwayand c Make The gcleanidishw Note: The gcontascrew“Repla Accessories Clean then umach ing ing! Cleaning should e socket or switch off ot use aggressive or a objects, since stains ...
Page 36 - Replacing the light bulb; To replace the light bulb, proceed as follows:
36 Care and Maintenance Replacing the light bulb To replace the light bulb, proceed as follows: • Disconnect the oven from the power supply. Take the plug out of the socket or switch off the oven’s power circuit. • Unscrew and remove the glass light cover. • Remove the light bulb. Warning! The bul...
Page 37 - kg
37 Tech TECHNICA Summary o Messa CAL -L0- VAP PUMP END Description Symbol R Specificatio AC Voltage……Power requireExterior dimeInterior dimenOven capacityWeight………… nical characteristics AL CHARACTER of Warming Mess ge Appliance Insufficien Indication The water Indication P Indicationpumped to Ind...
Page 38 - ZUBEHÖR UND VERBRAUCHSMATERIALIEN
38 FÜR PERFEKTE ERGEBNISSE Danke, dass Sie sich für dieses AEG Produkt entschieden haben. Wir haben es geschaffen, damit Sie viele Jahre von seiner ausgezeichneten Leistung und den innovativen Technologien, die Ihnen das Leben erleichtern, profitieren können. Es ist mit Funktionen ausgestattet, di...
Page 39 - Inha; INHALTSV; ltsverzeichnis; VERZEICHNIS
39 Inha INHALTSV ltsverzeichnis VERZEICHNIS Die foHandb WichtigSicherhdas Gebeschä Allgem Inform 40 44 45 46 50 51 57 59 66 73 74 SicherheitshinwInstallationsanBeschreibung IGrundeinstelluGaren mit DamSpezialfunktioWährend des BTabellen und tiReinigung undTechnische EigEinbau olgenden Symbole uch ...
Page 40 - Siche
SICHERHE Lesen Sie Gerät in BunsachgeVerletzunAnweisunkonsultie Sicherhe WARN Erstickun • Dieses Gmit eingeistigewerdensichere damit v • Kinder • Kinder dabei n Warnung Während geliefert w • .Nur quersetze WARN • Dieses GSie daraunter adabei st EITSHINWEISE die Anweisun Betrieb setzen. emäße Install...
Page 44 - Vor der Inst; TIONSANLEITU; tallation; NG; Installa
INSTALLAT Zu Ihrer eigesorgfältig di Vor der Inst Überpist, miÖffneAchtuSie dieUntersVergerichtigbeschäSchädTelefoBENUfalls dherunVerbinTelefoAchtugewäh Nach der In Gerät 230-2Im FainstallUnterKontaACHTDer Heab, dievorliegDas GSäubeHinweWähr TIONSANLEITU enen Sicherheit und e “Informationen z tallat...
Page 45 - BESCHREIBUNG IHRES DAMPFGAROFENS
45 Beschreibung Ihres Dampfgarofens BESCHREIBUNG IHRES DAMPFGAROFENS Türfenster aus Glas Gelochtes Garblech Scharniere Backblech Laufschienen für die Bleche Grillrost Schaltflächen Wasserbehälter Bestätigungstaste Abbrechen/Sicherheitsblockierung Starttaste Wasserstands-/Entkalkungsanzeigen Parame...
Page 46 - Grundeinstellungen; GRUNDEINSTELLUNGEN; Initialisierungseinstellungen
46 Grundeinstellungen GRUNDEINSTELLUNGEN Initialisierungseinstellungen Nach dem Erstanschluss an die Stromversorgung oder nach einem Stromausfall, blinkt das Zeitdisplay, wodurch ersichtlich wird, dass die angezeigte Zeit nicht korrekt ist. Der Dampfgarofen funktioniert nicht, bis Uhrzeit und Wass...
Page 47 - Die Wasserhärte einstellen
47 Grundeinstellungen Die Wasserhärte einstellen Das Gerät verfügt über ein System, das automatisch anzeigt, wann es entkalkt werden muss. Das System kann für Haushalte mit sehr weichem Wasser (auch durch den Einsatz von Wasserentkalkern) und mit sehr hartem Wasser optimiert werden, indem der ents...
Page 48 - Sicherheitsblockierung; Den Wasserbehälter auffüllen
48 Grundeinstellungen Sicherheitsblockierung Der Ofenfunktionen können blockiert werden (zum Beispiel, damit das Gerät von Kindern nicht benutzt wird). • Um den Garofen zu blockieren, drücken Sie drei Sekunden lang die Taste Abbrechen . • Danach hören Sie einen Signalton und auf dem Zeitdisplay er...
Page 50 - Garen mit Dampf; GAREN MIT DAMPF
50 Garen mit Dampf GAREN MIT DAMPF Sie können diese Funktion verwenden, um beliebiges Gemüse, Reis, Getreide und Fleisch zu garen. Sie eignet sich auch, um Beeren zu entsaften und um Gemüse gleichzeitig aufzutauen und zu garen. • Wählen Sie über die Funktionsauswahltasten die Dampfgarfunktion. • W...
Page 51 - Spezialfunktionen; SPEZIALFUNKTIONEN; Regenerieren & Sterilisieren
51 Spezialfunktionen SPEZIALFUNKTIONEN Regenerieren & Sterilisieren Verwenden Sie diese Funktion, um Teller- und Fertiggerichte aufzuwärmen sowie um Obst steril einzukochen. • Wählen Sie über die Funktionsauswahltasten Regenerieren und Sterilisieren. • Wählen Sie die Nahrungsmittelgruppe mit H...
Page 52 - Gemüse ko; chen; Spez; ialfunktionen
Gemüse ko Verwenden Skochen. • Wäh • WähNun • DrüDisp • DrüDie soweinh Pro WennübereDas B chen Sie diese Funktion, hlen Sie über die Funhlen Sie die Nahrung n beginnen das entsp cken Sie die Bestätig play und Symbol auf cken Sie die Starttas folgende Tabelle gib wie Gewichtsangaben heitliche Tempera...
Page 53 - Fisch garen
53 Spezialfunktionen Fisch garen Verwenden Sie diese Funktion, um die in der Tabelle unten angegebenen Fischsorten zu garen. • Wählen Sie über die Funktionsauswahltasten die Funktion Fisch garen . • Wählen Sie die Nahrungsmittelgruppe mit Hilfe der Parameterauswahltasten aus. Nun beginnen das ents...
Page 54 - Fleisch garen; Verwenden Sie diese Funktion,; um die in der Tabelle unten angegebenen
54 Spezialfunktionen Fleisch garen Verwenden Sie diese Funktion, um die in der Tabelle unten angegebenen Fleischsorten zu garen. • Wählen Sie über die Funktionsauswahltasten die Funktion Fleisch garen . • Wählen Sie die Nahrungsmittelgruppe mit Hilfe der Parameterauswahltasten aus. Nun beginnen da...
Page 55 - Beilagen garen
55 Spezialfunktionen Beilagen garen Verwenden Sie diese Funktion, um die in der Tabelle unten angegebenen Nahrungsmittel zu kochen. • Wählen Sie über die Funktionsauswahltasten die Funktion Beilagen garen. • Wählen Sie die Nahrungsmittelgruppe mit Hilfe der Parameterauswahltasten aus. Nun beginnen...
Page 56 - Zeitschaltuhr; Um die Zeitschaltuhr zu stellen, sind folgende Schritte nötig:
56 Spezialfunktionen Zeitschaltuhr Die Zeitschaltuhr funktioniert wie eine Eieruhr. Sie kann jederzeit und unabhängig von allen anderen Funktionen verwendet werden. Um die Zeitschaltuhr zu stellen, sind folgende Schritte nötig: • Wählen Sie mit Hilfe der Parameterauswahltasten das Zeitschaltuhrsym...
Page 57 - Während des Betriebes; Unterbrechung eines Kochvorgangs; Die Dampferzeugung wurde unterbrochen.; , um den Vorgang wieder; Änderung der Parameter
57 Während des Betriebes WÄHREND DES BETRIEBES... Unterbrechung eines Kochvorgangs Sie können den Kochvorgang jederzeit unterbrechen, indem Sie einmal die Taste Start/Stopp drücken. Das Gerät hat eine Dampfabbaufunktion, die durch die Taste Stopp aktiviert wird. Der Dampfaustritt beim öffnen der T...
Page 58 - Einen Kochvorgang löschen; Stopp; Daraufhin ertönen 3 Signale, und auf der Anzeige erscheint; „End“; Ende eines Kochvorgangs; Dampfaustoss
58 Während des Betriebes Einen Kochvorgang löschen Falls Sie den Garvorgang löschen möchten, drücken Sie zweimal die Taste Stopp . Daraufhin ertönen 3 Signale, und auf der Anzeige erscheint „End“ . Ende eines Kochvorgangs Nach Ende des Garvorgangs oder nach drücken der Stopp-Taste, fängt die Dampf...
Page 59 - Tabellen und Tipps; TABELLEN UND TIPPS; Fisch
59 Tabellen und Tipps TABELLEN UND TIPPS Wenn Sie das Gargut auf das Blech legen, achten Sie bitte darauf, dass die Stücke nicht übereinander liegen. Schneiden Sie das Gargut in möglichst gleich große Stücke. Das Blech sollte nicht höher als drei Zentimeter mit Gargut belegt sein. Fisch Fisch Meng...
Page 60 - Fleisch
60 Tabellen und Tipps Fleisch Fleisch Menge Temperatur ºC Garzeit Min. Behälter Leiste v.u. Hähnchenbollen 4-10 100 40-45 gelocht 2 Hähnchenbrust 4-6 100 25-35 gelocht 2 Kasseler 500g – 1000 g 100 40-50 gelocht 2 Putenschnitzel 4-8 100 20-25 gelocht 2 Schweinefilet, ganz 4-8 100 20-30 gelocht 2 Wü...
Page 61 - Gemüse
61 Tabellen und Tipps Gemüse Gemüse/ frisch Temperatur ºC Garzeit Min. Behälter Leiste v.u. Auberginen in Scheiben 100 15-20 gelocht 2 Bohnen 100 35-45 gelocht 2 Broccoli Röschen mit Stiel 100 25-30 gelocht 2 Broccoli Röschen ohne Stiel 100 15-20 gelocht 2 Blumenkohl Röschen 100 25-30 gelocht 2 Bl...
Page 62 - Klöße
62 Tabellen und Tipps Klöße Klöße Temperatur ºC Garzeit Min. Behälter Leiste v.u. Buchteln 100 20-30 ungelocht 2 Dampfnudeln 100 15-20 ungelocht 2 Hefeklöße 100 15-25 ungelocht 2 Semmelknödel 100 20-25 ungelocht 2 Serviettenkloß 100 25-30 ungelocht 2 Desserts Desserts Menge Temperatur ºC Garzeit M...
Page 63 - Regenerieren
63 Tabellen und Tipps Regenerieren Gemüse Menge Temperatur ºC Garzeit Min. Behälter Leiste v.u. Tellergerichte 1-2 100 12-15 Rost 2 Tellergerichte 3-4 100 15-20 Rost 2 Fertiggerichte 100 15-20 Rost 2 Blanchieren Gemüse Menge Temperatur ºC Garzeit Min. Behälter Leiste v.u. z.B. Bohnen, Porree 100 1...
Page 64 - Defrost
64 Tabellen und Tipps Defrost Gemüse/ Beilagen Temperatur ºC Garzeit Min. Behälter Leiste v.u. Broccoli Röschen mit Stiel 100 15-20 gelocht 2 Balkangemüse 100 15-20 gelocht 2 Blattspinat Portionsstücke 100 10-15 ungelocht 2 Blumenkohl Röschen 100 15-20 gelocht 2 Erbsen 100 15-25 gelocht 2 Grünkohl...
Page 65 - Garen auf 2 Ebenen
65 Tabellen und Tipps Garen auf 2 Ebenen Einige Hinweise: Beim Garen auf zwei Ebenen gehört der Rost immer auf die 2. oder 3. Einschubleiste von unten. Darauf können handelsübliche Gefäße aus Porzellan, Jena-Glas oder aus Edelstahl gestellt werden. In die 1. Leiste von unten wird der ungelochte- o...
Page 66 - Reinigung und Wartung; REINIGUNG UND WARTUNG; Reinigung des Innenraums
66 Reinigung und Wartung REINIGUNG UND WARTUNG Reinigung des Innenraums Keinesfalls scheuernde Reinigungsmittel wie Allzweck-Scheuerschwämme, Metallwatte usw. benutzen. Dadurch wird die Oberfläche beschädigt. Reinigen Sie das Garraum im warmen Zustand mit einem feuchteten Lappen Anschließend trock...
Page 68 - Geeignetes; Entkalkungsmitt; Reinigung; g und Wartung
Entkalkung Bei jeKalkgeDas EnBenutungef Das GEntkalSollteblockiWICHBeeinwerde Geeignetes VerweDiesesGeräteAchtuWasseHerköZusätz eder Dampferzeugun ehalt des Wassers), Kntkalkungsintervall is tzung abhängig. Bei 4 fähr wie folgt entkalk Wasserhärte Sehr weich Mittel Sehr hart erät entdeckt autom lkun...
Page 69 - Rein; Entkalkung; igung und Wartung; sprozess
69 Rein Entkalkung AchtuwerdeEntkalDer En • Drü • Abb„CA • Drü • Die • 0,5 den • Drü • Wenertö • DenInne • Drü • Wenneu • Den • Drü • Den • Was igung und Wartung sprozess ung: Aus Sicherheitsgen. Das Gerät kann m lkungsprozess muss ntkalkungsprozess w cken Sie die Bestätig brechen/Sicherheitsb L‘‘...
Page 70 - Reinigung d; Stirnsei; des Gerätes
Reinigung d AchtudurchStromBenutScheuVerwe Stirnsei te Es reicverschdanacBenutGlasrehorizoEntferkann eVerme Garraum Reinigdie TüNutzezu entscheuHalteeinwaVerhinDie GlReinigdiese Zubehör ReinigSie es kann i des Gerätes ung! Die Reinigung m geführt werden. Zieh mversorgungskreis de tzen Sie keine aggr...
Page 72 - Lampenwechsel; Gehen Sie folgendermaßen vor, um die Lampe auszutauschen:
72 Reinigung und Wartung Lampenwechsel Gehen Sie folgendermaßen vor, um die Lampe auszutauschen: • Trennen Sie das Gerät von der Stromversorgung. Ziehen Sie den Stecker aus der Steckdose bzw. unterbrechen Sie den Stromversorgungskreis des Gerätes. • Schrauben Sie den Glasdeckel von der Lampe ab. •...
Page 73 - TECHNISC; Anzeigen; CHE EIGENSCHA; eschreibung; AFTEN
73 Tech TECHNISC Anzeigen Displa CAL -L0- VAP PUMP END Funktionsbe Symbol R Spezifikation • Spannu • G e f o r d • Außena • Abmess • F a s s u n • Gewicht hnische Eigenschafte CHE EIGENSCHA ay Gerät mus Wasserma Hinweis a Der Wasse Hinweis a P Hinweis ahei en Wa Ende eines eschreibung Funktion Dam...