Page 2 - Table of contents; Safety; Observe the following safety instructions.
en Safety 2 Futher information and explanations are availableonline: Table of contents USER MANUAL 1 Safety .................................................................... 2 2 Preventing material damage ............................... 5 3 Environmental protection and saving en-ergy ............
Page 3 - WARNING ‒ Risk of fire!
Safety en 3 1.4 Safe use Always place accessories in the cooking com-partment the right way round. → "Accessories", Page 8 WARNING ‒ Risk of fire! Combustible objects that are left in the cook-ing compartment may catch fire. ▶ Never store combustible objects in thecooking compartment. ▶ If...
Page 5 - WARNING ‒ Risk of burns!; Preventing material damage; Environmental protection and saving energy; Disposing of packaging
Preventing material damage en 5 WARNING ‒ Risk of burns! The cooking compartment gets very hot whenthe cleaning function is in progress. ▶ Never open the appliance door. ▶ Allow the appliance to cool down. ▶ Keep children at a safe distance. The outside of the appliance gets very hot when the clean...
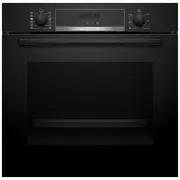
Page 6 - Familiarising yourself with your appliance; Buttons and display
en Familiarising yourself with your appliance 6 If the cooking time is relatively long, you can switchthe appliance off 10 minutes before the cooking timeends. ¡ There will be enough residual heat to finish cookingthe dish. Remove any accessories that are not being used fromthe cooking compartment....
Page 7 - Types of heating and functions; Other functions; Temperature and setting levels
Familiarising yourself with your appliance en 7 4.3 Types of heating and functions To ensure that you always find the right type of heating to cook your food, we explain the differences and applica-tions below. Symbol Type of heating What it's used for/how it works 3D hot air Bake and roast on one ...
Page 8 - Cooking compartment; Shelf supports; Accessories
en Accessories 8 Symbol Function Use 50–275 Temperature range Set the temperature in the cooking compartment in °C. 1, 2, 3orI, II, III Grill settings Set the grill settings for Full-surface grill and Grill, small area (depending on the appliance model).1 = low2 = medium3 = high 1, 2, 3orI, II, III...
Page 10 - Combining accessories; Other accessories; Before using for the first time; Setting the time on the clock
en Before using for the first time 10 Wire rackor bakingtray Position the accessory so that itsedge is behind the lug on the pull-out rail. Note: The pull-out rails lock in place when they are fully pulled out. Gently push the pull-out rails backinto the cooking compartment. 4. Push the accessory...
Page 11 - Basic operation; Switching on the appliance; Changing the type of heating; Rapid heating; Setting rapid heating; Steam assistance
Basic operation en 11 7 Basic operation 7.1 Switching on the appliance ▶ Turn the function selector to any position other thanthe "Off" position . a The appliance is switched on. 7.2 Switching off the appliance ▶ Turn the function selector to the "Off" position . a The appliance ...
Page 12 - 0 Time-setting options; Overview of the time-setting options; Changing the timer; Setting the cooking time; Changing the cooking time
en Time-setting options 12 4. Use the temperature selector to set the requiredtemperature. a After a few seconds, the appliance starts to heatand activates the steam-assisted cooking. 9.2 Ending steam-assisted cooking 1. Switch off the appliance. 2. Once the cooking compartment has cooled down: ‒ T...
Page 13 - Cancelling the cooking time; Setting the end time; Changing the end time; Setting the time on the clock; Changing the time on the clock; Cookware for programmes
Programme en 13 Cancelling the cooking time You can cancel the cooking time at any time. Requirement: is highlighted on the display. ▶ Reset the cooking time to zero using the button. a After a few seconds, the appliance applies thechange and continues to heat without a cookingtime. 10.4 Setting ...
Page 15 - 2 Childproof lock; Overview of the basic settings
Childproof lock en 15 11.3 Preparing food for the programme Use fresh and, ideally, chilled food. 1. Weigh the food.The weight of the food is required in order to cor-rectly set the programme. 2. Add the food to the cookware. 3. Place the cookware onto the wire rack.Always place the cookware into t...
Page 16 - Changing basic settings; 4 Cleaning and servicing; Cleaning products; Suitable cleaning agents
en Cleaning and servicing 16 Display Basic setting Selection Time display = hide the time = display the time 1 Childproof lock can be adjusted = no = yes 1 = yes, with locked door Interior lighting during operation = no = yes 1 Cooling fan run-on time = short = medium 1 = long = extra-long ...
Page 18 - Cleaning the appliance; 5 Pyrolytic self-cleaning; Setting the cleaning function
en Pyrolytic self-cleaning 18 Area Suitable cleaning agents Information AccessorIes ¡ Hot soapy water ¡ Oven cleaner Soak any heavily soiled areas and use a brush or steel wool.Enamelled accessories are dishwasher-safe. Water bowl ¡ Hot soapy water Wash and dry with a soft cloth.The water bowl is d...
Page 19 - 6 Cleaning assistance; Setting the cleaning assistance
Cleaning assistance en 19 WARNING ‒ Risk of burns! The cooking compartment gets very hot when thecleaning function is in progress. ▶ Never open the appliance door. ▶ Allow the appliance to cool down. ▶ Keep children at a safe distance. The outside of the appliance gets very hot when the cleaning fu...
Page 20 - 7 Shelf supports; Detaching the shelf supports; Attaching the shelf supports; 8 Appliance door; Detaching the appliance door
en Shelf supports 20 ‒ To dry the cooking compartment quickly, heat upthe appliance for approx. five minutes at 3D hot air and 50 °C while the door is open. 17 Shelf supports To clean the rails and the cooking compartment, or toreplace the rails, you can remove these. 17.1 Detaching the shelf su...
Page 21 - Attaching the appliance door; Removing the door panes
Appliance door en 21 2. WARNING ‒ Risk of injury! When the hinges are not secured, they can snapshut with great force. ▶ Make sure that the locking levers are alwayseither fully closed or (when detaching the ovendoor) fully open. Open the locking levers on the left- and right-handhinges. Locking le...
Page 22 - Fitting the door panes
en Appliance door 22 1. Open the appliance door slightly. 2. Push on the left- and right-hand side of the doorcover from the outside until it is released. 3. Remove the door cover . 4. Clean the door cover. → "Suitable cleaning agents", Page 16 5. Undoing and removing the left- and righ...
Page 23 - 9 Troubleshooting
Troubleshooting en 23 7. Open the appliance door slightly and remove thetea towel. 8. Screw both screws back in on the left and right ofthe appliance door. 9. Put the door cover in position and push down on it until you hear it click into place. 10. Close the appliance door. Note: Do not use the c...
Page 24 - Replacing the oven light bulb
en Troubleshooting 24 Fault Cause and troubleshooting lights up in the dis- play and no settingscan be made on theappliance. Childproof lock is activated. ▶ Use the button to deactivate the childproof lock. → "Childproof lock", Page 15 flashes in the dis- play and the appli-ance will not ...
Page 25 - Disposing of old appliance; 1 Customer Service
Disposal en 25 20 Disposal Find out here how to dispose of old appliances cor-rectly. 20.1 Disposing of old appliance Valuable raw materials can be reused by recycling. 1. Unplug the appliance from the mains. 2. Cut through the power cord. 3. Dispose of the appliance in an environmentallyfriendly ...
Page 26 - Notes on roasting and grilling; Roasting and grilling on the wire rack
en How it works 26 Notes ¡ When baking on several layers, always use hot air.Baked goods that are placed in the oven at thesame time will not necessarily be ready at the sametime. ¡ Position baking tins/dishes either next to one an-other or offset on different shelves so that they arenot directly o...
Page 28 - Steam assistance; Recommended settings for steam-assisted cooking; Preparing yoghurt
en How it works 28 22.5 Steam assistance If you are using steam-assisted cooking, steam is produced in the cooking compartment. This gives the food a crispycrust and a shiny surface. Furthermore, the food becomes tender and juicy inside and there is only a minimal reduc-tion in its volume. Recommen...
Page 29 - Baking; Recommended settings for baking
How it works en 29 22.7 Test dishes These overviews have been produced for test institutesto facilitate appliance testing in accordance with EN60350-1. Baking Observe this information when baking test dishes. General information ¡ The settings apply to food that is placed into a coldcooking compart...
Page 30 - Recommended settings for grilling; 3 Installation instructions; General installation instructions
en Installation instructions 30 Recommended settings for grilling Food Accessories/cookware Shelf pos-ition Type ofheating Temperature in°C/grill setting Cook-ing timein mins Toasting bread Wire rack 5 3 1 5–6 1 Do not preheat the appliance. 23 Installation instructions Observe this information wh...
Page 31 - Appliance dimensions; Installation below a worktop; Installation in a tall unit
Installation instructions en 31 23.2 Appliance dimensions You will find the dimensions of the appliance here 23.3 Installation below a worktop Observe the installation dimensions and the installationinstructions when installing below a worktop. ¡ To ventilate the appliance, the intermediate floormu...
Page 32 - Corner installation; Electrically connecting an appliance without a; Installing the appliance
en Installation instructions 32 23.6 Corner installation Observe the installation dimensions and the installationinstructions when installing in a corner. ¡ To ensure that the appliance door can be opened,you must take the minimum dimensions into consid-eration when installing in a corner. The dime...
Page 33 - Removing the appliance
Installation instructions en 33 3. For handleless kitchens with vertical bar handlestrips: ‒ Attach a suitable filling piece in order to coverany sharp edges and to guarantee a safe install-ation. ‒ Pre-drill aluminium profiles to establish a screwconnection . ‒ Secure the appliance using a suitab...
Page 36 - Register your new device on MyBosch now and profit directly from:; • Expert tips & tricks for your appliance; Free and easy registration – also on mobile phones:; BSH Hausgeräte GmbH; A Bosch Company
Thank you for buying a Bosch Home Appliance! Register your new device on MyBosch now and profit directly from: • Expert tips & tricks for your appliance • Warranty extension options • Discounts for accessories & spare-parts • Digital manual and all appliance data at hand • Easy access to Bos...