Page 2 - Futher information and explanations are available online:; Table of contents; Safety; Observe the following safety instructions.
en Safety 2 Futher information and explanations are available online: Table of contents INFORMATION FOR USE 1 Safety ................................................................... 2 2 Preventing material damage .............................. 6 3 Environmental protection and saving en-ergy .....
Page 3 - WARNING ‒ Risk of fire!
Safety en 3 been instructed on how to use the appliancesafely and have understood the resultingdangers.Do not let children play with the appliance.Children must not perform cleaning or usermaintenance unless they are at least 15 yearsold and are being supervised.Keep children under the age of 8 yea...
Page 4 - WARNING ‒ Risk of electric shock!
en Safety 4 WARNING ‒ Risk of electric shock! Incorrect repairs are dangerous. ▶ Repairs to the appliance should only becarried out by trained specialist staff. ▶ Only use genuine spare parts when repair-ing the appliance. ▶ If the power cord of this appliance is dam-aged, it must be replaced by th...
Page 5 - WARNING ‒ Risk of scalding!
Safety en 5 sausages, may burst. Before heating, prickthe peel or skin. Heat is not distributed evenly through babyfood. ▶ Never heat baby food in closed containers. ▶ Always remove the lid or teat. ▶ Stir or shake well after heating. ▶ Check the temperature before giving thefood or drink to a chil...
Page 6 - Never remove the casing.; Preventing material damage
en Preventing material damage 6 Never operate the appliance if the cookingcompartment door or the door seal is dam-aged. Microwave energy may escape. ▶ Never use the appliance if the cookingcompartment door, the door seal or theplastic door frame is damaged. ▶ Any repair work must only be carried o...
Page 7 - Environmental protection and saving energy; Disposing of packaging
Environmental protection and saving energy en 7 Operating the appliance without food in the cookingcompartment may lead to overloading. ▶ Do not switch on the microwave unless there is foodinside. The only exception to this rule is when per-forming a short cookware test. If you prepare microwave po...
Page 8 - Familiarising yourself with your appliance; Digital setting ring
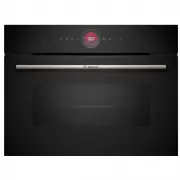
en Familiarising yourself with your appliance 8 4 Familiarising yourself with your appliance 4.1 Control panel You can use the control panel to configure all functionsof your appliance and to obtain information about theoperating status.On certain models, specific details such as colour andshape m...
Page 9 - Cooking compartment; Shelf supports; Operating modes
Operating modes en 9 4.4 Cooking compartment Various functions in the cooking compartment providesupport when operating your appliance. Shelf supports The shelf supports in the cooking compartment enableyou to place accessories at different heights.→ "Accessories", Page 11 Your appliance h...
Page 10 - Microwave output settings
en Operating modes 10 Symbol Type of heating Temperaturerange What it's used for and how it works 2D hot air 30 - 230 °C Bake or roast on one level.The fan in the back panel of the oven distributes the heat evenlythroughout the cooking compartment. Top/bottom heating 30 - 230 °C Traditionally bake ...
Page 11 - Information on accessories; Microwave accessories
Accessories en 11 Note: The maximum microwave output setting "Boost" is not designed for heating food. To protect the appli-ance, the microwave output is gradually reduced to600 watts during the first few minutes. Maximum outputis made available again after a cooling period. 6 Accessories...
Page 12 - Other accessories; Before using for the first time
en Before using for the first time 12 Wire rack Insert the wire rack with the openside facing the appliance door andthe curved lip facing downwards. Baking trayE.g. univer-sal pan orbaking tray Slide the tray in with the slopingedge towards the appliance door. 3. Push the accessory all the way in...
Page 13 - Basic operation; Changing the type of heating
Basic operation en 13 8 Basic operation 8.1 Switching on the appliance ▶ Press to switch the appliance on. a The display shows the menu. 8.2 Switching off the appliance Switch your appliance off when you are not using it.The appliance will switch itself off automatically if it isnot used for a cer...
Page 14 - Time-setting options; Setting the cooking time; Changing the cooking time; Setting the end time
en Time-setting options 14 8.8 Sabbath-compliant use If you want to operate your appliance so that it is Sab-bath-compliant, use the time-setting options andchange the basic setting for the lighting. Note: If you open the appliance door during operation, the appliance stops heating. When you close...
Page 15 - Changing the end time; Setting the timer; Changing the timer
Microwave en 15 Requirements ¡ An operating mode and temperature or level havebeen set. ¡ A cooking time is set. 1. Press "End time". 2. To set the time, press the hour display or the minutedisplay. a The selected value is marked in blue. 3. Use the setting ring to delay the time.If requi...
Page 16 - Testing cookware for microwave suitability; Setting options with the microwave; Microwave-only operation; Setting the microwave
en Microwave 16 Cookware that is not microwave-safeNote: Observe the specifications for preventing mater- ial damage. → "Microwave", Page 6 ¡ Metal cookware and bakeware Microwaves cannot pass through metal. The food isbarely heated or not heated at all. Metal may createsparks in microwav...
Page 17 - Changing the microwave output; Setting added microwave; Changing added microwave; Cookware for dishes; Programmes
Dishes en 17 ‒ If required, you can select other settings and re-start the operation. ‒ When the food is ready, use to switch the ap-pliance off. 11. If condensation has formed in the cooking compart-ment, dry the cooking compartment. → "Drying", Page 24 Note: If you open the appliance do...
Page 18 - Overview of the dishes; 2 Favourites; Saving favourites
en Favourites 18 To achieve an optimal cooking result, you must alsoset the weight, thickness or the cooking level. You canset the weight only in the intended range.Unless otherwise indicated, set the total weight for yourdish. 11.3 Overview of the dishes You can find out which individual dishes ar...
Page 19 - 3 Childproof lock; Activating the childproof lock; 4 Basic settings; Overview of the basic settings
Childproof lock en 19 13 Childproof lock You can secure your appliance to prevent childrenfrom accidentally switching it on or changing the set-tings. 13.1 Activating the childproof lock The childproof lock can be activated regardless ofwhether the appliance is on or off. ▶ Press and hold for appr...
Page 20 - Changing the basic settings; 5 Home Connect; Setting up Home Connect
en Home Connect 20 Personalisa-tion Selection Dishes ¡ All 1 ¡ No pork ¡ Kosher only Childprooflock ¡ Button lock only 1 ¡ Deactivated 1 Factory setting (may vary according to model) Factory set-tings Selection Factory set-tings ¡ Restore Info Display Appliance in-formation Display technical inform...
Page 22 - 6 Cleaning and servicing; Cleaning products; Suitable cleaning agents
en Cleaning and servicing 22 15.6 Data protection Please see the information on data protection.The first time your appliance is registered on a homenetwork connected to the Internet, your appliance willtransmit the following types of data to theHome Connect server (initial registration): ¡ Unique ...
Page 23 - Cleaning the appliance; 7 Cleaning aid; Setting the cleaning aid
Cleaning aid en 23 Cooking compartment Area Suitable cleaning agents Information Enamel surfaces ¡ Hot soapy water ¡ Vinegar water ¡ Oven cleaners Soak any heavily soiled areas and use a brush or steel wool.Leave the appliance door open to dry the cooking compartmentafter cleaning it. Notes ¡ Ename...
Page 24 - Drying the cooking compartment; Setting the drying process; 9 Appliance door; Detaching the door outer pane
en Drying 24 8. → "Cleaning the cooking compartment after using the cleaning aid", Page 24 . 17.2 Cleaning the cooking compartmentafter using the cleaning aid ATTENTION! The prolonged presence of moisture in the cookingcompartment leads to corrosion. ▶ After using the cleaning assistance, ...
Page 25 - Attaching the door outer pane
Rails en 25 5. Use two hands on the handle to pull the front pane upwards and remove it . 6. Set the front pane down on a level surface with thedoor handle facing down. 7. WARNING ‒ Risk of serious harm to health! If the screws are undone, the safety of the appliancecan no longer be guaranteed. Mi...
Page 26 - Fitting the retainers; 1 Troubleshooting
en Troubleshooting 26 2. Swivel the entire rail outwards and unhook it atthe rear . 3. Clean the rail. 20.2 Fitting the retainers The retainers may fall out when you detach the rails. Note: The retainers at the front differ from those at the rear. 1. Hook the front retainers with the hook into the...
Page 28 - Disposing of old appliance; 3 Customer Service
en Disposal 28 Fault Cause and troubleshooting The cooking result isnot satisfactory. Settings were unsuitable.Adjustment values, e.g. temperature or cooking time, depend on the recipe, quantity andfood. ▶ Next time, set lower or higher values. Tip: A lot of other information about the food prepar...
Page 29 - 5 Declaration of Conformity; General cooking tips; Shelf positions; Roasting, braising and grilling tips; Roasting on the wire rack
Declaration of Conformity en 29 25 Declaration of Conformity BSH Hausgeräte GmbH hereby declares that the appli-ance with Home Connect functionality conforms to theessential requirements and other relevant provisions ofDirective 2014/53/EU.A detailed RED Declaration of Conformity can be foundonlin...
Page 30 - Microwave cooking
en How it works 30 ¡ Add up to ½ litre of water to the universal pan, de-pending on the size and type of food that you wantto roast.You can make a sauce from the juices that are col-lected. This also means that less smoke is pro-duced and the cooking compartment does not be-come as dirty. Roasting ...
Page 31 - Recommended settings for various types of food
How it works en 31 ¡ Distribute foods that are in the form of separatepieces, such as bread rolls and potato products, sothat they are spread out flat and evenly on the ac-cessory. Leave a little space between the individualpieces. ¡ Follow the manufacturer's instructions on the pack-aging. ¡ If th...
Page 33 - Desserts; Air Fry
How it works en 33 Desserts Making yoghurt 1. Remove the accessories and shelves from thecooking compartment. 2. Heat 1 litre of whole milk (3.5% fat) to 90 °C on thehob and then leave it to cool down to 40 °C.It is sufficient to heat UHT milk to 40 °C. 3. Mix 150 g of chilled yoghurt into the milk...
Page 34 - Defrosting; Warming up food using the microwave mode
en How it works 34 Recommended settings for Air Fry Food Accessory/cook-ware Shelf pos-ition Heatingfunction Temperature in°C Microwavepower settingin W Cookingtime inmins Sponge cake, simple Ring-shaped tinorLoaf tin 1 160-180 90 30-40 Chips Universal pan 2 190-210 - 20-25 Potato pockets, filled U...
Page 36 - Baking; Grilling
en How it works 36 26.8 Meals and tips for cooking for GreatBritain Recommended settings for meals with British cookinghabits. Also follow the instructions in the individual sections.This section contains only special additional informa-tion relating to British meals and cooking habits. Baking Reco...
Page 37 - Roasting and braising
How it works en 37 Recommended settings for poultry Food Accessory/cook-ware Shelf pos-ition Type ofheating→ Page 9 Temperature in°C Microwavepower settingin W Cookingtime inmins Chicken, whole Uncovered cook-ware 1 200-220 - 25+15 Chicken, halved Uncovered cook-ware 1 180-200 360 25-35 Roasting a...
Page 38 - Microwave cooking
en How it works 38 26.9 Test dishes The information in this section is provided for test institutes to facilitate testing of the appliance in accordance withEN 60350-1 or IEC 60350-1 and EN 60705 or IEC 60705. Baking ¡ The setting values apply to food that is placed into acold cooking compartment. ...
Page 39 - 7 Installation instructions; General installation instructions
Installation instructions en 39 Food Accessory/cook-ware Shelf pos-ition Type ofheating→ Page 9 Temperature in°C Microwavepower settingin W Cookingtime inmins Sponge Uncovered cook-ware 1 - 600 7-9 Meat loaf Uncovered cook-ware 1 - 600 22-27 Recommended settings for cooking in combination with the...
Page 40 - Installation below a worktop; Installation underneath a hob
en Installation instructions 40 WARNING ‒ Risk of fire! It is dangerous to use an extended powercord and non-approved adapters. ▶ Do not use multiple socket strips. ▶ Only use extension cables that are certified,have a minimum cross section of 1.5 mm²and comply with the applicable nationalsafety re...
Page 41 - Installation in a tall unit
Installation instructions en 41 Hob type a raised in mm a flush in mm b in mm Induction hob 42 43 5 Full-surface induction hob 52 53 5 Gas hob 32 43 5 1 Electric hob 32 35 2 1 Observe different national installation instructions for the hob. 27.5 Installation in a tall unit Observe the installation...
Page 42 - Electrically connecting an appliance without a; Installing the appliance
en Installation instructions 42 When the appliance is installed, the mains plug ofthe power cord must be freely accessible. If free ac-cess is not possible, an isolating switch must be in-tegrated into the permanent electrical installation ac-cording to the installation regulations. Electrically co...
Page 44 - Register your new device on MyBosch now and profit directly from:; • Expert tips & tricks for your appliance; Free and easy registration – also on mobile phones:; BSH Hausgeräte GmbH; A Bosch Company
Thank you for buying a Bosch Home Appliance! Register your new device on MyBosch now and profit directly from: • Expert tips & tricks for your appliance • Warranty extension options • Discounts for accessories & spare-parts • Digital manual and all appliance data at hand • Easy access to Bos...