Avanti CK3016 - User Manual

Avanti CK3016 Refrigerator – User Manual, read for free online in PDF format. We hope this helps you resolve any issues you may have. If you have further questions, please contact us through the contact form.


Table of Contents:
- Page 2 – TABLE OF CONTENTS
- Page 3 – Write down the model and serial numbers.; IF YOU NEED SERVICE; THE REFRIGERATOR OF
- Page 4 – PARTS AND FEATURES
- Page 5 – IMPORTANT SAFETY INSTRUCTIONS; WARNING; Before you throw away your old refrigerator:
- Page 6 – Attach and secure conduit to the knockout hole of the junction box.; FOR ALL MODELS
- Page 7 – Refrigerator Section; INSTALLATION INSTRUCTIONS; Before Using Your Compact kitchen
- Page 8 – Avoid locating the unit in moist areas.; Electrical Connection
- Page 9 – Power Supply Connections; Secure conduit to the junction box with a conduit connector.; Backsplash Installation
- Page 10 – Water Faucet Installation And Water Line Connection; Turn off the water supply.; Sink Strainer Installation And Water Drain; The sink strainer is already preassembled in the factory.; IMPROPER WATER LINE CONNECTION MAY RESULT IN FLOODING
- Page 11 – Installation Of Your Refrigerator; installation of your Compact Kitchen.; Installation Of Side Tray; Photo may vary
- Page 12 – OPERATING YOUR COMPACT KITCHEN; Directions For Use Of Electrical Connection
- Page 13 – CARE AND MAINTENANCE – COMPACT KITCHEN
- Page 14 – Moving Your Compact kitchen; PROBLEMS WITH YOUR COMPACT KITCHEN?; TROUBLESHOOTING GUIDE; PROBLEM
- Page 15 – SERVICE FOR YOUR COMPACT KITCHEN; AVANTI PRODUCTS CUSTOMER SERVICES
- Page 16 – YOUR AVANTI PRODUCTS WARRANTY; WHAT IS COVERED; Content losses of food due to spoilage.; WHAT IS NOT COVERED
- Page 17 – CARACTERISTICAS
- Page 18 – INSTALACION DEL REFRIGERADOR
- Page 19 – UBICACION; Use un tomacorriente de pared exclusivo.; PERDIDA DE LA FUENTE ELECTRICA
- Page 20 – CONEXION DE LA FUENTE DE AGUA; ADVERTENCIA; Ciérre la llave maestra del agua.
- Page 21 – vaya a limpiar las partes esmaltadas.
- Page 23 – Registration Information; Protect your product:; Avanti Registration Card; How Did You Learn About This Product:
- Page 24 – PRINTED IN CHINA
INSTRUCTION MANUAL
MANUAL DE INSTRUCCIONES
Model Number / No. de Modelo:
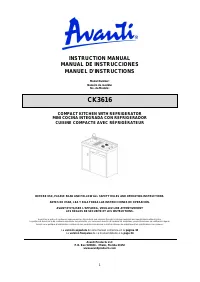
CK3016
COMPACT KITCHEN WITH REFRIGERATOR
MINI COCINA INTEGRADA CON REFRIGERADOR
BEFORE USE, PLEASE READ AND FOLLOW ALL SAFETY RULES AND OPERATING
INSTRUCTIONS AND SAVE FOR LOCAL ELECTRICAL INSPECTOR.
La sección en español empieza en la página 17
Avanti Products has a policy of continuous improvement on its products and reserves the right to change materials and
specifications without notice.
La política de Avanti es la de continuar mejorando sus productos y se reserva el derecho de cambiar los materiales y
especificaciones sin notificación alguna.
Avanti Products LLC
P.O. Box 520604 - Miami, Florida 33152
www.avantiproducts.com
"Loading the manual" means you need to wait until the file loads and becomes available for online reading. Some manuals are very large, and the time they take to appear depends on your internet speed.
Was this manual helpful?
About this manual
- Brand
- Avanti
- Model
- CK3016
- Document type
- User Manual
- Category
- Refrigerator
- Language(s)
- English
- Pages
- 24
- File size
- 798.1 KB
- Format
Other Manuals for Avanti CK3016
Summary
2 TABLE OF CONTENTS Help Us Help You 3 Parts and Features 4 Important Safety Instructions 5 Electrical Installation Instructions 6 Installation Instructions 7 Before Using Your Compact Kitchen 7 Energy Saving Tips 7 Installation of Your Compact Kitchen 7 Electrical Connection 8 Power Supply Connecti...
3 HELP US HELP YOU... Read this guide carefully. It is intended to help you operate and maintain your new Compact Kitchen properly. Keep it handy to answer your questions. If you don't understand something or you need more assistance, please call: Avanti Customer Service 800-220-5570 Keep proof of o...
4 PARTS AND FEATURES 1. BACKSPLASH 2. REAR BURNER (500 WATTS) 3. FRONT BURNER (900 WATTS) 4. COOK-TOP 5. REAR BURNER POWER SWITCH / KNOB 6. REAR BURNER INDICATOR 7. FRONT BURNER INDICATOR 8. FRONT BURNER POWER SWITCH / KNOB 9. REFRIGERATOR 10. WATER FAUCET 11. SINK 12. DRAWER – LARGE 13. DRAWER – SM...
Ask a question
Related manuals
More Avanti Refrigerators models
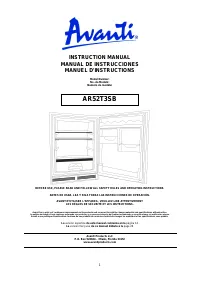 Avanti AR52T3SB User Manual
 Avanti AR2416B User Manual
 Avanti AR4446B User Manual
- Avanti AR4456SS User Manual
 Avanti CK3616 User Manual
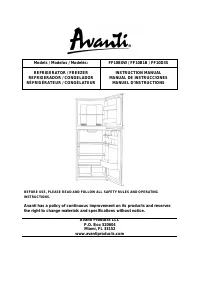 Avanti FF10B0W User Manual
- Avanti FF10B3S User Manual
 Avanti FFFDS175L3S User Manual
 Avanti FFS157L3S User Manual
 Avanti RA31B3S User Manual
 Avanti RA733B3S User Manual
 Avanti RM24T1B User Manual
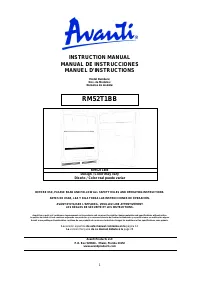 Avanti RM52T1BB User Manual
 Avanti RM3306W User Manual
- Avanti RM3316B User Manual
- Avanti RM4406W User Manual
- Avanti RM4416B User Manual
- Avanti RM4436SS User Manual
 Avanti RMS551SS User Manual