Page 2 - CONTENTS; BEFORE USING THE UNIT; Selecting the input source and favorite settings with one touch
CONTENTS BEFORE USING THE UNIT 4 Accessories................................................................................................ 4How to use this manual............................................................................ 4Remote control...............................................
Page 4 - Accessories; How to use this manual; Remote control; Insert the batteries; Operating range of the remote control
BEFORE USING THE UNIT Accessories Check that the following accessories are supplied with the product. £ FM antenna £ Remote control £ Batteries (AAA, R03, UM-4) (x2) £ CD-ROM (Owner's Manual) £ Quick Start Guide * One of the above is supplied depending on the region of purchase. How to use this manu...
Page 5 - FEATURES; What you can do with the unit
FEATURES What you can do with the unit The unit is equipped with full of useful functions. Supports 2- to 5.1-channel speaker system You can enjoy your favorite acoustic spaces in various styles. CINEMA DSP allows you to create stereo or multichannel sounds withthe sound fields like actual movie the...
Page 6 - Application for tablets “AV SETUP GUIDE”
Surround playback with 5 speakers placed in front You can enjoy the surround sound even when the surround speakers are placed in front. • “Enjoying sound field effects without surround speakers (Virtual CINEMA DSP)” (p.29) Enhanced bass reproduction Extra Bass allows you to enjoy enhanced bass repro...
Page 7 - Part names and functions; Front panel
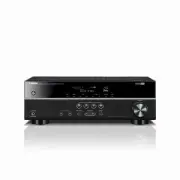
Part names and functions The part names and functions of the unit and the supplied remote control are as follows. Front panel INFO MEMORY PRESET FM MODE MUTE TUNING PHONES SILENT CINEMA VOLUME TONE CONTROL STRAIGHT TV BD DVD CD RADIO INPUT PROGRAM SCENE 2 8 9 3 4 1 5 6 7 0 B D E F A C 1 z (power) ke...
Page 8 - PARTY; VIRTUAL; ENHANCER; SLEEP
Front display (indicators) -R es Hi YPAO VOL. PARTY ZONE FPR SBL SB SBR FPL VIRTUAL 3 B 2 A LINK MASTER 2 ENHANCER ECO OUT A - DRC SLEEP STEREO TUNED VOL. SL SW SR MUTE 1 2 4 5 6 3 8 7 8 0 9 A B 1 HDMI Lights up when HDMI signals are being input or output. OUT Lights up when HDMI signals are being o...
Page 9 - Rear panel
Rear panel SUB WOOFER 7 8 5 6 2 1 3 4 ▪ The area around the video/audio output jacks is marked in white on the actual product to prevent improper connections. 1 HDMI OUT jack For connecting to an HDMI-compatible TV and outputting video/audio signals (p.17). When using ARC, TV audio signal can also b...
Page 11 - PREPARATIONS; General setup procedure
PREPARATIONS General setup procedure 1 Placing speakers................................................................................................................................ (p.12) 2 Connecting speakers...........................................................................................
Page 12 - Placing speakers
1 Placing speakers Select the speaker layout for the number of speakers that you are using and place the speakers and subwoofer in your room. This section describes the representative speakerlayout examples. Notice ▪ Use speakers with an impedance of at least 6 W . ▪ Be sure to connect the front lef...
Page 13 - Typical speaker layouts
Typical speaker layouts n 5.1-channel system We recommend this speaker layout which can maximize the performance of the unit. 4 5 1 2 3 9 10° to 30° 10° to 30° Speaker type Abbr. Function Front (L/R) 1 / 2 Produce front left/right channel sounds (stereo sounds). Center 3 Produces center channel soun...
Page 14 - Other speaker layouts
Other speaker layouts The following speaker layouts are also available. n 3.1-channel system 1 2 3 9 n 2.1-channel system 1 2 9 En 14
Page 15 - Connecting speakers; Cables required for connection (commercially available)
2 Connecting speakers Connect the speakers placed in your room to the unit. The following diagrams provide connections for a 5.1-channel system as an example. For other systems, connect speakerswhile referring to the connection diagram for the 5.1-channel system. Notice ▪ Remove the unit’s power cab...
Page 16 - Connecting speaker cables; Connecting front speakers; Connecting center/surround speakers and a subwoofer
Connecting speaker cables Speaker cables have two wires. One is for connecting the negative (-) terminals of the unit and the speaker to each other, and the other is for the positive (+) terminals. If thewires are colored to prevent confusion, connect the black wire to the negative and theother wire...
Page 17 - Connecting a TV/playback devices; Input/output jacks and cables; HDMI jacks; Audio jacks; OPTICAL jack; COAXIAL jacks; AUDIO jacks
3 Connecting a TV/playback devices The unit is equipped with a variety of input jacksincluding HDMI input jacks to allow you to connectdifferent types of playback devices. Input/output jacks and cables n Video/audio jacks HDMI jacks Transmit digital video and digital sound through asingle jack. Use ...
Page 18 - Connecting a TV; HDMI connection
Connecting a TV Connect the TV to the unit with an HDMI cable and a digital optical cable. HDMI HDMI HDMI OPTICAL OPTICAL HDMI HDMI HDMI OPTICAL OPTICAL O O O O The unit (rear) AUDIO 1 (OPTICAL) jack HDMI OUT jack HDMI input Audio output (digital optical) TV Note ▪ A digital optical cable connection...
Page 19 - Changing the combination of video/audio input jacks; Necessary setting; After connecting external devices (such as a TV and playback; Use the cursor keys (; Audio In; Audio•••AUDIO1
n Changing the combination of video/audio input jacks If the combination of video/audio input jacks available on the unit does not match your video device, change its combination according to the output jacks of your device.You can connect a video device that has the following video/audio output jac...
Page 20 - Connecting audio devices (such as CD players); Connecting the FM antenna
Connecting audio devices (such as CD players) Connect audio devices such as CD players and MD players to the unit. Depending on the audio output jacks available on your audio device, choose one of the followingconnections. Audio output jacks on audio device Audio input jacks on the unit Digital opti...
Page 21 - Connecting the power cable
5 Connecting the power cable Warning (Brazil and General models only)Make sure you set VOLTAGE SELECTOR of the unit BEFORE plugging the power cable into an AC wall outlet. Improper setting of VOLTAGE SELECTOR may cause damage to the unit and create a potential fire hazard. Before connecting the powe...
Page 22 - Selecting an on-screen menu language; Press; Use the cursor keys to select “Language” and press ENTER.
6 Selecting an on-screen menu language Select the desired on-screen menu language. 1 Press z (receiver power) to turn on the unit. 2 Turn on the TV and switch the TV input to display video from the unit (HDMI OUT jack). Note Operations with TV screen are available only when your TV is connected to t...
Page 23 - Configure the speaker settings; Press RECEIVER
7 Configure the speaker settings 1 Press RECEIVER z to turn on the unit. 2 Turn on the TV and switch the TV input to display video from the unit (HDMI OUT jack). 3 Press SETUP. 4 Use the cursor keys to select “Speaker” and press ENTER. 5 Configure the output characteristics of the speakers. 1 Use th...
Page 24 - Set the distance between each speaker and listening position.; Setting items; The speaker settings are complete.
6 Set the distance between each speaker and listening position. 1 Use the cursor keys to select “Distance” and press ENTER. 2 Use the cursor keys ( q / w ) to select speaker and cursor keys ( e / r ) to set distance. 3 When setting is complete, press RETURN. Setting items Speaker Setting range Front...
Page 25 - PLAYBACK; Basic playback procedure; Enjoying playback; Use the input selection keys to select an input source.; Start playback on the external device or select a radio station.; Switching information on the front display; Audio Decoder; DPL
PLAYBACK Basic playback procedure Enjoying playback 1 Turn on the external devices (such as a TV or BD/DVD player)connected to the unit. 2 Use the input selection keys to select an input source. MUTE FM PRESET VOLUME P RO G RA M I N P U T TUNING MUTE MEMORY TOP MENU HOME POP-UP/MENU DISPLAY RETURN S...
Page 26 - Selecting a registered scene; Registering a scene; to assign to a scene.; SET Complete
Selecting the input source and favorite settings with one touch (SCENE) The SCENE function allows you to select the assigned input source, sound program,and Compressed Music Enhancer on/off with just one touch. Selecting a registered scene 1 Press SCENE. The input source and settings registered to t...
Page 27 - Selecting the sound mode; I want to enjoy listening to music sources or stereo playback.
Selecting the sound mode The unit is equipped with a variety of sound programs and surround decoders thatallow you to enjoy playback sources with your favorite sound mode (such as soundfield effect or stereo playback). TUNING MUTE MEMORY TOP MENU HOME POP-UP/MENU DISPLAY RETURN SETUP OPTION ENTER FM...
Page 28 - Enjoying sound field effects (CINEMA DSP); Sound programs suitable for movies (MOVIE)
Enjoying sound field effects (CINEMA DSP) The unit is equipped with a variety of sound programs that utilize Yamaha’s originalDSP technology (CINEMA DSP). It allows you to easily create sound fields like actualmovie theaters or concert halls in your room. ENHANCER LINK ECO MASTER OUT 2 -Res Hi YPAO ...
Page 30 - Enjoying unprocessed playback; Playing back in original channels (straight decode); Each time you press the key, the straight decode mode is enabled or; Press PROGRAM repeatedly to select a surround decoder.
Enjoying unprocessed playback You can play back input sources without any sound field effect processing. n Playing back in original channels (straight decode) When the straight decode mode is enabled, the unit produces stereo sound from thefront speakers for 2-channel sources such as CDs, and produc...
Page 31 - Each time you press the key, Extra Bass is enabled or disabled.; Playing back digitally compressed formats (such as; Enhancer On
Enhancing the bass (Extra Bass) Extra Bass allows you to enjoy enhanced bass sounds, regardless of the size of the front speakers and the presence or absence of the subwoofer. 1 Press BASS. Each time you press the key, Extra Bass is enabled or disabled. Note You can also use “Extra Bass” (p.45) in t...
Page 32 - Listening to FM radio; Setting the frequency steps; TU••••••••FM50; Selecting a frequency for reception; selected is displayed.
Listening to FM radio You can tune into a radio station by specifying its frequency or selecting fromregistered radio stations. Note ▪ The radio frequencies differ depending on the country or region where the unit is being used. The explanation of this section uses a display with frequencies used in...
Page 33 - Press TUNING repeatedly to set a frequency.; Registering favorite radio stations (presets); Registering radio stations automatically (Auto Preset); Press FM to select “TUNER” as the input source.; Preset
2 Press TUNING repeatedly to set a frequency. Hold down the key for about a second to search stations automatically. TUNING MUTE MEMORY TOP MENU HOME POP-UP/MENU DISPLAY RETURN SETUP OPTION ENTER FM PRESET VOLUME P RO G RA M STRAIGHT ENHANCER BASS I N P U T BD DVD T V C D S C E N E RADIO SLEEP BLUE ...
Page 34 - To start the Auto Preset process, press ENTER.; Auto Preset; Registering a radio station manually; Follow “Selecting a frequency for reception” (p.32) to tune into
4 To start the Auto Preset process, press ENTER. ENHANCER LINK ECO MASTER OUT 2 -Res Hi YPAO VOL. A - DRC SLEEP PARTY ZONE 3 B 2 A MUTE VIRTUAL STEREO TUNED FPR SBL SB SBR FPL SL SW SR VOL. 01:FM 87.50MHz “SEARCH” appears during Auto Preset Preset number from which to start the registration Note ▪ T...
Page 35 - Selecting a preset station; Clearing preset stations; preset number is displayed.
n Selecting a preset station Tune into a registered radio station by selecting its preset number. 1 Press FM to select “TUNER” as the input source. 2 Press PRESET repeatedly to select the desired radio station. MUTE FM PRESET VOLUME P RO G RA M I N P U T TUNING MUTE MEMORY TOP MENU HOME POP-UP/MENU ...
Page 36 - Radio Data System tuning; Displaying the Radio Data System information; Tune into the desired Radio Data System broadcasting station.; Program Type; CLASSICS; Receiving traffic information automatically; When “TUNER” is selected as the input source, press OPTION.; again to start the search immediately.; The following screen appears for about 3 seconds when the search
Radio Data System tuning (U.K. and Europe models only)Radio Data System is a data transmission system used by FM stations in manycountries. The unit can receive various types of Radio Data System data, such as“Program Service”, “Program Type”, “Radio Text” and “Clock Time”, when it is tuned into a R...
Page 37 - Input Select; Front display; Use the cursor keys to select an item and press ENTER.; Option menu items
Configuring playback settings for different playback sources (Option menu) You can configure separate playback settings for different playback sources. Thismenu is available on the front panel (or on the TV screen), allowing you to easilyconfigure settings during playback. 1 Press OPTION. ENHANCER L...
Page 39 - Setup procedure
n Volume Trim (Volume Trim) Fine-adjusts volume difference between input sources or subwoofer volume. Input Trim (In.Trim) Corrects volume differences between input sources. If you are bothered by volumedifferences when switching between input sources, use this function to correct it. Note This sett...
Page 40 - Input sources
n Video Out (Video Out) Selects a video to be output with the selected audio source. For example, you can watch the video while listening to the radio. Input sources AUDIO 1-5, TUNER Settings Off(Off) Does not output video. HDMI 1-4 Outputs video input through the corresponding video input jacks. En...
Page 41 - CONFIGURATIONS; Configuring various functions (Setup Menu); Use the cursor keys to select a menu and press ENTER.
CONFIGURATIONS Configuring various functions (Setup Menu) You can configure the unit’s various function with the menu displayed on the TVscreen. Note Operations with TV screen are available only when your TV is connected to the unit via HDMI. If not, carry outoperations while viewing the front displ...
Page 42 - Setup menu items
Setup menu items Menu Item Function Page Speaker Configuration Subwoofer Selects whether or not a subwoofer is connected. p.44 Front Selects the size of the front speakers. p.44 Center Selects whether or not a center speaker is connected and its size. p.44 Surround Selects whether or not surround sp...
Page 44 - Speaker; Configuration; Subwoofer; Front; Settings; Center; Settings
Speaker Configures the speaker settings manually. Note Default settings are underlined. n Configuration Configures the output characteristics of the speakers. Note When configuring the speaker size, as a general guideline, select “Large” if the woofer diameter of yourspeaker is 16 cm (6 ‑ 1/4”) or l...
Page 45 - Surround; Crossover; Subwoofer Phase; Extra Bass; Virtual CINEMA FRONT
Surround Selects whether or not surround speakers are connected and their sizes. Settings Small Select this option for small speakers.The subwoofer or front speakers will produce surround channel low-frequency components (configurable in “Crossover”). Large Select this option for large speakers.The ...
Page 46 - Equalizer; EQ Select; Setting range; Test Tone
n Distance Sets the distance between each speaker and listening position so that sounds from the speakers reach the listening position at the same time. First, select the unit of distancefrom “Meter” or “Feet”. Choices Front L, Front R, Center, Surround L, Surround R, Subwoofer Setting range 0.30 m ...
Page 47 - HDMI Control; Audio Output; K Upscaling; TV Audio Input
HDMI Configures the HDMI settings. Note Default settings are underlined. n HDMI Control Enables/disables HDMI Control (p.66). Settings Off Disables HDMI Control. On Enables HDMI Control.Configure the settings in “TV Audio Input”, “Standby Sync”, “ARC”, and“SCENE”. Note To use HDMI control, you need ...
Page 48 - Standby Sync; ARC
n Standby Sync Select whether to use HDMI control to link the unit's standby mode to the TV's power when “HDMI Control” is set to “On”. Settings Off Does not set the unit to standby mode when the TV is turned off. On Sets the unit to standby mode when the TV is turned off. Auto Sets the unit to stan...
Page 49 - Sound; DSP Parameter; Panorama; Center Width; Dimension; Lipsync; Select; Adjustment
Sound Configures the audio output settings. Note Default settings are underlined. n DSP Parameter Configures the surround decoder settings. Panorama Enables/disables the broadening effect of the front sound field. When this functionis enabled, you can wrap front left/right channel sounds around the ...
Page 50 - Dialogue; Dialogue Level; Volume; Scale; Dynamic Range; Max Volume; Initial Volume
n Dialogue Adjusts the volume of dialogue sounds. Dialogue Level Adjusts the volume of the center orientation sounds such as dialogue. Setting range 0 to 3 (higher to strengthen) n Volume Configures the volume settings. Scale Switches the scale of the volume display. Settings dB Displays the volume ...
Page 51 - Auto Power Standby; ECO Mode
ECO Configures the power supply settings. Note Default settings are underlined. n Auto Power Standby Set the amount of time for the auto-standby function. Settings Off Does not set the unit to standby mode automatically. 20 minutes Sets the unit to standby mode when you have not operated the unit an...
Page 52 - Function; Input Rename; Procedure to rename automatically; The unit creates a name automatically according to the connected; Procedure to rename manually; The edit screen is displayed.
Function Configures the functions that make the unit easier to use. Note Default settings are underlined. n Input Rename Changes the input source name displayed on the front display. You can also select aname created by the Auto Rename function. Input sources HDMI 1–4, AUDIO 1–5 Default HDMI 1-4: Au...
Page 53 - Input Skip; Dimmer; Memory Guard; Remote Color Key
n Input Skip Set which input source is skipped when operating the INPUT key.You can select the desired input source quickly by using this function. Input sources HDMI 1–4, AUDIO 1–5, TUNER Settings Off Does not skip the selected input source. On Skips the selected input source. n Dimmer Adjusts the ...
Page 54 - Language
Language Select an on-screen menu language. Note Default settings are underlined. Settings English English 日本語 Japanese Français French Deutsch German Español Spanish Русский Russian Italiano Italian 中文 Chinese Note The information on the front display is provided in English only. En 54
Page 55 - Configuring the system settings (ADVANCED SETUP menu); The new settings take effect.; ADVANCED SETUP menu items; Selecting the remote control ID (REMOTE ID); REMOTE ID••ID1; Changing the remote control ID of the remote control
Configuring the system settings (ADVANCED SETUP menu) Configure the system settings of the unit while viewing the front display. 1 Set the unit to standby mode. 2 While holding down STRAIGHT on the front panel, press z (power). (power) z STRAIGHT PROGRAM 3 Press PROGRAM to select an item. 4 Press ST...
Page 56 - Changing the FM tuning frequency setting (TU); Switching the video signal type (TV FORMAT); TV FORMAT•NTSC; Selecting the HDMI 4K signal format (4K MODE); K MODE•MODE 1; Format
Changing the FM tuning frequency setting (TU) (Asia and General models only) ENHANCER LINK ECO MASTER OUT 2 -Res Hi YPAO VOL. A - DRC SLEEP STEREO PARTY TUNED ZONE 3 B 2 A VOL. FPR SL SW SR SBL SB SBR FPL MUTE VIRTUAL TU••••••••FM50 Change the FM tuning frequency setting of the unit depending on you...
Page 57 - INIT••••CANCEL; Choices
Restoring the default settings (INIT) ENHANCER LINK ECO MASTER OUT 2 -Res Hi YPAO VOL. A - DRC SLEEP STEREO PARTY TUNED ZONE 3 B 2 A VOL. FPR SL SW SR SBL SB SBR FPL MUTE VIRTUAL INIT••••CANCEL Restores the default settings for the unit. Choices ALL Restores the default settings for the unit. CANCEL...
Page 58 - APPENDIX; Frequently asked questions; The new speaker system does not provide an ideal sound balance...
APPENDIX Frequently asked questions The frequently asked questions from customers and the answers are shown below. The new speaker system does not provide an ideal sound balance... If you have changed speakers or have a new speaker system, reconfigure the speakersettings in “Speaker” in the “Setup” ...
Page 59 - Troubleshooting; Power, system and remote control
Troubleshooting Refer to the table below when the unit does not function properly.If the problem you are experiencing is not listed below or if the instructions below do not help, turn off the unit, disconnect the power cable, and contact the nearest authorizedYamaha dealer or service center. First,...
Page 60 - Audio
Problem Cause Remedy The unit cannot be controlled using the remote control. The unit is out of the operating range. Use the remote control within the operating range (p.4). The batteries are weak. Replace with new batteries. The unit’s remote control sensor is exposed to direct sunlight orstrong li...
Page 63 - Error indications on the front display
Error indications on the front display Refer to the table below when the error message is indicated on the front display. Message Cause Remedy Check SP Wires The speaker cables short circuit. Twist the bare wires of the cables firmly and connect to the unit and speakers properly. Internal Error An i...
Page 64 - Glossary; Audio information; Audio decoding format; HDMI and video information
Glossary This is a glossary of the technical terms used in this manual. Audio information n Audio decoding format Dolby Digital Dolby Digital is a compressed digital audio format developed by Dolby Laboratories, Inc. thatsupports 5.1-channel audio. This technology is used for audio on most DVD disc....
Page 65 - Yamaha technologies
Yamaha technologies CINEMA DSP (Digital Sound Field Processor) Since the surround sound systems were originally designed for use in movie theaters, their effectis best experienced in a theater that has many speakers designed for acoustic effects. Sincehome conditions (such as room size, wall materia...
Page 66 - Information on HDMI; Operations available from the TV’s remote control; Operations available from the unit’s remote control; Configure the settings of the unit.
Information on HDMI The additional information on HDMI is as follows. HDMI Control HDMI Control allows you to operate external devices via HDMI. If you connect a TVthat supports HDMI Control to the unit with an HDMI cable, you can control the unit(such as power and volume) with TV remote control ope...
Page 67 - Turn on the unit and playback devices and then turn on the TV.; The input to which the playback device is connected is; Check that the unit is properly synchronized with the TV by
3 Use the cursor keys to select “HDMI” and press ENTER. 4 Use the cursor keys ( q / w ) to select “HDMI Control” and the cursor keys ( e / r ) to select “On” as shown below. 5 If you made a digital optical cable connection between the TV and theunit, use the cursor keys ( q / w ) to select “TV Audio...
Page 68 - Select a TV program with the TV remote control.; If you cannot hear the TV audio, check the following:; HDMI signal compatibility
Audio Return Channel (ARC) ARC allows you to input TV audio to the unit with the HDMI cable which transmits video signal to the TV.Check the following after the HDMI Control settings. 1 Select a TV program with the TV remote control. 2 Check that the input source of the unit will be automaticallyswi...
Page 69 - Trademarks
Trademarks The trademarks used in this manual are as follows. Manufactured under license from Dolby Laboratories. Dolby,Pro Logic, and the double-D symbol are trademarks of DolbyLaboratories. For DTS patents, see http://patents.dts.com. Manufacturedunder license from DTS Licensing Limited. DTS, the ...
Page 70 - Specifications; Input jacks
Specifications The specifications of this unit are as follows. Input jacks Analog Audio • Audio x 2 Digital Audio (Supported frequencies: 32 kHz to 96 kHz) • Optical x 1• Coaxial x 2 HDMI Input • HDMI x 4 Output jacks Analog Audio • Speaker Out x 6 (FRONT L/R, CENTER, SURROUND L/R, SUBWOOFER)• Subwo...