Page 2 - Indice
2 Table of Contents REFRIGERATOR SAFETY ..............................................................3PARTS AND FEATURES ................................................................4 What’s New Behind the Doors? ...................................................5 GETTING STARTED .................
Page 3 - Your safety and the safety of others are very important.; DANGER; REFRIGERATOR SAFETY; IMPORTANT SAFETY INSTRUCTIONS
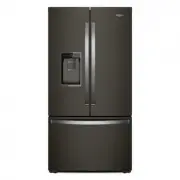
3 You can be killed or seriously injured if you don't immediately You can be killed or seriously injured if you don't follow All safety messages will tell you what the potential hazard is, tell you how to reduce the chance of injury, and tell you what canhappen if the instructions are not followed. ...
Page 4 - PARTS AND FEATURES; Proper Disposal of; WARNING
4 PARTS AND FEATURES Proper Disposal of Your Old Refrigerator WARNING Suffocation Hazard Remove doors from your old refrigerator. Failure to do so can result in death or brain damage. IMPORTANT: Child entrapment and suffocation are not problems of the past. Junked or abandoned refrigerators are stil...
Page 5 - What’s New Behind the Doors?
5 Energy and Normal Operating Sounds Your new French door bottom-mount refrigerator has been designed with a linear compressor to optimize energy efficiency and better regulate temperatures to match cooling demand. You may notice that it operates differently than your previously owned refrigerator. ...
Page 6 - GETTING STARTED; Installation Checklist; Water Filter Installation
6 GETTING STARTED Electrical Shock Hazard Plug into a grounded 3 prong outlet. Do not remove ground prong. Do not use an adapter. Do not use an extension cord. Failure to follow these instructions can result in death, fire, or electrical shock. WARNING Installation Checklist ✔ Electrical Power ■ Plu...
Page 7 - Door Alignment
7 Energy Saver Mode and Normal Operating Sounds Your new French door bottom mount refrigerator has been designed to optimize energy efficiency and better regulate temperatures to match cooling demand. You may notice that it operates differently from your previously owned refrigerator. It is normal f...
Page 8 - INSTALLATION INSTRUCTIONS; Location Requirements; Unpack the Refrigerator
8 INSTALLATION INSTRUCTIONS Location Requirements WARNING Explosion Hazard Keep flammable materials and vapors, such as gasoline, away from refrigerator. Failure to do so can result in death, explosion, or fire. IMPORTANT: This refrigerator is designed for indoor, household use only.To ensure proper...
Page 9 - Remove and Replace Refrigerator Doors
9 Remove and Replace Refrigerator Doors NOTE: Measure the width of your house door opening to see whether or not you need to remove the refrigerator doors to move the refrigerator into your home. If refrigerator door removal is necessary, see the following instructions. IMPORTANT: If the refrigerato...
Page 10 - Reset the Door Hinge
10 WARNING Excessive Weight Hazard Use two or more people to move and install refrigerator. Failure to do so can result in back or other injury. Bottom Door Hinge For your convenience, the refrigerator doors have bottom hinges with door closers. These closers allow the doors to swing fully closed wi...
Page 13 - Remove and Replace
13 3. Tighten the 2 screws at the top of the drawer front (1 on the left-hand side and 1 on the right-hand side) and install the 2 screws on the bottom. Final Steps Electrical Shock Hazard Plug into a grounded 3 prong outlet. Do not remove ground prong. Do not use an adapter. Do not use an extension...
Page 14 - Electrical Requirements; Water Supply Requirements; Connect the Water Supply
14 Electrical Requirements Electrical Shock Hazard Plug into a grounded 3 prong outlet. Do not remove ground prong. Do not use an adapter. Do not use an extension cord. Failure to follow these instructions can result in death, fire, or electrical shock. WARNING Before you move your refrigerator into...
Page 16 - Handle Installation and Removal
16 Complete the Installation Electrical Shock Hazard Plug into a grounded 3 prong outlet. Do not remove ground prong. Do not use an adapter. Do not use an extension cord. Failure to follow these instructions can result in death, fire, or electrical shock. WARNING 1. Plug into a grounded 3 prong outl...
Page 17 - Refrigerator Leveling
17 8. Repeat steps 2 through 7 to install the other handle onto the adjacent refrigerator door. Freezer Drawer 1. With the drawer closed, place the handle onto the shoulder screws so that the setscrews are facing down toward the floor. A. Shoulder screwB. Setscrews inside the handle B A 2. Firmly pu...
Page 18 - FILTERS AND; Water Filtration System
18 3. Move the refrigerator to its final location. 4. Using the 1/4" hex driver, lower the brake feet. Turn them clockwise until the rollers are off the floor and both brake feet are snug against the floor. This keeps the refrigerator from rolling forward when opening the refrigerator doors or f...
Page 20 - Install Produce Preserver; Install FreshFlowTM Air Filter
20 Replacing the FreshFlow™ Air Filter The disposable air filter should be replaced every 6 months. Some air filters have an indicator that replacement is needed.To order a replacement air filter, contact us. See the “Accessories” section in the Use & Care Guide for information on ordering. 1. O...
Page 21 - REFRIGERATOR USE; Opening and Closing Doors; Accessories
21 REFRIGERATOR USE Opening and Closing Doors There are 2 refrigerator compartment doors. The doors can be opened and closed either separately or together. There is a vertically hinged seal on the left refrigerator door. ■ When the left-side door is opened, the hinged seal automatically folds inward...
Page 22 - Using the Controls
22 Using the Controls View Temperature Set Points Touch [ ▼ ]/[ ▲ ] for refrigerator or [ ▼ ]/[ ▲ ] for freezer to toggle through temperature set points. NOTE: To view temperature in degrees Celsius, touch and hold the [°F-°C] button for 3 seconds and the temperature display will change. To return t...
Page 24 - External Dispenser Controls; Lighting the Refrigerator
24 Showroom Mode This mode is used when the refrigerator is on display in a retail store or if you want to turn the cooling off and deactivate all other functions except interior lighting. Showroom mode can be used when going on vacation. See the “Vacation and Moving Care” section for proper steps o...
Page 28 - Ice Maker and Storage Bin
28 The Dispenser Light 1. When you use the dispenser, the light will automatically turn on. 2. The dispenser light also serves as an automatic night light. Once the ambient light in the room is reduced, the auto sensor will cause the dispenser light to illuminate. The Dispenser Lock The dispenser ca...
Page 31 - Freezer Drawers; Audio Reference; Tone Assignment
31 Refrigerator Door Bins The bins on your refrigerator door are adjustable to meet your individual storage needs. The gallon-size bins make it easy to customize door storage to hold gallon containers. Door Bin Divider (on some models) This divider fits in the door bin to divide the bin and elevate ...
Page 32 - REFRIGERATOR CARE; Cleaning
32 REFRIGERATOR CARE Cleaning WARNING Explosion Hazard Use nonflammable cleaner. Failure to do so can result in death, explosion, or fire. Both the refrigerator and freezer sections defrost automatically. However, clean both sections about once a month to avoid buildup of odors. Wipe up spills immed...
Page 33 - Lights
33 Condenser Cleaning There is no need for routine condenser cleaning in normal home operating environments. If the environment is particularly greasy or dusty or there is significant pet traffic in the home, the condenser should be cleaned every 6 months to ensure maximum efficiency. If you need to...
Page 34 - TROUBLESHOOTING
34 Refrigerator Operation First try the solutions suggested here or visit our website at producthelp.whirlpool.com Electrical Shock Hazard Plug into a grounded 3 prong outlet. Do not remove ground prong. Do not use an adapter. Do not use an extension cord. Failure to follow these instructions can re...
Page 41 - PERFORMANCE DATA SHEET
41 PERFORMANCE DATA SHEET Water Filtration System Model P9WB2L/P9RFWB2L Capacity 200 Gallons (757 Liters) This system has been tested according to NSF/ANSI Standards 42, 53, 401, and CSA B483.1 for the reduction of the substances listed below. The concentration of the indicated substances in water e...
Page 42 - WARRANTY; WHIRLPOOL; FIVE YEAR LIMITED WARRANTY
42 WARRANTY 02/17 IF YOU NEED SERVICE: 1. Before contacting us to arrange service, please determine whether your product requires repair. Some questions can be addressed without service. Please take a few minutes to review the Troubleshooting section of the Use and Care Guide or visit producthelp.wh...