Page 2 - TA B L E O F C O N T E N T S; French Door
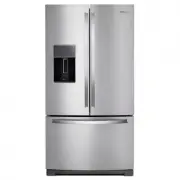
2 TA B L E O F C O N T E N T S Congratulations on your purchase and welcome to the Whirlpool Brand family of high-quality appliances. Your new Whirlpool ® French Door Refrigerator combines advanced cooling technology with simple operation and high efficiency. Each appliance that leaves our factory i...
Page 3 - R E F R I G E R A T O R S A F E T Y; Proper Disposal of; You; Your safety and the safety of others are very important.; DANGER; WARNING; Suffocation Hazard; IMPORTANT SAFETY INSTRUCTIONS
R E F R I G E R A T O R S A F E T Y 3 Proper Disposal of Your Old Refrigerator IMPORTANT: Child entrapment and suffocation are not problems of the past. Junked or abandoned refrigerators are still dangerous – even if they will sit for “just a few days.” If you are getting rid of your old refrigerato...
Page 4 - P A R T S A N D F E A T U R E S; What’s New Behind the Doors?
4 P A R T S A N D F E A T U R E S What’s New Behind the Doors? Your Whirlpool ® French Door Refrigerator comes equipped with various innovative storage and energy efficient features. Energy and Normal Operating Sounds Your new French Door Bottom Mount refrigerator has been designed to optimize energ...
Page 5 - I N S T A L L A T I O N I N S T R U C T I O N S; LED Lighting; MicroEdge; Door Alarm; Unpack the Refrigerator; Remove the Packaging; Clean Before Using; Excessive Weight Hazard
I N S T A L L A T I O N I N S T R U C T I O N S 5 LED Lighting The LED lights do not ever need to be replaced. MicroEdge ® Glo Shelves (on some models) Industry-exclusive MicroEdge ® Glo shelves make every snack stand out in your refrigerator. By moving LED lighting to a new spot under the shelves, ...
Page 6 - Location Requirements; Explosion Hazard
6 I N S T A L L A T I O N I N S T R U C T I O N S Location Requirements IMPORTANT: This refrigerator is designed for indoor, household use only. To ensure proper ventilation for your refrigerator, allow for a ¹⁄₂ " (1.25 cm) of space on each side and at the top. Allow for a 1" (2.54 cm) spac...
Page 7 - Remove and Replace Refrigerator Doors; Electrical Shock Hazard; Door Removal and Replacement
I N S T A L L A T I O N I N S T R U C T I O N S 7 Remove and Replace Refrigerator Doors NOTE: Measure the width of your door opening, to see whether or not you need to remove the refrigerator doors to move the refrigerator into your home. If door removal is necessary, see the following instructions....
Page 8 - Remove Right-Hand Refrigerator Door
8 I N S T A L L A T I O N I N S T R U C T I O N S Remove Right-Hand Refrigerator Door 1. Unplug refrigerator or disconnect power. 2. Keep the refrigerator doors closed until you are ready to lift them free from the cabinet. NOTE: Provide additional support for the refrigerator door while the hinges ...
Page 9 - Replace Right-Hand Refrigerator Door; Final Steps
I N S T A L L A T I O N I N S T R U C T I O N S 9 Style 2 - Firmly pull up on the clasp. Then, pull the tubing out of the fitting. NOTE: The water dispenser tubing remains attached to the left-hand refrigerator door. 3. Disconnect the wiring plug located on top of the door hinge. ■ Grasp each side o...
Page 10 - Remove and Replace Freezer Drawer Front; Remove Drawer Front; Replace Drawer Front
10 I N S T A L L A T I O N I N S T R U C T I O N S Remove and Replace Freezer Drawer Front Depending on the width of your door opening, it may be necessary to remove the freezer drawer front to move the refrigerator into your home. IMPORTANT: ■ If the refrigerator was previously installed and you ar...
Page 11 - Electrical Requirements; Recommended Grounding Method; Water Supply Requirements; Reverse Osmosis Water Supply
I N S T A L L A T I O N I N S T R U C T I O N S 11 Electrical Requirements Before you move your refrigerator into its final location, it is important to make sure you have the proper electrical connection. Recommended Grounding Method A 115 volt, 60 Hz, AC only 15- or 20-amp fused, grounded electric...
Page 12 - Connect the Water Supply; Connect to Refrigerator
12 I N S T A L L A T I O N I N S T R U C T I O N S Connect the Water Supply Read all directions before you begin. IMPORTANT: ■ Plumbing shall be installed in accordance with the International Plumbing Code and any local codes and ordinances. ■ The gray water tubing on the back of the refrigerator (w...
Page 13 - Complete the Installation; Handle Installation and Removal; Install Handles
I N S T A L L A T I O N I N S T R U C T I O N S 13 3. Turn on water supply to refrigerator and check for leaks. Correct any leaks. Style 2 1. Unplug refrigerator or disconnect power. 2. Remove and discard the short, black plastic part from the end of the water line inlet. 3. Thread the nut onto the ...
Page 14 - Remove the Handles
14 I N S T A L L A T I O N I N S T R U C T I O N S 4. While holding the handle, insert the short end of the hex key into the upper hole and slightly rotate the hex key until it is engaged in the setscrew. 5. Using a clockwise motion tighten the setscrew just until it begins to contact the shoulder s...
Page 15 - Refrigerator Leveling, Door Closing and Alignment
I N S T A L L A T I O N I N S T R U C T I O N S 15 Refrigerator Leveling, Door Closing and Alignment The base grille covers the adjustable brake feet and roller assemblies located at the bottom of the refrigerator below the freezer drawer. Before making any adjustments, remove the base grille and mo...
Page 16 - F I L T E R S A N D A C C E S S O R I E S; Water Filtration System; Install the Water Filter; The Water Filter Status Light
16 F I L T E R S A N D A C C E S S O R I E S To Steady the Refrigerator: ■ Open the freezer drawer. Using a ¹⁄₄ " hex driver, turn both brake feet clockwise the same amount until the brake feet are snug against the floor. Check again. If not satisfied, continue to adjust the brake feet by half t...
Page 17 - Replace the Water Filter; Install Air Filter; Installing the Air Filter
F I L T E R S A N D A C C E S S O R I E S 17 ■ RESET the water filter status tracking feature. After you replace the disposable filter with a new filter, closing the filter compartment door will automatically reset the filter status tracking feature. See “Using the Control(s).” NOTE: “REPLACE FILTER...
Page 18 - Replacing the Air Filter; Install Produce Preserver; Installing the Produce Preserver; FIRST AID TREATMENT:
18 F I L T E R S A N D A C C E S S O R I E S Models without notches: ■ Place the indicator somewhere it is easily visible - either inside the refrigerator, or elsewhere in your kitchen or home. Replacing the Air Filter The disposable air filter should be replaced every 6 months, when the status indi...
Page 19 - Installing the Status Indicator; Accessories
F I L T E R S A N D A C C E S S O R I E S 19 Installing the Status Indicator The produce preserver comes with a status indicator, which should be activated and installed at the same time the pouches are installed. 1. Place the indicator face-down on a firm, flat surface. 2. Apply pressure to the bub...
Page 20 - R E F R I G E R A T O R U S E; Opening and Closing Doors; Viewing and Adjusting Temperature Set Points; View Temperature Set Points
20 R E F R I G E R A T O R U S E Opening and Closing Doors There are two refrigerator compartment doors. The doors can be opened and closed either separately or together. There is a vertically-hinged seal on the left refrigerator door. ■ When the left-hand refrigerator door is opened, the hinged sea...
Page 21 - Adjust Temperature Set Points; Options
R E F R I G E R A T O R U S E 21 When Temperature mode is activated, press TEMP to toggle between Fridge and Freezer. The display will show the temperature set point of the selected compartment, and temperature adjusting information will appear on the display screen. Recommended Refrigerator Tempera...
Page 22 - Additional Features
22 R E F R I G E R A T O R U S E Fast Ice The Fast Ice feature assists with temporary periods of heavy ice use by increasing ice production. ■ To turn on the Fast Ice feature, press FAST ICE. When the feature is on, the Fast Ice icon will appear on the display. The Fast Ice feature will remain on fo...
Page 23 - Water and Ice Dispensers; Flush the Water System; To Clean the Ice Dispenser Chute:
R E F R I G E R A T O R U S E 23 Water and Ice Dispensers IMPORTANT: ■ Allow 3 hours for the refrigerator to cool down and chill water. ■ Allow 24 hours to produce the first batch of ice. Discard the first three batches of ice produced. ■ The dispensing system will not operate when either the refrig...
Page 24 - The Dispenser Light; Ice Maker and Ice Storage Bin; Ice Production Rate; Cut Hazard
24 R E F R I G E R A T O R U S E To Dispense Ice: 1. Select the desired type of ice. To switch between cubed ice and crushed ice, press ICE/WATER. 2. Press a sturdy glass against the dispenser paddle. Hold the glass close to the dispenser opening so ice does not fall outside of the glass. IMPORTANT:...
Page 25 - Turn the Ice Maker On/Off; Remove and Replace the Ice Storage Bin
R E F R I G E R A T O R U S E 25 Style 1 - Ice Maker in the Refrigerator (on some models) The ice maker is located on the left-hand side of the refrigerator compartment ceiling. Ice cubes are ejected into the ice storage bin, located on the left-hand refrigerator door. Turn the Ice Maker On/Off 1. P...
Page 26 - R E F R I G E R A T O R F E A T U R E S; Refrigerator Shelves; Shelves and Shelf Frames; Crisper Drawers/Pantry Drawer/Crisper Cover
26 R E F R I G E R A T O R F E A T U R E S Refrigerator Shelves The shelves in your refrigerator are adjustable to meet your individual storage needs. Storing similar food items together in your refrigerator and adjusting the shelves to fit different heights of items will make finding the exact item...
Page 27 - Crisper Humidity Control; Style 1 - Electronic Control
R E F R I G E R A T O R F E A T U R E S 27 To remove the crisper(s) cover: 1. Remove crisper drawers. 2. Holding the glass insert firmly with one hand, press up in center of glass insert until it rises above the plastic frame. Gently slide the glass insert forward to remove. 3. Lift the cover frame ...
Page 28 - Drawer Removal and Replacement; Drawer Divider; Meat Storage Guide; Door Bins; Pizza Pocket and Drawer Div ider
28 R E F R I G E R A T O R F E A T U R E S Drawer Removal and Replacement To remove the drawer: 1. Push the drawer completely closed. 2. Lift up the front of the drawer and pull it straight out. To replace the drawer: 1. Push the metal glide rails to the rear of the refrigerator. 2. Place the drawer...
Page 29 - R E F R I G E R A T O R C A R E; Cleaning; Exterior Cleaning; Style 1 - Smooth Door; Interior Cleaning
R E F R I G E R A T O R C A R E 29 Cleaning Both the refrigerator and freezer sections defrost automatically. However, clean both sections about once a month to avoid buildup of odors. Wipe up spills immediately. Exterior Cleaning Please see the exterior cleaning information specific to your model. ...
Page 30 - Condenser Cleaning; Lights; Vacations
30 R E F R I G E R A T O R C A R E Condenser Cleaning There is no need for routine condenser cleaning in normal home operating environments. If the environment is particularly greasy or dusty, or there is significant pet traffic in the home, the condenser should be cleaned every 2 to 3 months to ens...
Page 31 - TR O U B L E S H O O T I N G; Operation
TR O U B L E S H O O T I N G 31 First try the solutions suggested here. If you need further assistance or more recommendations that may help you avoid a service call, refer to the warranty page in this manual and scan the code with your mobile device, or visit www.whirlpool.com/product_help . In Can...
Page 32 - Noise
32 TR O U B L E S H O O T I N G Noise To listen to normal refrigerator sounds, go to the Product Help/FAQ section of the brand website and search for “normal sounds.” The motor seems to run too much High efficiency compressor and fans Larger, more efficient refrigerators run longer at lower, more en...
Page 33 - Temperature and Moisture
TR O U B L E S H O O T I N G 33 Temperature and Moisture Popping Contraction/expansion of inside walls, especially during initial cool-down This is normal. Hissing/Dripping Flow of refrigerant, or flow of oil in the compressor This is normal. Vibration The refrigerator may not be steady Adjust the l...
Page 34 - Ice and Water
34 TR O U B L E S H O O T I N G Ice and Water There is interior moisture buildup NOTE: Some moisture buildup is normal. The room is humid. A humid environment contributes to moisture buildup. The door(s) are opened often or not closed completely. Allows humid air to enter the refrigerator. Minimize ...
Page 36 - Doors
36 TR O U B L E S H O O T I N G Doors To view an animation showing how to adjust and align the doors, refer to the Product Help/FAQ section of the brand website and search for “door closing and door alignment.” The ice dispenser jams while dispensing crushed ice Crushed ice is blocking the ice deliv...
Page 37 - TROUBLESHOOTING
TROUBLESHOOTING 37 The doors are difficult to open The door gaskets are dirty or sticky. Clean gaskets and contact surfaces with mild soap and warm water. Rinse and dry with soft cloth. The doors appear to be uneven The doors need to be aligned, or the refrigerator needs to be leveled. See “Refriger...
Page 38 - P E R F O R M A N C E D A T A S H E E T
38 P E R F O R M A N C E D A T A S H E E T Water Filtration System Model P9WB2L/P9RFWB2L Capacity 200 Gallons (757 Liters) This system has been tested according to NSF/ANSI Standards 42, 53, 401, and CSA B483.1 for the reduction of the substances listed below. The concentration of the indicated subs...


 Whirlpool WRF560SEHZ User Manual
 Whirlpool WRF560SMHB User Manual
 Whirlpool WRF560SMHZ User Manual
 Whirlpool WRF954CIHZ User Manual
 Whirlpool WRFF5333PV User Manual
 Whirlpool WRFF5333PW User Manual
 Whirlpool WRS311SDHM User Manual
 Whirlpool WRS312SNHB User Manual
 Whirlpool WRS312SNHM User Manual
 Whirlpool WRS312SNHW User Manual
 Whirlpool WRS315SDHM User Manual