Westinghouse WQE6870SA - User Manual
Westinghouse WQE6870SA Refrigerator – User Manual, read for free online in PDF format. We hope this helps you resolve any issues you may have. If you have further questions, please contact us through the contact form.


Table of Contents:
- Page 2 – CONGRATULATIONS; Conditions of use; CONTENTS
- Page 3 – IMPORTANT SAFETY INSTRUCTIONS
- Page 4 – FEATURES AT A GLANCE
- Page 5 – INSTALLING YOUR NEW APPLIANCE
- Page 6 – CAUTION; LED lighting
- Page 7 – CONNECTING THE WATER SUPPLY; PSI
- Page 9 – ABOUT THE USER INTERFACE
- Page 13 – Note: The ice maker; Dispenser
- Page 14 – Removing Ice Bin
- Page 15 – Adjusting the Ice Bin Auger; STORAGE FEATURES; Flip Shelf
- Page 16 – Opening the Crisper Drawer; Removing the FreshSeal; Crisper
- Page 17 – Opening the SnackZone; Note: It can be difficult to pull out the; Adjustable Door Bins
- Page 20 – Note: When ordering your replacement
- Page 21 – FOOD STORAGE GUIDE; IMPORTANT
- Page 23 – TROUBLESHOOTING
- Page 26 – Warranty; Important Notice
- Page 27 – Notes
- Page 28 – TOP SERVICE
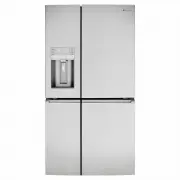
WQE6870
REFRIGERATION
0 0 0 0 0 0 0 0 0 0 0
REGISTER YOUR FRIDGE
WITH YOUR SMARTPHONE
1
Locate the labe
l
on the inside of
your fridge
Easy register with your smartphone
0 0 0 0 0 0 0 0 0 0 0
2
Photograph the
camera icon, including
the 4 dots
( )
3
(Australia only
)
© 2017 Electrolux Home Products Pty Ltd. EST_PhotoRegister_Fridge_70x70_Dec17
Text image to 0488 446 622
1.
h
p
a
r
g
o
t
o
h
P
the camera icon,
including the 4 dots( ).
2.
o
t
ti
t
x
e
t
n
e
h
T
0488 446 622
(Australia only)
USER MANUAL
"Loading the manual" means you need to wait until the file loads and becomes available for online reading. Some manuals are very large, and the time they take to appear depends on your internet speed.
Summary
CONGRATULATIONS Dear Customer, Congratulations and thank you for choosing our refrigerator. We are sure you will find your new refrigerator a pleasure to use. Before you use the relevant sections of this manual, which provides a description of your refrigerator and its functions. To avoid the risks ...
IMPORTANT SAFETY INSTRUCTIONS WARNING • This appliance is not intended for use by persons (including children) with reduced physical, sensory or mental capabilities, or lack of experience and knowledge, unless they have been given supervision or instruction concerning use of the appliance by a perso...
FEATURES AT A GLANCE 1 11 21 2 12 22 3 13 23 4 14 24 5 15 25 6 16 26 7 17 27 8 18 28 9 19 29 10 20 Ice Maker Air distributor - Multiflow Air filter Water filter Flip up glass shelf Slide/fold glass shelf Left Spillsafe™ glass shelf Right Spillsafe™ glass shelf Crisper shelf cover FreshSeal™ crisper ...