Westinghouse WIM1200SC - User Manual
Westinghouse WIM1200SC Refrigerator – User Manual, read for free online in PDF format. We hope this helps you resolve any issues you may have. If you have further questions, please contact us through the contact form.


Table of Contents:
- Page 2 – coNditioNS of USE; ENVIRONMENTAL TIPS; coNtENtS
- Page 3 – iMpoRtANt SAfEtY iNStRUctioNS
- Page 4 – BAR REfRiGERAtoRS witH icE BoX fEAtURES
- Page 5 – BAR REfRiGERAtoRS witHoUt icE BoX fEAtURES
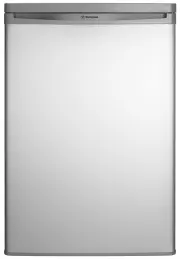
- Page 6 – SiNGLE dooR ALL REfRiGERAtoR fEAtURES
- Page 7 – BAR fREEZER fEAtURES
- Page 8 – SiNGLE dooR ALL fREEZER fEAtURES
- Page 9 – CAUTION; iNStALLiNG YoUR NEw AppLiANcE
- Page 10 – WARNING
- Page 11 – ice making
- Page 16 – LAMp REpLAcEMENt foR ModEL wiM1000; LAMp REpLAcEMENt
- Page 18 – wHAt to do BEfoRE cALLiNG foR SERvicE
- Page 19 – Warranty
USER MANUAL
Bar Fridges with Ice Box,
All Refrigerators and Upright Freezers
Models
WIM1000
WIM1200
WRM1300
WRM2400
WFM0700
WFM0900
WFM1800
"Loading the manual" means you need to wait until the file loads and becomes available for online reading. Some manuals are very large, and the time they take to appear depends on your internet speed.
Summary
2 CONTENTS Important safety instructions . . . . . . . . . . . . . 3Bar refrigerator with ice box features . . . . . . . . . 4Bar refrigerator without ice box features . . . . . . . 5Single door all refrigerator features . . . . . . . . . 6Bar freezer features . . . . . . . . . . . . . . . . 7Single...
3 SAFETY Please read the user manual carefully and store in a handy place for later reference . The symbols you will see in this booklet have these meanings: WARNING this symbol indicates information concerning your personal safety CAUTION this symbol indicates information on how to avoid damaging t...
4 FEATURES BAR REfRiGERAtoRS witH icE BoX fEAtURES 1 Ice box door 2 Light switch 3 Ice box 4 Ice bin 5 Drain plug 6 Drip tray 7 Ice tray 8 Light housing 9 Light lens 10 Control knob 11 Glass shelf 12 Wine rack 13 Glass crisper cover 14 Crisper 15 Adjustable levelling leg 16 Door bin cover/lid 17 Doo...