Westinghouse PHN644DU - User Manual
Westinghouse PHN644DU Hob – User Manual, read for free online in PDF format. We hope this helps you resolve any issues you may have. If you have further questions, please contact us through the contact form.


Table of Contents:
- Page 2 – Correct use
- Page 3 – Description of the appliance; Cooking surface layout
- Page 4 – Displays
- Page 5 – Operating the appliance; Switching the appliance on and off
- Page 6 – Locking/unlocking the control panel
- Page 7 – The power function; Power Management
- Page 10 – Tips on cooking and frying
- Page 11 – Cleaning and care; Sharp objects and abrasive
- Page 12 – splashes, shiny metallic discolorations
- Page 13 – Operating noises
- Page 14 – Technical data; Disposal; The symbol; Packaging material; Installation Instructions; Safety instructions; Installation may only be carried
- Page 16 – Assembly; Surface temperatures of
- Page 17 – Rating plate; Warranty; – Electrolux' means Electrolux Home
- Page 19 – Service; for glass ceramic
user manual
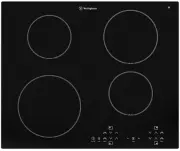
Ceramic glass induction hob
PHN644DU
"Loading the manual" means you need to wait until the file loads and becomes available for online reading. Some manuals are very large, and the time they take to appear depends on your internet speed.
Summary
Electrolux. Thinking of you. Westinghouse. We are part of the Electrolux family. Share more of our thinking at www.electrolux.com Contents Safety instructions 2 Description of the appliance 3 Operating the appliance 5 Tips on cooking and frying 10 Cleaning and care 11 What to do if ... 12 Technical ...
• Risk of burns! Do not place objects made of metal, such as knives, forks, spoonsand saucepan lids on the cooking surface,as they can get hot Safety when cleaning • For cleaning, the appliance must be switched off and cooled down. • For safety reasons, the cleaning of the ap- pliance with steam jet...
Control panel layout 1 8 7 6 2 3 4 5 1 Power function 2 Display 3 Cooking zone indicators. Timer function 4 Timer display 5 Heat setting selection 6 Timer 7 Lock 8 On/Off with indicator Touch Control sensor fields The appliance is operated using Touch Con-trol sensor fields. Functions are controlled...