Vissani VAP09R1AWT - User Manual
Vissani VAP09R1AWT Air Conditioner – User Manual, read for free online in PDF format. We hope this helps you resolve any issues you may have. If you have further questions, please contact us through the contact form.


Table of Contents:
- Page 4 – Explanation of symbols displayed on the unit:; WARNING
- Page 5 – Part
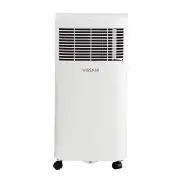
- Page 6 – PACKAGE CONTENTS
- Page 7 – MODE; Cool; EXHAUST HOSE INSTALLATION
- Page 9 – Installation; Prepare the Exhaust Hose assembly
- Page 11 – Install Window Slider Adaptor
- Page 12 – Operation; Using the Control Panel; DRY operation; FAN operation
- Page 13 – Shows protection code:; I SENSE feature; WAIT 3 MINUTES BEFORE RESUMING OPERATION
- Page 14 – Water Drainage
- Page 15 – Using the Remote Control; Model; Rated Voltage
- Page 16 – Using Cool Mode; Using Auto Mode
- Page 17 – Using Fan Mode; Using Dry Mode
- Page 18 – Using the Timer
- Page 19 – EXAMPLE; xn; Using I SENSE; Press I SENSE button.; Using the °C/°F button
- Page 20 – Using the LED Display; Using the Short Cut setting; Using the Sleep Function
- Page 21 – Inserting and Replacing Batteries; Slide the battery cover back into place.; Tips for using remote control
- Page 22 – Maintenance; SAFETY PRECAUTIONS; Always unplug the unit before cleaning or servicing.; Care and Cleaning; AIR FILTER CLEANING; Maintenance Tips; UNIT CLEANING; Turn off the appliance and unplug it.
- Page 23 – Troubleshooting; Problem
THANK YOU
We appreciate the trust and confidence you have placed in Vissani through the purchase of this air conditioner. We strive to continually create
quality products designed to enhance your home. Visit us online to see our full line of products available for your home improvement needs.
Thank you for choosing Vissani!
USE AND CARE GUIDE
PORTABLE AIR CONDITIONER
Questions, problems, missing parts? Before returning to the store,
call Vissani Customer Service
8 a.m. - 7 p.m., EST, Monday - Friday, 9 a.m. - 6 p.m., EST, Saturday
1-855-847-7264
HOMEDEPOT.COM
Item #1008 582 683
Model #VAP09R1AWT
"Loading the manual" means you need to wait until the file loads and becomes available for online reading. Some manuals are very large, and the time they take to appear depends on your internet speed.
Summary
4 Safety Information (continued) CAUTION: □ Hold the plug by the head of the power plug when taking it out. Otherwise, it may cause electric shock and damage. □ Ensure that the installation is properly secured to prevent the product from potentially falling. □ Do not place heavy objects on the power...
5 HOMEDEPOT.COM Please contact 1-855-847-7264 for further assistance. Pre-Installation TOOLS REQUIRED Phillips screwdriver Measuring tape or ruler Flat blade screwdriver Scissors or knife HARDWARE INCLUDED NOTE: Hardware not shown to actual size. TIMER ON TIMER OFF TEMP LED O N / O F F SHORT CUT MOD...
6 Pre-Installation (continued) PACKAGE CONTENTS A Front B C D E F Rear G H I JK L M Part Description A Control Panel B Remote Signal Receptor C Horizontal Louver Control D Vertical Louver Control E Panel F Caster G Handle (both sides) H Air Filter I Upper Air Intake J Drain Outlet K Air Outlet L Low...