Summit Appliance CSD4B24SS - User Manual

Summit Appliance CSD4B24SS Hob – User Manual, read for free online in PDF format. We hope this helps you resolve any issues you may have. If you have further questions, please contact us through the contact form.
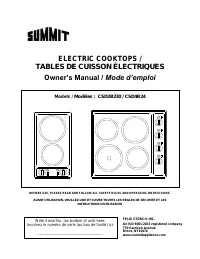


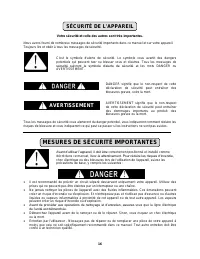
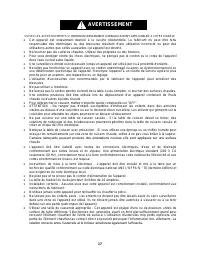
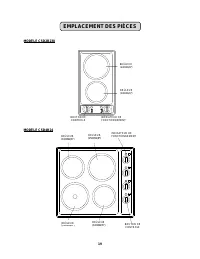
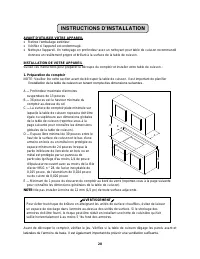
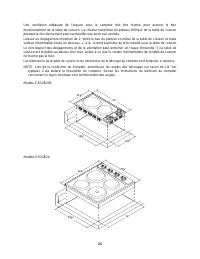
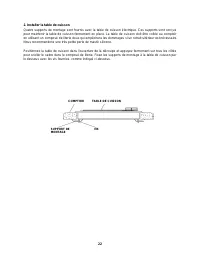
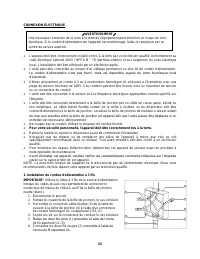
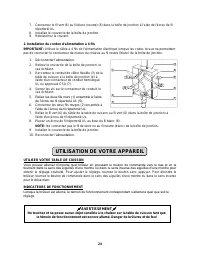

Table of Contents:
- Page 2 – TABLE OF CONTENTS
- Page 3 – APPLIANCE SAFETY; Your safety and the safety of others are very important.; IMPORTANT SAFEGUARDS
- Page 6 – LOCATION OF PARTS
- Page 7 – INSTALLATION INSTRUCTIONS; INSTALLATION OF YOUR APPLIANCE
- Page 9 – Installing the Cooktop
- Page 10 – ELECTRICAL CONNECTION; For personal safety, the appliance must be properly grounded.; WARNING
- Page 11 – OPERATING YOUR APPLIANCE; OPERATING YOUR COOKTOP; indicator is still on. Danger of burns and fire hazard!
- Page 13 – CARE AND MAINTENANCE; CLEANING YOUR APPLIANCE
- Page 14 – TROUBLESHOOTING; Troubleshooting Guide; PROBLEM
- Page 15 – LIMITED WARRANTY; ONE-YEAR LIMITED WARRANTY; ITEMS WARRANTOR WILL NOT PAY FOR:; DISCLAIMER OF IMPLIED WARRANTIESLIMITATION OF REMEDIES
- Page 16 – TABLE DES MATIÈRES
- Page 17 – SÉCURITÉ DE L'APPAREIL; Votre sécurité et celle des autres sont très importantes.; MESURES DE SÉCURITÉ IMPORTANTES; AVERTISSEMENT
- Page 20 – EMPLACEMENT DES PIÈCES
- Page 21 – INSTRUCTIONS D’INSTALLATION; INSTALLATION DE VOTRE APPAREIL
- Page 23 – Installer la table de cuisson
- Page 25 – Installation du cordon d'alimentation à 4 fils; UTILISATION DE VOTRE APPAREIL; UTILISER VOTRE TABLE DE CUISSON
- Page 26 – DÉPANNAGE; PROBLÈME
- Page 27 – SOIN ET ENTRETIEN; NETTOYER VOTRE APPAREIL
- Page 28 – GARANTIE LIMITÉE; UN AN DE GARANTIE LIMITÉE; EXCLUSION DE GARANTIES IMPLICITES
ELECTRIC COOKTOPS /
TABLES DE CUISSON ÉLECTRIQUES
O
wner’s Manual /
Mode d’emploi
Models /
Modèles : CSD2B230 / CSD4B24
BEFORE USE, PLEASE READ AND FOLLOW ALL SAFETY RULES AND OPERATING INSTRUCTIONS.
AVANT UTILISATION, VEUILLEZ LIRE ET SUIVRE TOUTES LES RÈGLES DE SÉCURITÉ ET LES
INSTRUCTIONS D'UTILISATION.
FELIX STORCH, INC.
An ISO 9001:2015 registered company
770 Garrison Avenue
Bronx, NY10474
www.summitappliance.com
Write Serial No. (on bottom of unit) here:
Inscrivez le numéro de série (au bas de l'unité) ici:
______________________________
"Loading the manual" means you need to wait until the file loads and becomes available for online reading. Some manuals are very large, and the time they take to appear depends on your internet speed.
Summary
1 TABLE OF CONTENTS Appliance Safety 2 Important Safeguards 2 - 4 Location of Parts 5 Installation Instructions 6 - 10 Before Using Your Appliance 6 Installation of Your Appliance 6 - 8 Electrical Connection 9 - 10 Operating Your Appliance 10 - 11 Operating Your Cooktop 10 Operating Indicators 10 Co...
2 APPLIANCE SAFETY Your safety and the safety of others are very important. We have provided many important safety messages in this manual and on your appliance. Always read and obey all safety messages. This is the Safety Alert Symbol. The symbol alerts you to potential hazards that can kill or inj...
5 LOCATION OF PARTS MODEL CSD2B230 BURNER (2000W/8") BURNER (1000W/6") CONTROL KNOB OPERATING INDICATOR MODEL CSD4B24 BURNER (2000W/8") BURNER (1000W/6") CONTROL KNOB OPERATING INDICATOR BURNER (1000W/6") BURNER (1500W/8")