Page 3 - Table of contents; Quick
3 Rules and regulations ....................................... 4Safety precautions ............................................. 6 Getting Started Unpacking your phone ................................... 11Looking at your phone ................................... 12Charging the battery pack ..........
Page 4 - Rules and regulations; License
4 Rules and regulations The U.S. Federal Communications Commissionand the Industry Canada regulate PCS telephoneservice in their respective countries. It isimportant for you, the PCS telephone user, toobserve the applicable regulations whenoperating your PCS telephone in either country.In addition t...
Page 5 - Privacy; Interference
5 Equipment modifications — The U.S. Federal Communications Commission has type-approvedthe model of PCS telephone which you havepurchased, and has allocated a specific frequencyrange for PCS service. No changes or adjustmentsare to be made to your PCS telephone. The radio equipment shall be made av...
Page 6 - Safety precautions; IMPORTANT; Exposure to radio frequency energy
6 Safety precautions IMPORTANT For safe and efficient operation of your phone,observe these guidelines. Your hand-held portable PCS telephone usesdigital Code Division Multiple Access (CDMA)technology. CDMA is a newer radio frequency(RF) technology than the FM technology that hasbeen used for radio ...
Page 9 - Aircraft; Children
9 Aircraft Turn your phone OFF before boarding anyaircraft.• Use it on the ground only with crew permission. • Do not use in the air. To prevent possible interference with aircraftsystems, U.S. Federal Aviation Administration(FAA) regulations require you to have permissionfrom a crew member to use y...
Page 11 - Getting Started; Unpacking your phone; Portable PCS; Attaching the hand strap
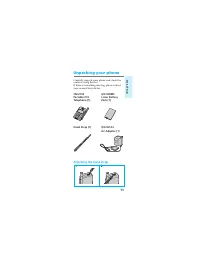
11 Getting Started Unpacking your phone Carefully unpack your phone and check thecontents using this list.If there is something missing, please contactyour nearest Sony dealer. CM-Z100 QN-029BPL Portable PCS Li-Ion Battery Telephone (1) Pack (1) Hand Strap (1) QN-001ACAC Adapter (1) Attaching the ha...
Page 12 - Looking at your phone; Telephone; Earpiece
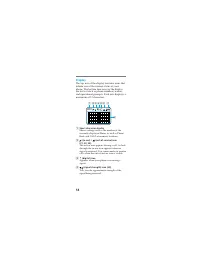
12 NO 8 TUV 9 PWR CLR END WXY 0 + !º 12 3 4 6 7 8 9 5 2 ABC 4 GHI 8 TUV 7 PQRS 9 WXYZ 5 JKL 6 MNO 3 DEF 1 0 + SEND END CLR PWR !¡ !£ !¢ !™ !∞ Looking at your phone For further information, refer to the pagenumbers indicated in parentheses ( ). Telephone 1 Call alert indicator (20) Lights when there ...
Page 14 - Display; Short character display
14 Display The top row of the display contains icons thatinform you of the current status of yourphone. The bottom four rows of the displayare for text such as phone numbers, names,and operational prompts. Each row displays amaximum of 12 characters. 1 Short character display Shows settings such as ...
Page 16 - Charging the battery pack; Attaching the battery pack; battery pack down
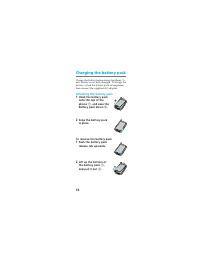
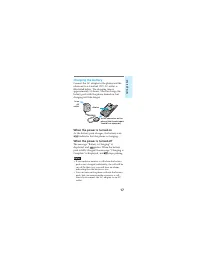
16 Charging the battery pack Charge the battery before using the phone. Anew battery is not fully charged. To charge thebattery, attach the battery pack to the phone,then connect the supplied AC adapter. Attaching the battery pack 1 Hook the battery packonto the top of thephone 1 , and ease the batt...
Page 17 - Charging the battery; When the power is turned on; pulses. When the battery
17 Getting Started display to the connector on thephone (the thumb indentshould face upwards) Charging the battery Connect the AC adapter to the phone and theother end to a standard 120V AC outlet asillustrated below. The charging time isapproximately 3.5 hours. You can charge thebattery pack with t...
Page 19 - Checking the battery; Battery life
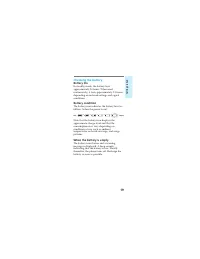
19 Getting Started Checking the battery Battery life In standby mode, the battery lastsapproximately 24 hours. When usedcontinuously, it lasts approximately 2.5 hours,depending on network settings and signalconditions. Battery condition The battery icon indicates the battery level asfollows (when th...
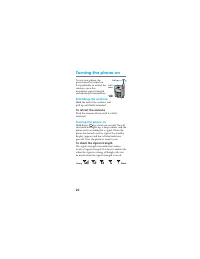
Page 20 - Turning the phone on; Extending the antenna; To retract the antenna; Turning the power on; Hold down; for about one second. The call; To check the signal strength
20 Turning the phone on To use your phone, thepower must be turned on.It is preferable to extend theantenna, since thismaximizes signal strengthand minimizes interference. Extending the antenna Hold the end of the antenna andpull up until fully extended. To retract the antenna Push the antenna down ...
Page 21 - If you are out of the service area; Turning the power off; for about one second.; Using the Jog DialTM navigator; Choosing a menu item; on the standby display, you will go to the
21 Getting Started If you are out of the service area The out-of-service icon ( ) appears, and thephone searches for a service signal. If a signalcannot be found, the phone enters power savemode. It will “wake up” automatically atintervals (based on carrier network settings) tosearch for a service s...
Page 22 - to access the Options menu.; To go back; . If you want to return to the standby; or hold down; Scrolling through menu items; within the Sounds
22 As shown below, if you enter digits on thestandby display, the word “Options” appearsat the bottom of the display, preceded by .Push to access the Options menu. To go back If you want to go back to the previous display,press CLR . If you want to return to the standby display, either press END or ...
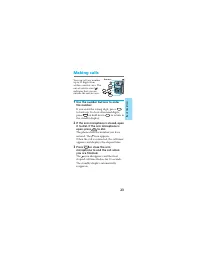
Page 23 - Making calls; If you enter the wrong digit, press; to return to; Press; or close the arm
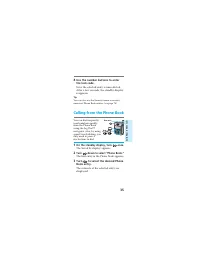
23 Basic Oper ations Making calls You can call any numberup to 32 digits fromwithin a service area. Theout-of-service icon ( )indicates that you areoutside the service area. 1 Use the number buttons to enterthe number. If you enter the wrong digit, press CLR to back up. To clear all entered digits,p...
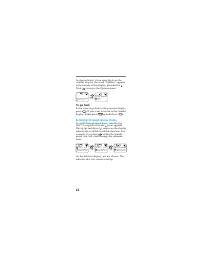
Page 24 - Tips; Tip; To redial the last number
24 Tips • When dialing, you can insert a pause to attach a DTMF (Dual Tone Multiple Frequency) numberto the number you are calling (see page 30). • If Auto-Hyphen is turned on, the phone number is hyphenated automatically as youenter the digits (see page 80). • If Minute Alert is turned on, a beep s...
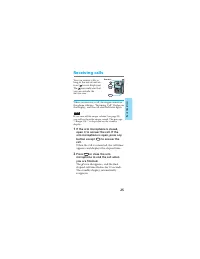
Page 25 - Receiving calls; Note; to answer the
25 Basic Oper ations Receiving calls You can receive calls aslong as the out-of-serviceicon ( ) is not displayed.The icon indicates thatyou are outside theservice area. When you receive a call, the ringer sounds orthe phone vibrates. “Incoming Call” flashes onthe display, and the call alert indicato...
Page 26 - If the caller supports caller ID
26 Tips • Using the Jog Dial™ navigator, you can adjust the earpiece volume or mute the microphoneduring a call (see pages 56 and 57). • Enhanced voice privacy is indicated by the message “–P–” displayed in the upper leftcorner of the LCD (see page 85). This feature iscarrier-dependent. If the calle...
Page 27 - Storing phone numbers in the Phone Book; Push; The Options menu appears.; Turn
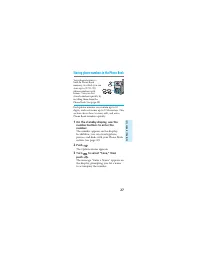
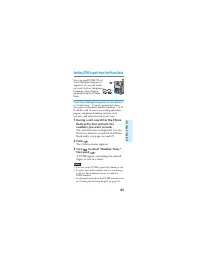
27 Quick W ays to Mak e Calls Storing phone numbers in the Phone Book Your phone features abuilt-in Phone Bookmemory, in which you canstore up to 99 (01–99)phone numbers withnames. You can dialstored numbers quickly byrecalling them from thePhone Book (see page 35). Each phone number can contain up ...
Page 28 - to clear; To enter “SONY”
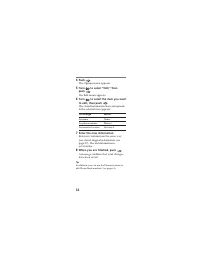
28 4 Use the number buttons to enterthe name. If you press the same button in quicksuccession, you will scroll through thecharacters available on that button. (Seethe “Alphanumeric table” on page 29.)For the next entry, wait until the cursormoves one step to the right or use / or to move the cursor ...
Page 29 - to select the desired; Alphanumeric table; Button
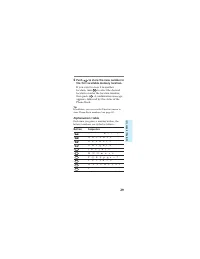
29 Quick W ays to Mak e Calls 6 Push to store the new number in the first available memory location. If you want to store it in anotherlocation, turn to select the desired location or enter the location number,then push . A confirmation message appears, followed by the status of thePhone Book. Tip I...
Page 30 - While entering digits, push
30 To enter a hyphen, pause, or link In addition to digits, you can insert hyphens,pauses, and links into the phone number of aPhone Book entry. (See page 36 forinformation on releasing a pause or linkduring a call.) Hyphens: Turn off the autohyphenation feature (see page 80) when you want to enter ...
Page 31 - To enter; If the Phone Book is full; Editing stored information
31 Quick W ays to Mak e Calls To enter Select The display shows a hard pause Hard Pause H a time pause Time Pause T a link Enter Link L a hyphen Enter Hyphen – If the Phone Book is full If there are no memory locations available, amessage indicates that the memory is full.After entering a name, a me...
Page 32 - To change
32 4 Push . The Options menu appears. 5 Turn to select “Edit,” then push . The Edit menu appears. 6 Turn to select the item you want to edit, then push . The stored information that correspondsto the selected item appears. To change Select the name Name the phone number Phone # the memory location L...
Page 33 - Erasing a phone number; The first Phone Book entry is displayed.
33 Quick W ays to Mak e Calls Erasing a phone number You can erase stored Phone Book entries. Ifthe selected entry is restricted, you must enterthe four-digit lock code before you can erase it(see page 74). 1 On the standby display, turn down twice to select “Phone Book.” The first Phone Book entry ...
Page 34 - Restricting Phone Book entries
34 Restricting Phone Book entries You can restrict individual Phone Book entriesor the entire Phone Book so that access can begained only by entering a lock code (see page74). The phone numbers of restricted entrieswill not be displayed. 1 Select the Phone Book entry thatyou want to restrict, then p...
Page 35 - Calling from the Phone Book; On the standby display, turn; The first entry in the Phone Book appears.
35 Quick W ays to Mak e Calls 4 Use the number buttons to enterthe lock code. Now the selected entry is unrestricted.After a few seconds, the standby displayreappears. Tip You can also use the Security menu to restrict/unrestrict Phone Book entries (see page 74). Calling from the Phone Book You can ...
Page 36 - twice or press; To release a pause or link during a call
36 4 Open the arm microphone if it isclosed. If the arm microphone isopen, push twice or press SEND . The phone dials the number stored inthe selected Phone Book entry. The icon appears. Tips • You can search for a phone number by name or memory location (see pages 38 and 39). • Whenever the phone n...
Page 37 - Speed dialing; Touch dialing
37 Quick W ays to Mak e Calls Speed dialing To dial quickly, you can enter the Phone Bookmemory location numbers. The phone callsthe number stored in the correspondinglocation. 1 Use the number buttons to enterthe memory location number. 2 To dial the number, open the armmicrophone. If the arm micro...
Page 38 - Searching the Phone Book; Searching alphabetically; The Search display appears.; Searching for a string of characters
38 Searching the Phone Book To locate a desired PhoneBook entry, you can searchby name, phone number, ormemory location. You cansearch the Phone Book eitheralphabetically or for a stringof characters. Searching alphabetically When you enter only one character, the phonelists all entries that begin w...
Page 39 - Searching by memory location
39 Quick W ays to Mak e Calls 1 From the standby display, turn once. The Saved #s display appears. 2 Push . The Search display appears. 3 Enter at least two characters. 4 Push . The entries containing the selected stringare displayed starting from the lowestmemory location number. 5 Turn to view the...
Page 40 - Searching for a phone number
40 3 Turn up to select “Recall Loc#,” then push . The Phone Book entry stored in theselected memory location is displayed.If the entered location is empty, this isindicated on the display. After a fewseconds, the standby display reappears. Tip You can also use the Directory menu to search thePhone B...
Page 41 - Calling from the Calls List
41 Quick W ays to Mak e Calls Calling from the Calls List Information on the tenmost recent outgoingcalls, incoming calls,scratch pad entries, andmissed calls are stored inthe phone’s Calls List. Ifyou call the same numbertwice in a row, only themost recent call is storedin the Calls List. 1 On the ...
Page 42 - To view; To save the number to the Phone Book
42 Tips • In addition, you can dial by pressing SEND (when the arm microphone is open) afterselecting the entry in step 3 on page 41. • If the selected entry contains a pause or a link, only the digits up to the pause or link are dialed.To release pauses and links, see page 36. • In addition, you ca...
Page 43 - Sending DTMF signals from the Phone Book; Notes
43 Quick W ays to Mak e Calls Sending DTMF signals from the Phone Book You can send DTMF (DualTone Multiple Frequency)signals to access electronicservices (such as telephonebanking) when dialingnumbers from the PhoneBook. Dual Tone Multiple Frequency is also knownas “touch-tone.” A tone is generated...
Page 44 - About the Features menu; Viewing and selecting menu options; to display the Features menu. The
44 About the Features menu You can use the Features menu to activate thespecial features of your phone. For a list ofsubmenus and settings, see “List of menuitems” on page 90. Viewing and selecting menu options The Jog Dial™ navigator makes it easy tonavigate the phone’s menus. The procedure toview ...
Page 45 - The available options scroll as you turn; to return to the
Advanced F eatur es 45 4 Turn to select the setting. The available options scroll as you turn . 5 Push to enter the new setting. The standby display reappears. To exit from the Features menu Press END or hold down CLR to return to the standby display. To return to the previous display Press CLR . To...
Page 46 - Using the Short Messaging Service; Receiving messages; When you receive a message
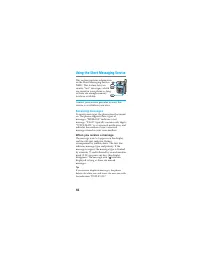
46 Using the Short Messaging Service This section contains informationon the Short Messaging Service(SMS). This feature lets youreceive “text” messages, whichare stored in your phone as longas there are enough memorylocations available. Contact your service provider to see if thisservice is availabl...
Page 47 - If the memory becomes full; Accessing messages; • Text messages and pagings that you
Advanced F eatur es 47 WARNING When you receive a new message and yourphone does not have enough memory to store it,the phone automatically erases old messages thatare not locked. Note If the ringer volume is set to “vibration,” thephone emits a vibration instead of an audible ringwhen you receive a...
Page 48 - to go back
48 Reading voice mail notificationmessages [F11] 1 Push to select “Voice” from the Message menu. The Voice display appears, indicatingthe number of voice messages stored inyour voice mailbox. Press CLR to go back to the Message menu. 2 Turn to scroll through the message. A hollow box ( ) indicates t...
Page 51 - The selected message is displayed.; To read the next message, push
Advanced F eatur es 51 Reading old text messages [F13] The most recent messages are listed first. 1 Turn to select “Old Text” from the Message menu, then push . A list of old messages is displayed. A dot(•) indicates the beginning of eachmessage. A lock icon ( ) indicates thatthe message is locked (...
Page 55 - Adjusting the volume; The standby display reappears.
Advanced F eatur es 55 Adjusting the volume You can adjust the volume of the ringer,keybeep, and earpiece on the Sounds menu.In addition, you can select the type of soundsheard when the phone rings and when youpress buttons. (See page 21 for instructions onhow to reach the Sounds menu.) Adjusting th...
Page 56 - to select; The Sounds menu appears.; Now the microphone is muted.; To unmute the microphone, push; The Sounds menu reappears.; Now the microphone is unmuted.
56 • If the telephone is used in conjunction with a hands-free car kit or a portable hands-free carkit, the “vibration” setting is not available. • If the telephone is connected to a wall outlet and the ringer volume is set to “vibration,” thetelephone emits an audible ring at the “high”setting inst...
Page 57 - The Keybeep Vol menu appears.; the volume as follows:; The Earpiece Vol menu appears.
Advanced F eatur es 57 Adjusting the keybeep volume [F23] You can adjust the volume of the beep thatsounds when you press a button. 1 Turn to select “Keybeep Vol” from the Sounds menu, then push . The Keybeep Vol menu appears. 2 Turn up to raise the keybeep volume, and down to lower it. You can sele...
Page 59 - The Beep Length menu appears.
Advanced F eatur es 59 Setting the keybeep length [F27] You can set the length of the beep that soundswhen you press a button. This setting affectsboth the keybeep feedback and DTMFtransmission tones. The phone sends a shortDTMF burst (default) or plays every tone ofthe DTMF signal as long as the ke...
Page 60 - Checking and setting the timers; The All Calls display appears.; The Minute Alert menu appears.
60 Checking and setting the timers You can check call durations on the Timersmenu. In addition, you can set the phone toalert you every minute of a call, and make thephone turn itself off automatically. Checking the duration of all calls [F31] You can view the total duration of all calls.This inform...
Page 62 - Using the Directory
62 Using the Directory You can use the Directory menu to check yourphone number, as well as store, erase, and editphone numbers and names in the Phone Book.Also, you can use this menu to view the CallsList. Checking your phone number [F41] 1 Push to select “My Number” from the Directory menu. The My...
Page 63 - Use; to
Advanced F eatur es 63 4 Use the number buttons to enterthe name. Use / to move the cursor or to insert spaces between characters. If youenter the wrong character, press CLR to clear the character highlighted by thecursor. (See the “Alphanumeric table” onpage 29.) 5 When you are finished, push to st...
Page 65 - The Edit menu appears.
Advanced F eatur es 65 1 Turn to select “Edit” from the Directory menu, then push . A message appears, prompting you forthe Phone Book entry to be edited. 2 Turn to select the entry that contains the information you wantto edit. In addition, you can use the numberbuttons to select the entry to be ed...
Page 68 - You can view Calls List entries easily.; in step 2. You can also push
68 Tips • You can also use the Options menu to find Phone Book memory locations (see page 39). • You can also turn to scroll through the entire Phone Book instead of entering thememory location number in step 2. Viewing the Calls List [F47] You can view Calls List entries easily. 1 Turn to select “C...
Page 69 - Extra features; from; Open the arm microphone or press; in quick succession.
69 Advanced F eatur es Extra features On the Extras menu, you can set the phone toenable touch dialing, redial automatically, andanswer incoming calls automatically or at thepress of any button. Also, you can use thismenu to lock the keypad and to jot downphone numbers. Preventing accidental operati...
Page 73 - The Lock Phone menu appears.; On the standby display, push; Setting security options
73 Advanced F eatur es You can restrict unauthorized access to yourphone and the information it holds. Also, onthe Security menu, you can reset menu settingsto default and store emergency numbers.Unlike other items on the Features menu,accessing the Security menu requires a lockcode when you select ...
Page 74 - A confirmation display appears.; Now the selected entry is restricted.
74 Setting a new lock code [F62] The lock code must be entered every time youwant to unlock the phone, and also when youwant to access restricted numbers. 1 Turn to select “New Code” from the Security menu, then push . The Enter New Code display appears,prompting you to enter a new lock code. 2 Use ...
Page 75 - The Restrict All menu appears.
75 Advanced F eatur es To unrestrict an entry To select the entry you want to unrestrict,follow the procedure above for restricting anentry. Notes • The phone number of a restricted entry is not displayed when you view the Phone Book andmake a call. • Restricted entries are not listed or displayed a...
Page 76 - The Master Reset display appears.; You can erase all Phone Book entries at once.; The Erase Book display appears.
76 Reverting to default settings [F65] You can reset all menu settings to the defaults.This does not affect Phone Book or Calls Listentries. 1 Turn to select “Master Reset” from the Security menu, then push . The Master Reset display appears. 2 Press 1 to revert to the factory defaults, or push to k...
Page 77 - The Erase Calls display appears.
77 Advanced F eatur es Erasing all Calls List entries [F67] You can erase all Calls List entries at once. 1 Turn to select “Erase Calls” from the Security menu, then push . The Erase Calls display appears. 2 Press 1 to erase all Calls List entries, or push to quit without erasing. If you erase all e...
Page 78 - Setting display options; You can change what the banner reads.
78 Setting display options You can use the features on the Display menuto change the appearance of the on-screendisplay. Setting the banner [F71] You can change what the banner reads. 1 Push to select “Banner” from the Display menu. The Banner display appears. The currentbanner text is displayed. 2 ...
Page 79 - The Backlight menu appears.
79 Advanced F eatur es Setting the backlight [F72] You can adjust the duration of the backlighton the display and keypad. 1 Turn to select “Backlight” from the Display menu, then push . The Backlight menu appears. 2 Turn to select how long the backlight is on after the last pressof a button. You can...
Page 81 - The Sort Book menu appears.
81 Advanced F eatur es Sorting the Phone Book [F74] You can determine how the Phone Book willbe displayed, and also set the phone to sortthe entries either alphabetically or by memorylocation. 1 Turn to select “Sort Book” from the Display menu, then push . The Sort Book menu appears. 2 Turn to set t...
Page 83 - Adjusting network settings; The Roam Alert menu appears.
83 Advanced F eatur es Adjusting network settings On the Network menu, you can set the phoneto alert you when the roaming status changes,when a call is dropped, or when enhancedvoice privacy is lost. Setting the roaming alert [F81] Your phone is roaming when you use itoutside of the home area. Roami...
Page 86 - The Activation menu appears.; . To cancel activation and return to
86 Activating phone services (OTASP) [F84] You can use the OTASP (Over-The-Air ServiceProvision) activation feature to self-activateyour phone with a new service. Contact yourservice provider to see if this service isavailable in your area. 1 Turn to select “Activation” from the Network menu, then p...
Page 87 - Additional Information; Specifications
Additional Information 87 Specifications Frequency range Transmit: 1851.25 to 1908.75 MHz Receive: 1931.25 to 1988.75 MHz Dimensions 3.6 × 2.4 × 1.0 inches (h/w/d) (not including antenna)(91 × 62 × 26 mm) Mass (weight) Approx. 5.3 oz (150 g)(including battery) RF power output 0.01 µW to 300 mW Opera...
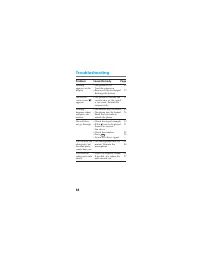
Page 88 - Problem; Troubleshooting; Page
88 •The phone is off. Turn the phone on. •Battery is fully discharged. Recharge the battery. •The phone is outside the service area, or the signalis too weak. Extend theantenna fully. • The buttons may be locked.•The phone may be locked. Enter the lock code tounlock the phone. •Check the signal stre...
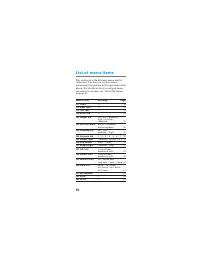
Page 90 - List of menu items; Menu Item
90 List of menu items This section lists the Features menu and itssubmenus. Use these to set the variousparameters that pertain to the operation of thephone. For details on how to navigate fromone menu to another, see “About the Menu”on page 44. Menu Item Settings Page F11 Voice — 48 F12 New Text — ...
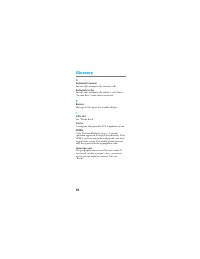
Page 92 - Glossary
92 A Automatic answer Feature that automatically answers calls. Automatic retry Feature that automatically redials a call when a“System Busy” indication is received. B Banner Message at the top of the standby display. C Calls List See “Phone Book.” Carrier A company that provides PCS telephone servi...
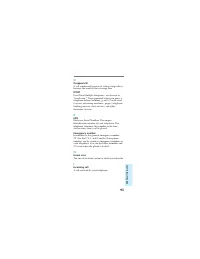
Page 95 - Pause
Additional Information 95 P Pause You can enter pause codes in the phone numbermemory data. Use this feature when accessing ananswering machine, voice mail system, electronicbanking system, etc. When a pause is insertedbetween two groups of digits, the phone willpause before dialing the next set of ...
Page 97 - Index
Additional Information 97 A AC adapter 11, 17Antenna 20 Arm microphone 12Automatic Answer 71Hyphenation 80Retry 70Redial 70 B Backlight 79Banner 78Battery pack Charging 16Checking 19Attaching/removing 16 Battery charge contacts 17 Battery pack release tab 13 Battery icon 15, 17 C Calling Calls List ...
Page 100 - SONY Wireless Hotline Number; If you have any questions or comments,
SONY Wireless Hotline Number (USA only) If you have any questions or comments, please call: SONY WIRELESS HOTLINE 1-800-578-SONY (7669) © 1998 Sony Electronics Inc. All rights reserved.Reproduction without written consent expresslyprohibited. Sony and Jog Dial are trademarks ofSony. All other tradem...