Smeg SI2M7953D - User Manual
Smeg SI2M7953D Hob – User Manual, read for free online in PDF format. We hope this helps you resolve any issues you may have. If you have further questions, please contact us through the contact form.


Table of Contents:
- Page 2 – SAFETY INFORMATION; Children and vulnerable people safety
- Page 3 – General Safety
- Page 4 – SAFETY INSTRUCTIONS; Installation; WARNING! Only a qualified; Electrical Connection; WARNING! Risk of fire and
- Page 5 – Use; Care and cleaning
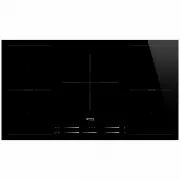
- Page 6 – WARNING! Risk of injury or; PRODUCT DESCRIPTION; Cooking surface layout
- Page 7 – Heat setting displays
- Page 8 – DAILY USE; WARNING! Refer to Safety; Activating and deactivating; The function deactivates the hob; The heat setting
- Page 9 – Power function; To activate the function for a cooking; Timer; Count Down Timer
- Page 10 – Pause; Set the heat setting in 10 seconds. You
- Page 11 – Operating the function automatically
- Page 12 – Changing the automatic mode; HINTS AND TIPS
- Page 13 – Cookware; Cookware is suitable for an induction; The noises during operation; The noises are normal and do not refer; Examples of cooking
- Page 14 – Hints and Tips for Auto-Vent; The hood in the picture is only
- Page 15 – Cooker hoods with the Auto-Vent; CARE AND CLEANING; General information; discoloration: use a solution of water; TROUBLESHOOTING
- Page 17 – INSTALLATION; Before the installation; Clean the worktop around the cut out
- Page 18 – Attaching the seal - Integrated; Cut the supplied thicker seal stripe; Assembly
- Page 19 – Integrated installation
- Page 20 – TECHNICAL DATA; Rating plate; ENERGY EFFICIENCY; Product information according to EU 66/2014
- Page 21 – Energy saving; ENVIRONMENTAL CONCERNS
SI2M7953D
User Manual
Hob
Notice d'utili‐
sation
Table de
cuisson
Benutzerin‐
formation
Kochfeld
"Loading the manual" means you need to wait until the file loads and becomes available for online reading. Some manuals are very large, and the time they take to appear depends on your internet speed.
Was this manual helpful?
About this manual
- Brand
- Smeg
- Model
- SI2M7953D
- Document type
- User Manual
- Category
- Hob
- Language(s)
- English
- Pages
- 22
- File size
- 316.8 KB
- Format
Summary
CONTENTS Safety information 2 Safety instructions 4 Product description 6 Daily use 8 Hints and tips 12 Care and cleaning 15 Troubleshooting 15 Installation 17 Technical data 20 Energy efficiency 20 Subject to change without notice. SAFETY INFORMATION Before the installation and use of the appliance...
General Safety • WARNING: The appliance and its accessible parts become hot during use. Care should be taken to avoid touching heating elements. • Do not operate the appliance by means of an external timer or separate remote-control system. • WARNING: Unattended cooking on a hob with fat or oil can ...
SAFETY INSTRUCTIONS Installation WARNING! Only a qualified person must install this appliance. WARNING! Risk of injury or damage to the appliance. • Remove all the packaging. • Do not install or use a damaged appliance. • Follow the installation instructions supplied with the appliance. • Keep the m...
Ask a question
Related manuals
Popular Smeg Hobs
More Smeg Hobs models
 Smeg SE232TX1 User Manual
 Smeg SE263TD1 Manual
 Smeg SE264TD1 User Manual
 Smeg SE394EMTBAU User Manual
 Smeg SI1M7743B User Manual
 Smeg SI2M7643B User Manual
 Smeg SI364BM User Manual
 Smeg SIA1963D User Manual
 Smeg SIM1644D User Manual
 Smeg SIM1644DG User Manual
 Smeg SIM1963D User Manual
 Smeg SIM1964D User Manual
 Smeg SIM1964DG User Manual
 Smeg HOBD182DG User Manual