Page 3 - Contents; Warnings; TRANSLATION OF THE ORIGINAL INSTRUCTIONS
Contents 39 EN 1 Warnings 40 1.1 General safety instructions 40 1.2 Intended use 43 1.3 Manufacturer’s liability 43 1.4 About this manual 44 1.5 Identification plate 44 1.6 Disposal 44 1.7 How to use the user manual 45 2 Description 46 2.1 General Description 46 2.2 Control panel 47 2.3 Vacuum drawe...
Page 4 - Warnings; General safety instructions
Warnings 40 1 Warnings 1.1 General safety instructions Risk of personal injury • This appliance may be used by children aged 8 years and over and by people of reduced physical, sensory or mental capacity, or lacking in experience in the use of electrical appliances, provided that they are supervised...
Page 5 - Risk of damage to the appliance
Warnings 41 EN • DO NOT USE OR STORE FLAMMABLE MATERIALS NEAR THE APPLIANCE. • DO NOT MODIFY THE APPLIANCE. • The appliance should be installed and maintained according to current standards by qualified personnel. • If the appliance is damaged or does not work, contact an authorized technical assist...
Page 6 - Installation and maintenance
Warnings 42 Installation and maintenance • THIS APPLIANCE MUST NOT BE INSTALLED IN BOATS OR CARAVANS. • Install the appliance and anchor it to a fixed structure. • The sides of the appliance must be next to equipment or units of the same height. • Install the appliance so that the drawer can be pull...
Page 7 - For this appliance
Warnings 43 EN For this appliance • The vacuum drawer must only be used if it is built-in. • Do not use the glass lid as a support on which to place things or as a work surface. • Do not close the vacuum drawer while it is in operation. • Do not use the vacuum drawer for storing food or drink. • Do ...
Page 8 - About this manual; • This user manual is an integral part of the; Identification plate; • Take the appliance to the appropriate
Warnings 44 1.4 About this manual • This user manual is an integral part of the appliance and must therefore be kept in its entirety and at hand for the entire working life of the appliance. • Read this user manual carefully before using the appliance. 1.5 Identification plate The identification pla...
Page 9 - How to use the user manual; Danger of suffocation
Warnings 45 EN Our appliances are packaged in non-polluting and recyclable materials.• Take the packing materials to the appropriate recycling centre. 1.7 How to use the user manual This the following symbols are used in this user manual. 1. Sequence of instructions.• Standalone instruction. Plastic...
Page 10 - Description; General Description; Glass lid
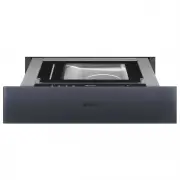
Description 46 2 Description 2.1 General Description 1 Built-in box 2 Glass lid 3 Sealing bar 4 Control panel 5 Vacuum chamber 6 Vacuum pump air inlet 1 2 3 4 5 6
Page 12 - Accessories provided; Drawer-securing device
Description 48 2.3 Vacuum drawer The drawer consists of an internal vacuum chamber in which the vacuum is created. The pump completely eliminates the air from the outside and the inside of the bag.The bag is then hermetically sealed by the sealing bar with a double heat seal.Vacuum sealing helps to ...
Page 13 - Description of the functions; Setting the vacuum level for bags
Description 49 EN 2.6 Description of the functions Setting the vacuum level for bags Setting the bag sealing level * no preservation effect. To be used together with the bag sealing level selection button. ** Sealing level 3 allows multiple overlapped bags to be sealed simultaneously. The bags will ...
Page 14 - Setting the vacuum level for containers; Setting
Description 50 Setting the vacuum level for containers Setting the Chef cycle Setting Suitable for Level 1 • Containers with a “twist- off” lid containing:marmalades, jams,sauces and preserves (inoil, in vinegar), mousse,whipped cream Level 2 • LifeBox containers, professional usecontainers and cont...
Page 15 - Use; Improper use
Use 51 EN 3 Use 3.1 Warnings Improper use Risk of personal injury • Do not touch the sealing bar or the seal immediately after sealing. • Only use certified vacuum seal bags and containers. • Pack cold foods, preferably chilled to 3°C and that have been washed, cleaned and dried beforehand. • Never ...
Page 16 - Using the accessories; Vacuum seal or sous-vide cooking bags
Use 52 3.2 First use 1. Remove the adhesive tape and the labels (apart from the technical data plate) from the appliance. 2. Clean the internal chamber and the glass lid using a soft damp cloth (see “4 Cleaning and maintenance”). 3.3 Using the accessories Vacuum seal or sous-vide cooking bags • Use ...
Page 17 - Vacuum containers
Use 53 EN • Only fill vacuum seal bags to a maximum of 1/3 of their capacity with liquids. • If you wish to put several foods in a single vacuum seal bag, arrange them neatly one beside another. • To obtain a perfect seal, do not allow grease, moisture or residue to remain in the sealing area of the...
Page 18 - Using vacuum seal bags
Use 54 3.4 Using vacuum seal bags 1. Use a vacuum seal bag suitable for preserving food or for sous-vide cooking that is appropriate for the amount of food. 2. Open the glass lid ( 1 ) and make sure that the internal chamber ( 2 ) is dry. 3. Position the bag ( 3 ) at the centre of the sealing bar ( ...
Page 20 - How to create vacuum in external; To connect LifeBox containers, follow the
Use 56 3.5 How to create vacuum in external containers 5. To connect LifeBox containers, follow the instructions in the container instructions booklet. 6. Press the ON/OFF button on the control panel. 7. Press the container vacuum level selection / set button . 8. Press the button several times to s...
Page 21 - After use
Use 57 EN 10. When the cycle has finished, disconnect the adapter from the lid of the container and from the fitting in the internal chamber. After use 1. Switch off the vacuum drawer by pressing the ON/OFF button. 2. Clean and dry the drawer as indicated in the “4 Cleaning and maintenance” section....
Page 23 - • Do not leave the food to be cooked at
Use 59 EN Useful tips: • Do not leave the food to be cooked at room temperature for too long as the bag may inflate during cooking and lose all the advantages of vacuum sealing it. • Make sure that you chill the food as quickly as possible using water, ice or a blast chiller. • Keep vacuum-sealed pr...
Page 27 - Cleaning and maintenance; Cleaning the appliance’s surfaces; Cleaning the outside of the appliance
Cleaning and maintenance 63 EN 4 Cleaning and maintenance 4.1 Warnings 4.2 Cleaning the appliance’s surfaces To keep the surfaces in good condition, they should be cleaned regularly after use. Let them cool down first.Only close the glass lid when the internal chamber is completely dry. Cleaning the...
Page 28 - Cleaning the sealing bar; Pump oil dehumidification cycle
Cleaning and maintenance 64 Cleaning the sealing bar 1. Wait for the sealing bar to cool down.2. Pull the bar upwards to remove it.3. Wipe with a soft cloth, dampened with hot water. 4. Dry thoroughly with a soft cloth or a microfibre cloth. Cleaning the vacuum adapter for external containers 1. Cle...
Page 32 - Installation; Electrical connection; General information
Installation 68 5 Installation 5.1 Electrical connection General information Make sure that the mains electricity supply is the same as that indicated on the identification plate.The identification plate with the technical data, serial number and brand name is located in an easily visible position o...
Page 33 - Position of the power cable; Installing the vacuum drawer; Heavy appliance
Installation 69 EN 5.2 Positioning Position of the power cable (rear view) 5.3 Installing the vacuum drawer 1. Remove the upper cover ( 1 ) in the direction indicated by the arrows. 2. Remove the oil filter cap ( 2 ). Heavy appliance Crushing hazard • Use protective gloves when handling the applianc...
Page 34 - indicated by the arrows.
Installation 70 3. Screw the filter ( 3 ) onto the pump. 4. Install the upper cover ( 1 ) in the direction indicated by the arrows. 5. Insert the plug ( 4 ) into the socket ( 5 ) on the back of the built-in box. 6. Insert the mounting brackets ( 6 ). 7. Lift the drawer and place it in the unit, rest...
Page 35 - side walls of the unit using the screws (
Installation 71 EN 8. Fasten the mounting brackets ( 6 ) to the side walls of the unit using the screws ( 8 ) provided. 9. Route the power cable towards the wall power socket. 10. Fasten the front part of the drawer to the unit using the screws ( 9 ) provided. 11. Fit the cover plates ( 10 ) onto th...
Page 36 - Adjusting the front panel
Installation 72 Adjusting the front panel 1. Press gently on the front of the drawer ( 1 ) to open it. 2. Loosen the 2 adjustment screws ( 2 ) at the bottom left and right of the front panel using an Allen key. 3. Readjust by moving the front panel of the drawer slightly upwards or downwards. 4. Tig...
Page 37 - Ventilation opening
Installation 73 EN Mounting under worktops (mm) 1 Ventilation opening 2 Built-in dimensions with mains plug: cable length (2 metres) Installing in a tall unit (mm) 1 Ventilation opening 2 Built-in dimensions with mains plug: cable length (2 metres) Make sure that there is an opening of approx. 35 or...