Page 2 - CONTENTS; CUSTOMER CARE AND SERVICE; Subject to change without notice.
CONTENTS CUSTOMER CARE AND SERVICE 2 Contents / Customer Care And Service SAFETY INFORMATION PRODUCT DESCRIPTIONCONTROL PANELBEFORE FIRST USEDAILY USE WASHING HINTSINTERNATIONAL WASH CODE SYMBOLSCARE AND CLEANINGTROUBLESHOOTING ...........................................................................
Page 3 - SAFETY INFORMATION; Conditions of use
Safety Information 3 SAFETY INFORMATION 1. In the interest of your safety and to ensure the correct use, before installing and first using the appliance, read this user manual carefully, including its hints and warnings. This appliance is intended to be used in household and similar applications suc...
Page 4 - CHILD SAFETY DEVICE
4 Safety Information After having installed the appliance, check that it is not standing on the inlet and drain hose and the worktop is not pressing the electrical supply cable.If the machine is situated on a carpeted floor, please adjust the feet in order to allow air to circulate freely.Always be ...
Page 5 - PRODUCT DESCRIPTION; The program selector dial
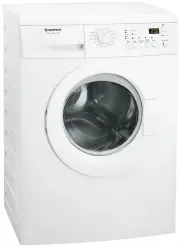
Product Description 5 PRODUCT DESCRIPTION 2. 1 Worktop 2 Detergent/Softener Dispenser 3 Control Panel 4 Door Handle 5 Door 13 Child Safety Device 14 Rating Plate 15 Drain Filter 7 6 Level Adjustment Feet (Front) 8 Mains Cable 9 Water Inlet Hose 10 Water Drain Hose 11 Hose Support 12 Level Adjustment...
Page 6 - CONTROL PANEL; Plastic caps; Accessories; Plastic hose guide
CONTROL PANEL 3. 6 Product Description / Control Panel To remove the transit bolts.To adjust levelling legs. To connect the drain hose on the edge of a sink. Plastic caps To close the holes on the rear side of the cabinet after the removal of the transit bolts. Accessories Plastic hose guide Spanner...
Page 7 - To empty out the water:; Delay Start Icon
Control Panel 7 3.1 Program Selector Knob Turn this knob to set a wash program, the machine will automatically select the spin speed and temperature for selected program.The selector knob can be turned either clockwise or anticlockwise.Position “ ” to reset program/ switching OFF the machine.At the ...
Page 8 - Child Lock Option; Setting Child Lock option:
8 Control Panel 3.8 Start/Pause Button To start the selected program, press the ‘Start/Pause’. To interrupt a program which is running, press the ‘Start/Pause’ to pause the machine. To restart the program from the point at which it was interrupted, press the ‘Start/Pause’ again.If you have chosen a ...
Page 9 - Cold
Control Panel 9 3.11 Programs + Options Program;TemperatureCottons;90 °C to Cold Prewash; 90 °C toCold Cottons Eco ; 60 °C to40 °C White cotton (heavy soiled cotton items):e.g. sheets,tablecloths, towels,household linen;maximum load 7 kg. WashRinsesLong Spin Spin, Rinse Hold, Quick Wash, Rinse +, De...
Page 10 - Delay Start; BEFORE FIRST USE
10 Control Panel/Before First Use Program;TemperatureSpin Easy Iron;40° C to Cold To spin the laundry and to drain the water in the drum; maximum load 7 kg. Synthetic or mixed fabrics, to be ironed underwear, coloured garments, non-shirnk shirts, blouses;maximum load 3.5 kg. Blanket;40° C to30° C Sp...
Page 11 - DAILY USE; - Setting A Program For Washing; Four Steps Start Up Guide; Turn the program selector dial to the
Daily Use 11 DAILY USE 5. Connect the mains plug to the mains socket.Turn the water tap on. Step 1 - Setting A Program For Washing 5.1 Four Steps Start Up Guide 1 2 3 4 1. Turn the program selector dial to the required program. Once you select a wash program, the program selected will stay at that p...
Page 12 - - Loading The Laundry
12 Daily Use Step 2 - Loading The Laundry 1. Before loading the laundry, please make sure: Empty pockets. Tie the cords. Fasten buttons. Close zippers. Place the laundry in the drum, one item at a time, shaking them out as much as possible. 3. Open the door by carefully pulling the door handle outwa...
Page 13 - down; Position; up; - Using Detergent And Additives
Daily Use 13 Powder or liquid detergent. 1 3 Position down : for liquid detergent. Position up : for powder detergent (factory setting). Position down : for liquid detergent. Position up : for powder detergent (factory setting). 2 Step 3 - Using Detergent And Additives Detergent Dispenser Drawer 1. ...
Page 14 - Interruption Of A Program; Close the drawer gently.; - Starting a program
14 Daily Use To pause press Start/Pause. The indicator will start flashing. - Press the Start/Pause again. The program will continue. - 5.2 Interruption Of A Program 5.3 Changing A Program It is possible to change only some options after the program has started. Press the Start/Pause button. The ind...
Page 15 - but; you have to; At The End Of The Program; Set the “Spin” or “Drain” program.; Stand by mode
Daily Use 15 If the door lock indicator does not disappear, this means that the machine is already heating and the water level is above the bottom edge of the door or the drum is turning. In this case the door CAN NOT be opened.If you can not open the door but you need to open it you have to switch ...
Page 16 - WASHING HINTS; Sorting The Laundry; Blood; : treat fresh stains with cold; Oil based paint
16 Washing Hints WASHING HINTS 6. Follow the wash code symbols on each garment label and the manufacturer’s washing instructions. Sort the laundry as follows: whites, coloureds, synthetics, delicates, woollens. 6.1 Sorting The Laundry 6.2 Temperatures 90°C 60°C50°C40°C 30°CCold For normally soiled, ...
Page 17 - : oxalic acid dissolved in hot; Detergents and Additives
Washing Hints 17 Rust : oxalic acid dissolved in hot water or a rust removing product used in cold water. Be careful with rust stains which are not recent since the cellulose structure will already have been damaged and the fabric tends to hole. Mould stains : treat with bleach, rinse well (whites a...
Page 18 - reduced washing effect,
18 Washing Hints the wash load to turn grey,greasy clothes. sudsing, inadequate rinsing. reduced washing effect, Any fabric softener or starching additives must be poured into the compartment marked ‘ ’ before starting the wash program.Follow the product manufacturer’s recommendations on quantities ...
Page 19 - INTERNATIONAL WASH CODE SYMBOLS
International Wash Code Symbols 19 INTERNATIONAL WASH CODE SYMBOLS 7. These symbols appear on fabric labels, in order to help you choose the best way to treat your laundry. Bleach in cold water DO NOT bleach Bleaching Energetic wash Delicate wash Hand wash Max. wash temperature 95 °C Hot iron max. 2...
Page 20 - CARE AND CLEANING; External Cleaning; To run a maintenance wash:
20 Care And Cleaning CARE AND CLEANING 8. You must DISCONNECT the appliance from the electricity supply, before you can carry out any cleaning or maintenance work. The water we use normally contains lime. It is a good idea to periodically use a water softening powder in the machine. Clean the applia...
Page 21 - Cleaning the drain filter; To clean the drain filter:; Turn the drum and align the filter; Cleaning The Drawer Recess
Care And Cleaning 21 8.7 Cleaning the drain filter Turn program selector dial to position Off ( ).Unplug the appliance.Open the door. To clean the drain filter: Disconnect the mains plug from the mains socket. Do not clean the drain filter if the water in the appliance is hot. 1. Turn the drum and a...
Page 22 - Open the filter cover by pressing
22 Care And Cleaning 2. Open the filter cover by pressing the special hook and by rotating the cover upwards. Hold filter securly and pull upwards to remove it from its position. Clean the filter under the water tap. After cleaning the filter, open the filter cover and insert the filter back to its ...
Page 23 - Close the filter cover.; Cleaning The Water Inlet Filter; To clean the water inlet filters:
Care And Cleaning 23 IMPORTANT! Close the filter cover. Insert the mains plug again. The filter is inserted correctly when the indicator on this top is visible and you will hear “Click” sound. 7. 8. 9. Do not start washing clothes without the filter in its place. WARNING! If your water is very hard ...
Page 24 - The Dangers Of Freezing; Turn off the water tap.
24 Care And Cleaning If the machine is exposed to temperatures below 0°C, certain precautions should be taken. 8.9 The Dangers Of Freezing Turn off the water tap. 1.2. Unscrew the inlet hose.3. Remove the drain hose from the rear support and unhook it from sink or spigot. 4. Put the ends of the drai...
Page 25 - Clean the drain filter.; TROUBLESHOOTING; Slelect spin program.; Malfunction
Troubleshooting 25 The door has not been closed. (Error code: ) The plug is not properly inserted in the power socket.There is no power at the socket. Insert the plug into the power socket.Please check your domestic electrical installation. The Start/Pause button has not been pressed. Press the Star...
Page 27 - Machine not installed properly.
Troubleshooting 27 If you are unable to identify or solve the problem, contact our service centre. Before telephoning, make a note of the model, serial number and purchase date of your machine: the Service Centre will require this information. Malfunction Possible cause Solution The electronic unbal...
Page 28 - TECHNICAL DATA; Dimensions; Programs
28 Technical Data TECHNICAL DATA 10. Dimensions Power supply (voltage/frequency) Total power absorbedMinimum fuse protection Water supply pressure Maximum load Spin speed 220-240 V/50 Hz 2000 W 10 A 0.8 MPa 0.05 MPa MaximumMinimum 1000 RPM 700 RPM MaximumMinimum WidthHeightDepth 60 cm85 cm56 cm Prog...
Page 29 - INSTALLATION; Remove the power supply cable
Installation 29 INSTALLATION 11 . 11.1 Unpacking You are advised to keep all transit devices so that they can be refitted if the machine ever has to be transported again. Use gloves. Remove the external film. If necessary, use a cutter. Remove the polystyrene packaging materials.Remove the plastic b...
Page 30 - Remove the three bolts.
30 Installation Loosen or tighten the feet to adjust the level. A correct adjustment of the appliance level prevents the vibration, noise and the movement of the appliance when in operation. Use a spirit level on the top and side of the washing machine to check the levels. If you do not have a spiri...
Page 32 - Electrical Connection
32 Installation Should the appliance power supply cable need to be replaced, this should be carried out by our Service Centre.When the appliance is installed the power supply cable must be easily accessible. If this appliance is supplied from a cord extension set or electrical portable outlet device...
Page 33 - Packaging Materials; ENVIRONMENT CONCERNS
Environment Concerns 33 The materials marked with the symbol are recyclable. >PE<=polyethylene>PS<=polystyrene>PP<=polypropylene This means that they can be recycled by disposing of them properly in appropriate collection containers. To save water, energy and to help protect the en...
Page 34 - NOTE