Page 2 - GARANTIE
39 Français Vornado Air, LLC garantit au consommateur initial ou à l’acheteur initial que ce Sharper Image® Produit vapeur (le « produit ») ne comporte aucun vice de matériau ou de fabrication pour une période d’un (1) an à compter de la date d’achat. Si un tel vice était décelé durant la période de...
Page 3 - GUIDE DE DÉPANNAGE; CONTENTS
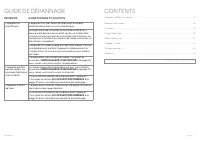
38 Français GUIDE DE DÉPANNAGE CAUSE POSSIBLE ET SOLUTION PROBLÈME L’appareil ne chauffe pas. L’appareil n’est pas branché. Branchez le cordon d’alimentation dans une prise électrique. Le disjoncteur de circuit/de fuite à la terre de la rési-dence a été déclenché ou a fait sauter un fusible. Rée-ncl...
Page 4 - IMPORTANT SAFETY INSTRUCTIONS; ENTRETIEN ET RANGEMENT
4 English IMPORTANT SAFETY INSTRUCTIONS This owner’s guide and any additional inserts are considered part of the product. They contain important information about safety, use and disposal. Before using the product, please familiarize yourself with all operating and safety instructions. Please keep a...
Page 5 - UTILISATION; VAPEUR; TISSUS; SAVE THESE INSTRUCTIONS
36 Français MISE EN GARDE : Avant d’utiliser la vapeur sur un tissu pour la première fois, il est recommandé d’effectuer un essai sur une petite zone peu visible avant de procéder. Ne pas utiliser sur les tissus synthétiques, comme les tissus composés à 100 % de polyester ou de nylon, ou toute autre...
Page 6 - PRODUCT INFORMATION; REMPLISSAGE DE L’ÉVAPORATEUR
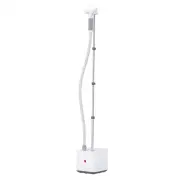
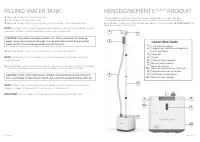
6 English 7A UNIT FEATURES 1234567 7A 89 10 Steam NozzleNozzle Cradle and Clothes HangerHandle/GripHoseTelescopic PoleSteam KnobWater TankWater Tank Cap (Internal)Water Tank HandleWater Level WindowDrain Plug The following features are included with your product. Carefully inspect the packing materi...
Page 8 - ASSEMBLY; ASSEMBLAGE
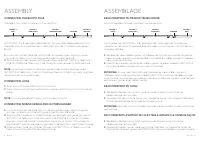
8 English CONNECTING TELESCOPIC POLE The telescopic pole is made up of four sections: SECTIONS 1, 2 & 3 are adjustable in length. By using the three extension locks, these sections may be extended or retracted in order to achieve the desired length. 1. Look down inside Pole Base, and locate two ...
Page 10 - FILLING WATER TANK; RENSEIGNEMENTS; SUR LE; PRODUIT
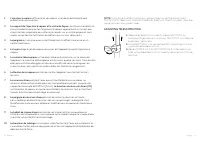
10 English 1. Remove Water Tank from main unit. 2. Hold Water Tank upside-down. 3. Remove Water Tank Cap by rotating it in a counter- clockwise direction. NOTE: In order to minimize potential mineral build-up and prolong the life of your steamer, distilled or de-mineralized water is recommended. 4. ...
Page 11 - CONSERVER CES INSTRUCTIONS; FABRIC STEAMING
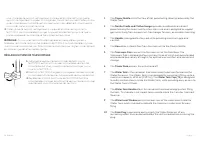
30 Français - Laissez l’appareil refroidir au moins 15minutes avant de déconnecter le tuyau et avant de déverrouiller le bouton de vidange. - Ne jamais tirer d’un coup sec sur le cordon d’alimentation pour le débrancher de la prise. À la place, saisir la fiche et tirer pour la débrancher. - Ne pas s...
Page 12 - CONSIGNES DE SÉCURITÉ IMPORTANTES
12 English PROPER STORAGE Preparing your unit for storage is quick and simple. When you have finished your steaming tasks, follow the steps listed below. 1. Set Steam Knob to “OFF” position and unplug power cord from electrical outlet. 2. Allow unit to cool (15 minutes for complete cooling). 3. Remo...
Page 13 - TABLE DES MATIÈRES; TROUBLESHOOTING
28 Français Consignes De Sécurité Importantes ..........................................................................................................................................29 Renseignements Sur Le Produit ......................................................................................
Page 14 - WARRANTY; GARANTÍA
14 English Vornado Air, LLC warrants to the original consumer or purchaser this Sharper Image® Steam Product (“Product”) is free from defects in material or workmanship for a period of one (1) year from the date of purchase. If any such defect is discovered within the warranty period, Vornado, at it...
Page 15 - CONTENIDO
26 Español RESOLUCIÓN DE PROBLEMAS POSIBLE CAUSA Y SOLUCIÓN PROBLEMA La unidad no cali-enta. La unidad no está enchufada. Enchufe el cable de ali-mentación en el tomacorriente. El interruptor de circuito/la falla a tierra del hogar se desconectó o se quemó un fusible. Vuelva a conectar el interrupto...
Page 16 - INSTRUCCIONES DE SEGURIDAD IMPORTANTES; ALMACENAMIENTO
16 Español INSTRUCCIONES DE SEGURIDAD IMPORTANTES Este manual de usuario y todos los folletos adicionales se consideran parte del producto. Contienen información importante sobre seguridad, utilización y eliminación. Antes de utilizar el producto, lea todas las instrucciones de seguridad y de operac...
Page 17 - GUARDE ESTAS INSTRUCCIONES
24 Español causa del calor o el goteo de agua. - Para esterilizar telas, retenga la boquilla de vapor a ½ pulgada (1,27 cm) del área a vaporizar durante, al menos, 5 segundos. Tenga precaución al realizar esto en telas más delicadas. Cuando termine de usar su unidad, desenchufe de inmediato el cable...
Page 18 - INFORMACIÓN DEL PRODUCTO; LIMPIEZA A VAPOR DE TELA
18 Español Las siguientes características y accesorios están incluidos con su unidad. Revise el paquete para ver que todas las partes estén incluidas. Para obtener posibles piezas faltantes, contactarse (833.800.8669) o ([email protected]). INFORMACIÓN DEL PRODUCTO 7A CARACTERÍSTICAS 1234567 7A 89 1...
Page 19 - LLENADO DEL TANQUE DE AGUA
22 Español 1. Quite el Tanque de agua de la unidad principal. 2. Mantenga el tanque de agua boca abajo. 3. Quite la Tapa de la válvula girándola en el sentido contrario a las agujas del reloj. NOTA: Para minimizar la posible acumulación de minerales y prolongar la vida útil del Vaporizador de telas ...
Page 20 - ENSAMBLAJE
20 Español CÓMO CONECTAR EL TUBO TELESCÓPICO El Tupo telescópico consta de cuatro secciones: La altura de las SECCIONES 1, 2 y 3 puede ajustarse. Utilizando las tres trabas de extensión, estas secciones se pueden extender o retraer para lograr el largo deseado. 1. Mire adentro de la Base del tubo, y...