Sharp R890NW - User Manual
Sharp R890NW Microwave – User Manual, read for free online in PDF format. We hope this helps you resolve any issues you may have. If you have further questions, please contact us through the contact form.

2
3
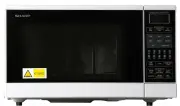
R-890N(S)/(W)
QUICK START GUIDE
1
DIGITAL DISPLAY
2
MULTI COOK
pad
3
CONVENIENCE/PIZZA
pad
4
MORE, LESS
pads
5
GRILL
pad
6
MIX
pad
7
NUMBER AND
TEMPERATURE
pads
8
STOP/CLEAR
pad
9
EASY DEFROST
pad
10 HELP
pad
11 CONVEC
pad
12 PREHEAT
pad
13 POWER LEVEL
pad
14 CLOCK
pad
15 INSTANT COOK/START
pad
16 INSTANT ACTION
pads
TINS-A761WRRZ-J81
1.
Remove all packaging and
accessories from the oven, including the
feature sticker fixed to the outside of the door
and the wrapping shown in the diagram.
DO NOT REMOVE THE WAVEGUIDE COVER,
this can be found on the right hand side wall
inside your microwave. Please see page 4 in
the operation manual.
2.
Ensure there is free space at least 40cm on the
top and 5cm on both sides and at the rear of
the oven.
3.
Ensure the turntable parts
are assembled as shown in
the diagram opposite.
Other Accessories
The racks are for Grill, Mix,
Convection and recommended automatic
operations.
1
40cm
5
cm
5
cm
Plug in the oven and switch on the
power. Nothing will be shown in
the display at this time.
Open the door, the display will flash the
message shown opposite (1).
Close the door. The display will show (2).
The oven is now ready for use.
If you want to set the clock, press the
CLOCK
pad
once and follow the instructions in Step 3 below.
IMPORTANT
The oven has an Energy Save mode, for details refer to page 8 of your
Operation Manual.
• The oven will default to Energy Save Mode after 3 minutes if not
used. Whilst in Energy Save Mode the display is blank and the
oven cannot be used.
• To remove Energy Save Mode, open and then close
the door, “.0” will be displayed and the oven
is ready for use.
• To remove Energy Save Mode
permanently, set the clock.
G E T T I N G S T A R T E D
G E T T I N G S T A R T E D
I N S T A L L A T I O N
I N S T A L L A T I O N
1.
2.
1
3
4
5
6
8
2
15
10
11
7
14
13
12
9
Your oven is fitted with a 12 hour clock.
To set the time of day, ensure the door is closed and
follow the guidelines given below:
1.
Press the
CLOCK
pad once.
2.
Enter the time of day by pressing the numbers
in sequence. (EX: 11:34 am or pm)
3.
Press the
CLOCK
pad again to start the clock.
If you
require any
advice or assistance
regarding your Sharp product,
please visit our Website or call
Sharp Customer Care.
Website:
Australia: www.sharp.net.au
New Zealand: www.sharp.net.nz
Sharp Customer Care:
1 300 135 022 (Australia)
09 573 0111 (New
Zealand)
S E T T I N G
S E T T I N G
T H E
T H E
C L O C K
C L O C K
M I C R O W A V I N G
M I C R O W A V I N G
CLOCK
x1
CLOCK
x1
To cook for 2 minutes 30 seconds at 70%
power level.
1.
Enter the cooking time by
pressing the numbers in
sequence.
2.
Select the power by pressing
the
POWER LEVEL
pad
twice.
3.
Press the
INSTANT
COOK/START
pad once to
start cooking.
4.
The display will count down through cooking time.
x2
x1
POWER LEVEL
INSTANT COOK
START
4
WARNING:
Before starting, read carefully all the warnings given
in the full operation manual for the safe use of your
oven.
NOTE FOR REHEATING READY MEALS:
Place the ready meal in a heat-resistant flan dish on
the low rack.
16
R-890N QSG.qxd 08.4.4 5:02 PM Page 1
"Loading the manual" means you need to wait until the file loads and becomes available for online reading. Some manuals are very large, and the time they take to appear depends on your internet speed.