Saturn ST-FP8087 - User Manual

Saturn ST-FP8087 Juicer – User Manual, read for free online in PDF format. We hope this helps you resolve any issues you may have. If you have further questions, please contact us through the contact form.
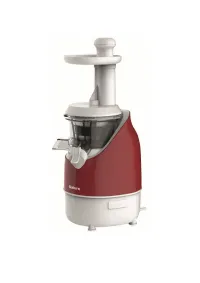
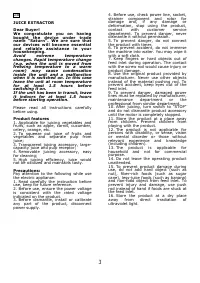

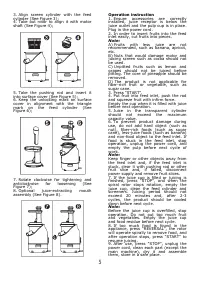

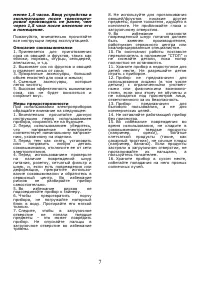

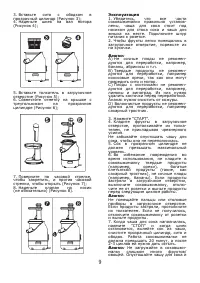
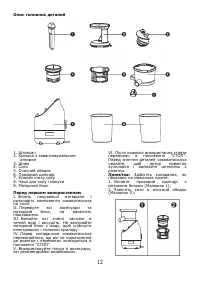
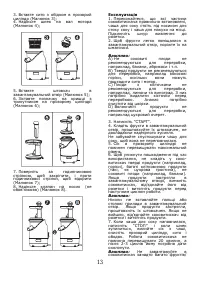

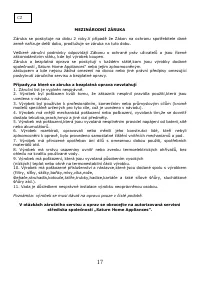

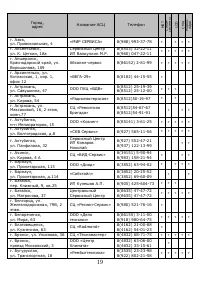
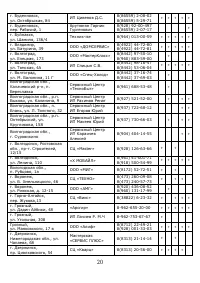
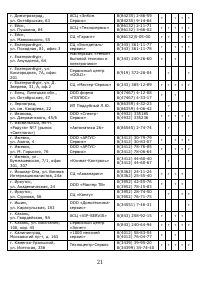
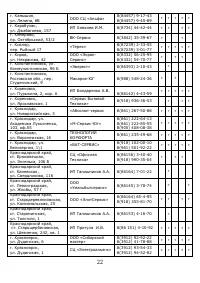
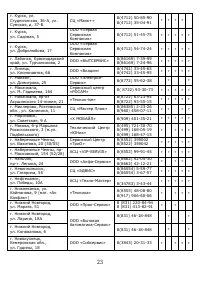
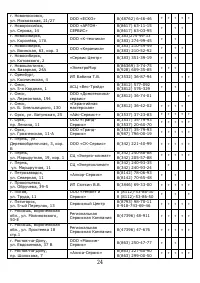
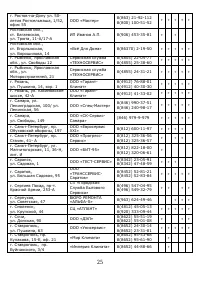
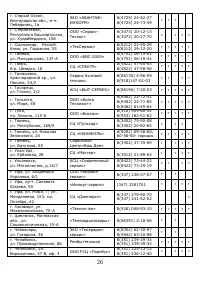
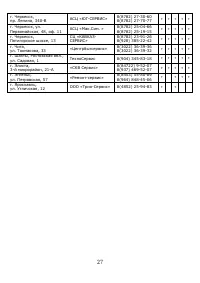
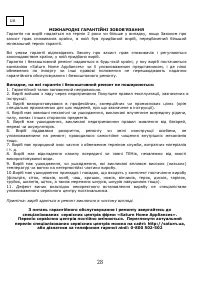
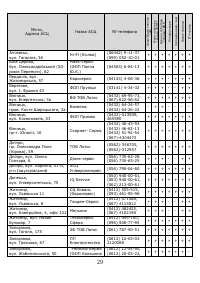
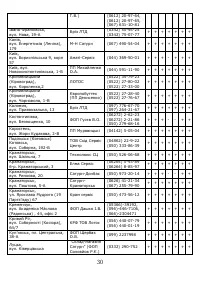
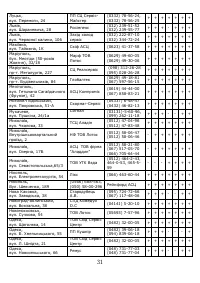
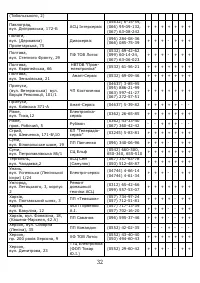
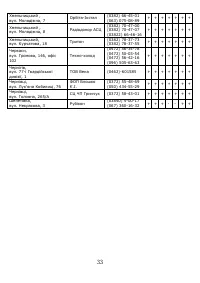
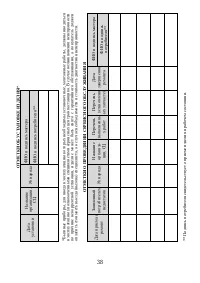
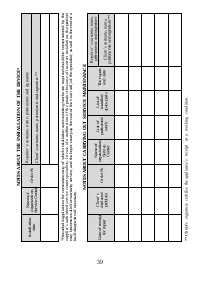

Table of Contents:
- Page 6 – Operation instruction
- Page 8 – Описание соковыжималки
- Page 10 – Эксплуатация
- Page 14 – Експлуатація
- Page 17 – INTERNATIONAL MANUFACTURER’S WARRANTY; services and free of charge repair.; Cases uncovered by the warranty and free of charge repair:; Guarantee coupon is filled in improperly.; centers of “Saturn Home Appliances”.; GB
- Page 18 – Poznámka: výrobek se musi dávat na opravu pouze v čisté podobě.; střediska společnosti „Saturn Home Appliances“.; CZ
- Page 19 – МЕЖДУНАРОДНЫЕ ГАРАНТИЙНЫЕ ОБЯЗАТЕЛЬСТВА; Примечание: изделие сдается в ремонт исключительно в чистом виде.; По вопросам гарантийного обслуживания и ремонта обращайтесь в
- Page 29 – Примітка: виріб здається в ремонт виключно в чистому вигляді.; З питань гарантійного обслуговування і ремонту звертайтесь до
- Page 36 – RU; UA
"Loading the manual" means you need to wait until the file loads and becomes available for online reading. Some manuals are very large, and the time they take to appear depends on your internet speed.
Summary
5 3. Align screen cylinder with the feed cylinder (See Figure 3); 4. Take out rotor to align it with motor shaft (See Figure 4); 5. Take the pushing rod and insert it into surface cover (See Figure 5); 6. Keep the unlocking mark on surface cover in alignment with the triangle mark on the feed cylind...
7 менее 1,5 часов. Ввод устройства в эксплуатацию после транспорти- ровки производить не ранее, чем через 1,5 часа после внесения его в помещение. Пожалуйста, внимательно прочитайте все инструкции перед эксплуатацией. Описание соковыжималки 1. Применяется для приготовления сока из овощей и фруктов, ...
9 3. Вставьте сито с ободком в прозрачный цилиндр (Рисунок 3); 4. Наденьте шнек на вал мотора (Рисунок 4); 5. Вставьте толкатель в загрузочное отверстие (Рисунок 5); 6. Совместите отметку на крышке с треугольником на прозрачном цилиндре (Рисунок 6); 7. Поверните по часовой стрелке, чтобы закрепить, ...