Page 2 - Table of Contents
Table of Contents Welcome to Sprint . . . . . . . . . . . . . . . . . . . . . . . . . . . . . . . . . . . . . . . . . . . .iIntroduction to this User’s Guide . . . . . . . . . . . . . . . . . . . . . . . . . . . .iiiSection 1: Getting Started . . . . . . . . . . . . . . . . . . . . . . . . . . . . ....
Page 6 - Welcome to Sprint
Welcome to Sprint S print built the largest all-digital, all-PCS nationwide networkwith advanced multimedia services, reaching more than 230 million people for clarity you can see and hear. We built our network to give you what we believe you really want from a wireless phone, clear sound, private c...
Page 8 - Getting Started; Section 1
Page 9 - Section 1A; Setting Up Service; In This Section; Getting Started With PCS Service; Section 1: Getting Started
Section 1A Setting Up Service In This Section 䊳 Getting Started With PCS Service 䊳 Setting Up Voicemail 䊳 Getting Help T his section walks you through setting up service for your PCS Phone, unlocking your phone, setting up your voicemail, and how to contact Sprint for assistance with your PCS Servic...
Page 10 - Visiting Our Web Site; Determine if Your Phone is Already Activated; Activating Your Phone
Setting Up Your Voicemail All unanswered calls to your PCS Phone are automaticallytransferred to voicemail, even if your phone is in use or turnedoff. Therefore, you will want to set up your voicemail andpersonal greeting as soon as your PCS Phone is activated. To set up voicemail: 1. Press and hold...
Page 11 - Section 2; Reaching PCS Customer Service Solutions; Receiving Automated Usage and Invoicing Information; PCS Directory Assistance
Understanding Your PCS Phone Section 2 Reaching PCS Customer Service Solutions SM You can reach PCS Customer Service Solutions by: 䊳 Dialing on your PCS Phone 䊳 Logging on to your account at www.sprintpcs.com 䊳 Calling us toll-free at 1-888-211-4727 (Consumer customers),1-877-CLEARPY (253-2779) (Cle...
Page 12 - Section 2A; Your PCS Phone: The Basics; Section 2: Understanding Your PCS Phone
Section 2A Your PCS Phone: The Basics In This Section 䊳 Front View of Phone 䊳 Viewing the Display Screen 䊳 Features of Your Phone 䊳 Turning Your Phone On and Off 䊳 Using the Battery and Charger 䊳 Displaying Your Phone Number 䊳 Making and Answering Calls Y our PCS Phone is packed with features that s...
Page 13 - Front View of Phone; Your Phone’s Features
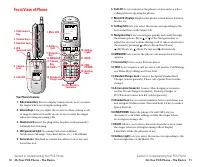
6.Sub LCD: Lets you monitor the phone’s status and see who’s calling without opening the phone. 7.Main LCD (display): Displays the phone’s main menu, features, modes, etc. 8.Softkey (left): Lets you select the menu corresponding to the bottom left line on the Main LCD. 9.Navigation Key: Lets you nav...
Page 14 - Viewing the Display Screen
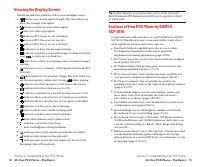
Tip: Display indicators let you know when you’re off the enhanced Sprint Nationwide PCS Network and whether you’re operating in digital or analog mode. Features of Your PCS Phone by SANYO SCP-8100 Congratulations on the purchase of your PCS Phone by SANYOSCP-8100. This phone is easy-to-use and relia...
Page 15 - Installing the Battery; Turning Your Phone ON and OFF; Turning Your Phone ON; Turning Your Phone OFF; Using the Battery; Battery Capacity
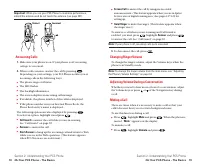
When the battery reaches 5% of its capacity, the battery icon appears. When there are approximately five minutes of talk timeleft, the phone sounds an audible alert and then powers down. Note: Long backlight settings, searching for service, vibrate mode, and browser use affect the battery’s talk and...
Page 16 - Displaying Your Phone Number; Phone Info; Making and Answering Calls; Making Calls; Roam Call; Charging the Battery
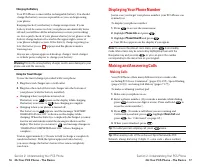
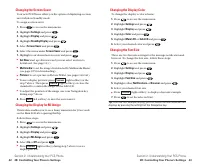
Displaying Your Phone Number Just in case you forget your phone number, your PCS Phone can remind you. To display your phone number: 1. Press to access the main menu. 2. Highlight Phone Info and press . 3. Highlight Phone# UserID and press . 䊳 User ID also appears on the display if you sign in. Note...
Page 17 - Changing Ringer Volume; Adjusting Volume During a Conversation; Answering Calls
䊳 Screen Call to answer the call by using pre-recorded announcement. (This feature appears when you are in SprintService area or digital roaming area.) See pages 127-129 forsetting up. 䊳 Quiet Ringer to mute the ringer. (This feature appears when the ringer is set.) To answer a call when you are roa...
Page 18 - Dialing Options; Call; Find; Missed Call Notification; Calling Emergency Numbers; Exit Emergency
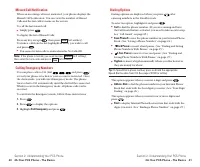
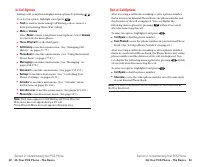
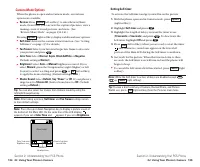
Dialing Options Dialing options are displayed when you press after entering numbers in the Standby mode. To select an option, highlight it and press . 䊳 Call to dial the phone number. (If you are roaming and have the Call Guard feature activated, you need to take an extra step.See “Call Guard” on pa...
Page 20 - Saving a Phone Number
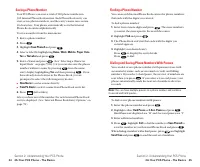
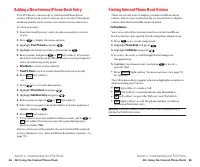
Finding a Phone Number You can search Internal Phone Book entries for phone numbersthat ends with the digits you entered. To find a phone number: 1. Enter four or more digits and press . The more numbers you enter, the more specific the search becomes. 2. Highlight Find and press . 3. The Phone Book...
Page 21 - Using One-Touch Speed Dialing; Dialing From the Internal Phone Book; Phone Book
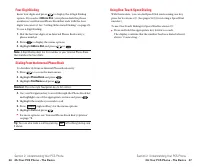
Using One-Touch Speed Dialing With this feature, you can dial Speed Dial entries using one keypress for locations 2-9. (See pages 92-93 for storing a Speed Dialnumber.) To use One-Touch Dialing for Speed Dial locations 2-9: 䊳 Press and hold the appropriate key for few seconds.The display confirms th...
Page 22 - Section 2B
Section 2B Controlling Your Phone’sSettings In This Section 䊳 Sound Settings 䊳 Display Settings 䊳 Location Settings 䊳 Airplane Mode 䊳 TTY Access 䊳 Phone Setup Options T his section describes how you can change your phone’ssettings to best suit your needs. Take a few moments to review these options a...
Page 23 - Sound Settings; Ringer Types
Selecting Ringer Types for Voicemail To select a ringer type for voicemail: 1. Press to access the main menu. 2. Highlight Settings and press . 3. Highlight Sounds and press . 4. Highlight Ringer Type and press . 5. Highlight Voicemail and press . 6. Select the menu under Voicemail and press . 7. Hi...
Page 24 - Using Voice Prompt; Selecting a Tone Length
Setting a Start-up/Power-off Tone 1. Follow the steps 1 to 4 above. 2. Select the menu under Start-up Tone or Power-off Tone and press . 3. Highlight your desired option and press . 䊳 Get New: start up a Browser and you can select an item to download. (See page 112.) 䊳 Multimedia: to set the ringer ...
Page 25 - Alert Notification; Adjusting the Phone’s Volume Settings
Alert Notification Your phone comes with several different options to keep youaware of what’s going on by sounding the alert or ringer. 䊳 Service sets alert On or Off for network services parameter changes. 䊳 Voicemail sets alert to notify you of caller’s message(s). 䊳 Messaging sets alert to notify...
Page 26 - Display Settings; Changing the Greeting; Silence All
Display Settings Changing the Greeting The greeting can be up to 12 characters and is displayed on thefirst line of your phone’s display screen in Standby mode. Youmay choose to display a custom greeting or you may display yourPCS User name on the phone’s screen (the default setting). To display or ...
Page 27 - Changing the Display Screen; Changing the Backlight Time Length
Changing the Display Screen Your new PCS Phone offers animation for what you see on thedisplay screen when in Standby mode, Outgoing Calls or ServiceSearch. To change the Animation: 1. Press to access the main menu. 2. Highlight Settings and press . 3. Highlight Display and press . 4. Highlight Anim...
Page 28 - Changing the Display for the Standby Mode; Changing the Display for Incoming Calls
Changing the Display for the Standby Mode This feature enables you to select a variety of items to display onthe Standby mode. Follow these steps: 1. Press to access the main menu. 2. Highlight Settings and press . 3. Highlight Display and press . 4. Highlight Standby Display and press . 5. Select y...
Page 29 - Changing the Screen Saver
Changing the Display Color To change the display’s color scheme: 1. Press to access the main menu. 2. Highlight Settings and press . 3. Highlight Display and press . 4. Highlight Color and press . 5. Highlight Main LCD or Sub LCD and press . 6. Select your desired color and press . Changing the Font...
Page 30 - Airplane Mode; Location Settings
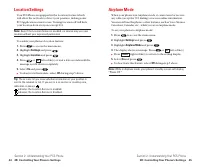
Airplane Mode When your phone is in Airplane mode, it cannot send or receiveany calls (except for 911 dialing) or access online information.You may still use the phone’s other features, such as Voice Memos,Calculator, Calendar, etc., while you are in Airplane mode. To set your phone to Airplane mode...
Page 31 - Phone Setup Options; My Shortcut; TTY Use With PCS Service From Sprint
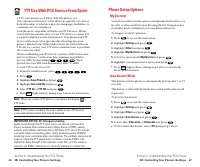
Phone Setup Options My Shortcut Your phone offers you the option of assigning a shortcut key to afavorite or often-used function. Pressing the left Navigation keyin standby mode will launch your user-defined shortcut. To assign your shortcut menu: 1. Press to access the main menu. 2. Highlight Setti...
Page 32 - Setting Abbreviated Dialing; Headset Mode; Setting Call Answer
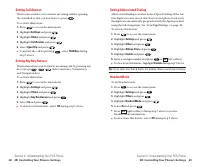
Setting Abbreviated Dialing Abbreviated Dialing is another form of Speed Dialing. If the lastfour digits you enter do not match any stored phone book entry,the digits are automatically prepended with the digits specifiedusing the following steps. See “Four-Digit Dialing” on page 26. To activate this...
Page 33 - Setting Side Key Guard; Sleep Mode
Setting Message Notification You can see message notification when you receive a textmessage or Voicemail while you are in PCS Vision applications orBrowser mode. 1. Press to access the main menu. 2. Highlight Settings and press . 3. Highlight Messaging and press . 4. Check the box next to Games/App...
Page 34 - Section 2C; Setting Your Phone’s Security; Accessing the Security Menu
Section 2C Setting Your Phone’s Security In This Section 䊳 Accessing the Security Menu 䊳 Locking Your Phone 䊳 Unlocking Your Phone 䊳 Using Special Numbers 䊳 Security Features for PCS Vision SM B y adjusting the security settings on your PCS Phone, youreceive peace of mind without sacrificing f lexib...
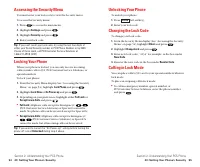
Page 35 - Locking Your Phone
Unlocking Your Phone To unlock your phone: 1. Press (left softkey). 2. Enter your lock code. Changing the Lock Code To change your lock code: 1. From the Security Menu display (See “Accessing the SecurityMenu” on page 54), highlight Others and press . 2. Highlight Change Lock and press . 3. Enter ne...
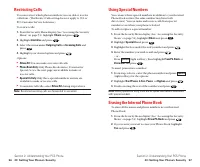
Page 36 - Using Special Numbers; Erasing the Internal Phone Book; Restricting Calls
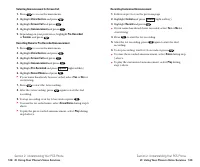
Using Special Numbers You can save three special numbers in addition to your InternalPhone Book entries (the same number may be in bothdirectories). You can make and receive calls from specialnumbers even when your phone is locked. To add or replace a special number: 1. From the Security Menu displa...
Page 37 - Resetting and Locking Your Phone through SMS; Erasing the Downloads
Resetting and Locking Your Phone through SMS When your phone is lost or stolen, you can erase your importantpersonal information (such as phone book entries, call history,and messages) and lock your phone by sending a specialformatted SMS message to your phone. From your computer, log on to www.spri...
Page 38 - Section 2D
Section 2D Controlling Your RoamingExperience In This Section 䊳 Understanding Roaming 䊳 Setting Your Phone’s Roam Mode 䊳 Controlling Roaming Charges Using Call Guard R oaming is the ability to make or receive calls when you’re offthe enhanced Sprint Nationwide PCS Network. Your new dual band/tri mod...
Page 39 - Roaming on Analog Networks; Understanding Roaming; Recognizing Icons on the Display Screen; Roaming on Digital Networks
Roaming on Analog Networks When you roam on analog networks, you will experience asimilar quality provided by other analog carriers today. Althoughsome features, such as PCS Vision and PCS Voice Command, willbe unavailable, you can still make and receive calls and accessvoicemail. You will experienc...
Page 40 - Controlling Roaming Charges Using Call Guard; Setting Your Phone’s Roam Mode
Controlling Roaming Charges Using Call Guard In addition to the roaming icon, Call Guard alerts you whenroaming charges apply. This feature makes it easy to manageyour roaming charges by reminding you when you make orreceive roaming calls. It also requires you to take an additionalstep before placin...
Page 41 - Section 2E; Navigating Through Menus; Menu Navigation
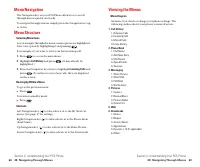
Section 2E Navigating Through Menus In This Section 䊳 Menu Navigation 䊳 Menu Structure 䊳 Viewing the Menus T his section is a road map for using your PCS Phone. Everyfunction and feature can be accessed through a menu. Take a few moments to learn your way around, you’ll find that it makesyour phone ...
Page 42 - Viewing the Menus
Viewing the Menus Menu Diagram Menus let you check or change your phone settings. Thefollowing outline shows your phone’s menu structure. 1. Call History 1. Outgoing Calls2. Incoming Calls3. Missed Calls4. Erase History 2. Phone Book 1. Find Name2. Add New Entry3. My Phone#4. Speed Dial #s5. Service...
Page 43 - Section 2F; Managing Call History; Viewing History
Section 2F Managing Call History In This Section 䊳 Viewing History 䊳 Call History Options 䊳 Making a Call From Call History 䊳 Saving a Phone Number From Call History 䊳 Erasing Call History T he Call History keeps track of incoming calls, calls made fromyour PCS Phone, and missed calls. This section ...
Page 44 - Making a Call From Call History; Saving a Phone Number From Call History
Making a Call From Call History To place a call from Call History: 1. Press to access the main menu. 2. Highlight Call History and press . 3. Highlight Outgoing Calls , Incoming Calls , or Missed Calls . 4. Press . 5. Highlight the entry you want to call by scrolling through the list. 6. Press . – o...
Page 45 - Erasing Call History; Prepending a Phone Number From Call History
Erasing Call History To erase individual Call History entries, see “Call HistoryOptions” on page 72. To erase Call History: 1. Press to access the main menu. 2. Highlight Call History and press . 3. Highlight Erase History and press . 4. Highlight the category you want to erase and press . 5. Highli...
Page 46 - Section 2G; Using the Internal Phone Book; Internal Phone Book Entry Options
Section 2G Using the Internal Phone Book In This Section 䊳 Internal Phone Book Entry Options 䊳 Adding a New Internal Phone Book Entry 䊳 Finding Internal Phone Book Entries 䊳 Selecting a Ringer Type 䊳 Dialing PCS Services N ow you know the basics that make it easier to stay in touchwith people and in...
Page 47 - Selecting a Character Input Mode; Entering Characters Using T9 Text Input
Selecting a Character Input Mode Your PCS Phone provides convenient ways to enter words, letters,punctuation, and numbers whenever you are prompted to entertext (for example, when adding an Internal Phone Book entry). To change the character input mode: 1. When you display a screen where you can ent...
Page 48 - Entering Characters by Tapping the Keypad; Adding a Word to the T9 Database; Alphabet
Entering Characters by Tapping the Keypad To enter characters by tapping the keypad, select the Alphabet mode (see “Selecting a Character Input Mode” on page 79).Press the corresponding key until the desired character appears.By default, the first letter of a word is capitalized and followingletters...
Page 49 - Using Smart Punctuation; Entering Numbers, Symbols, Canned Suffix and Smileys
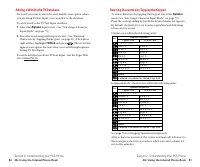
Entering CANNED SUFFIX To enter canned suffix, select the CANNED SUFFIX mode. (See “Selecting a Character Input Mode” on page 79.) 1. In a text entry field, press the right softkey. 2. Highlight CANNED SUFFIX and press . 3. Highlight your desired word by using the Navigation key andpress . Entering ...
Page 50 - Finding Internal Phone Book Entries; Adding a New Internal Phone Book Entry
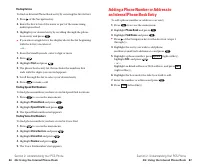
Finding Internal Phone Book Entries There are several ways to display your Internal Phone Bookentries. Follow steps outlined in the sections below to displayentries from the Internal Phone Book menu. Finding Names You can review all the entries stored in your Internal PhoneBook or find an entry quic...
Page 52 - Selecting a Ringer/Image Type for an Entry; Editing an Internal Phone Book Entry
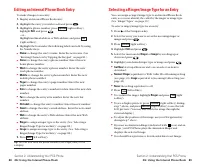
Selecting a Ringer/Image Type for an Entry You can assign a ringer/image type to an Internal Phone Bookentry so you can identify the caller by the ringer or image type.(See “Ringer Types” on page 30.) To select a ringer/image type for an entry: 1. Press of the Navigation key. 2. Select the entry you...
Page 53 - Storing Special Numbers in the Phone Book; Secret Internal Phone Book Entries; Dialing PCS Services
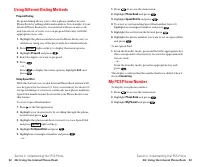
Storing Special Numbers in the Phone Book Using the Pause Feature Generally, when you call an automated system like voicemail boxesor credit card companies, you are required to enter a password orcalling card number. Rather than entering the numbers manuallyeach time, you can store the numbers in yo...
Page 54 - My PCS Phone Number; Using Different Dialing Methods
1. Press to access the main menu. 2. Highlight Phone Book and press . 3. Highlight Speed Dial #s and press . 4. To select a corresponding Speed Dial number from 2-9,highlight an unassigned number and press . 5. Highlight the entry from the list and press . 6. Highlight the phone number you want to s...
Page 55 - Section 2H; Personal Organizer
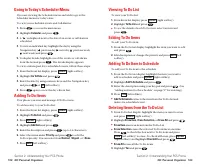
Section 2H Personal Organizer In This Section 䊳 Managing Schedules 䊳 Adding an Event to the Schedule 䊳 Event Alerts 䊳 Viewing Events 䊳 Personal Information Management 䊳 Using Your Phone’s Tools Y our PCS Phone is equipped with several personal informationmanagement features that help you manage your...
Page 56 - Adding an Event to the Scheduler; Managing Schedules
Adding an Event to the Scheduler Your Scheduler helps organize your time and reminds you ofimportant events. To add an event: 1. Press to access the main menu. 2. Highlight Calendar and press . 3. Highlight the day you want to add an event by using theNavigation key and press . 4. Press (right softk...
Page 57 - Event Alerts
Editing an Event 1. From the Event list display, highlight one of the events andpress . 2. The event details appear. 3. Select the box under each item you want to edit and press . (See “Adding an Event to the Scheduler” on page 97 for options.) 4. Enter or select a new setting and press . 5. Press (...
Page 58 - Call Alarm Alerts
Editing a Call Alarm 1. From the Event list display, highlight one of the call alarms andpress . 2. The call alarm details appear. 3. Select the box under each item you want to edit and press . (See “Adding a Call Alarm to the Scheduler” on page 99 for options.) 4. Enter or select a new setting and ...
Page 60 - Viewing Event, Call Alarm or To Do List
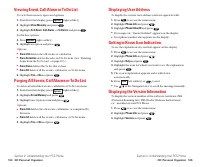
Displaying User Address To display the current user address you have signed in with: 1. Press to access the main menu. 2. Highlight Phone Info and press . 3. Highlight Phone# UserID and press . 䊳 If you sign out, “Vision Disabled” appears on the display. 䊳 Your phone number also appears on the displ...
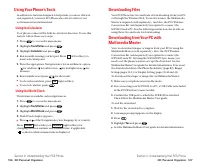
Page 61 - Downloading Files; Yes; Using Your Phone’s Tools; Using the Calculator; Calculator; Using the World Clock; World Clock
Downloading Files Your PCS Phone has two methods of downloading: from your PCor through the Wireless Web. To use the former, the MultimediaMaster is required (sold separately). And also, the PCS WirelessConnection Kit (sold separately) is required to connect the SCP-8100 and a PC. See the following ...
Page 62 - Type; Item
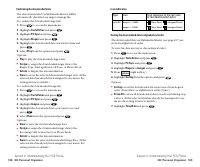
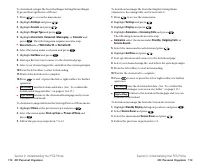
Icon Indication Sorting the downloaded data in alphabetical order The downloaded files via Multimedia Master (see page 107) arestored in alphabetical order. To store the data in reverse chronological order: 1. Press to access the main menu. 2. Highlight Tools/Extras and press . 3. Highlight PC Sync ...
Page 63 - Erasing All Downloaded Data
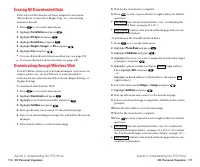
8. Wait for the download to complete. 9. Press to end, or press the left or right softkey for further operation. 䊳 runs the downloaded data. (See “Confirming the Downloaded Data” on pages 114-117.) 䊳 returns to the download homepage and you can continue to download. To download a file from Phone Boo...
Page 65 - Confirming the Downloaded Data
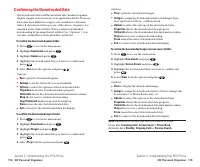
Options 䊳 Play to play the downloaded ringer. 䊳 Assign to assign the downloaded data to the Ringer Type, Start-up/Power-off Tone, or Phone Book. 䊳 Options to select the options of the downloaded data. Properties shows the downloaded data property. Online Info shows the downloaded data information on...
Page 67 - Viewing the Downloaded Data Size
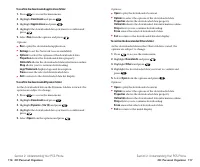
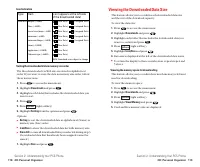
Viewing the Downloaded Data Size This feature allows you to confirm each downloaded data sizeand the rest of the download capacity. To view the data size: 1. Press to access the main menu. 2. Highlight Downloads and press . 3. Highlight each folder that includes the downloaded data youwant to confir...
Page 68 - Section 2I; Using Voice-Activated Dialing; Erasing old downloaded data to free space for new data
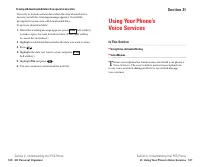
Section 2I Using Your Phone’s Voice Services In This Section 䊳 Using Voice-Activated Dialing 䊳 Voice Memos T his section explains the features associated with your phone’sVoice Services. The easy-to-follow instructions explain how to use voice-activated dialing and how to record and manage voice mem...
Page 69 - Erasing All Voice Dial Tags; Programming Voice Dial Tag to Your Phone
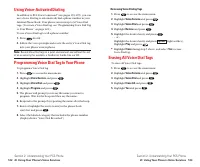
Reviewing Voice Dialing Tags 1. Press to access the main menu. 2. Highlight Voice Service and press . 3. Highlight Voice Dial and press . 4. Highlight Review and press . 5. Highlight the desired entry and press . – or –Highlight the desired entry and press (right softkey). Highlight Play and press ....
Page 70 - Voice Memo Options; Recording Voice Memos
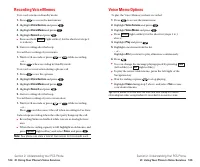
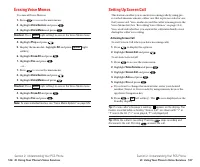
Voice Memo Options To play the Voice Memos you have recorded: 1. Press to access the main menu. 2. Highlight Voice Service and press . 3. Highlight Voice Memo and press . 䊳 Press (right softkey) for the shortcut (steps 1 to 3 above). 4. Highlight Play and press . 5. Highlight one memo from the list....
Page 71 - Setting Up Screen Call; Erasing Voice Memos
Setting Up Screen Call This feature enables you to answer incoming calls by using pre-recorded announcements, either one that is pre-recorded or onethat you record. You can also record the caller’s message into theVoice Memo list (See “Recording Voice Memos” on page 124).You can decide whether you a...
Page 73 - Section 2J; Using Your Phone’s Camera; Taking Pictures; Storing Pictures
Section 2J Using Your Phone’s Camera In This Section 䊳 Taking Pictures 䊳 Sharing Picture Mail SM 䊳 Storing Pictures 䊳 Managing Picture Mail SM Y our PCS Phone gives you the ability to take full-color digitalpictures, view your pictures using the phone’s display, and instantly share them with your fa...
Page 74 - Password; To Take a Picture With the Phone Open:
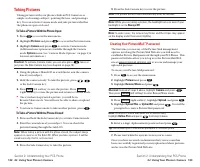
4. Press the Side Camera key to save the picture. Note: The picture will be saved automatically after 30 seconds. Note: While you are taking a picture, the backlight turns on even if your backlight is set to Always Off . Note: In some cases, the screen may flicker and the stripes may appear on the d...
Page 75 - Camera Mode Options
Setting Self-timer To activate the Self-timer and get yourself in on the picture: 1. With the phone open and in Camera mode, press (right softkey). 2. Highlight Self-timer and press . 3. Highlight the length of delay you want the timer to use ( 10 seconds or 5 seconds ) and press . To deactivate the...
Page 76 - Sharing Picture Mail; Sharing Picture Mail from Review/Share Mode
Note: The and icons next to contact’s names represent Mobile Phone and email. When entering a new contact, use the left/rightNavigation key to toggle to the correct icon for the entry. Note: Only the email address OR the phone number may be selected for a recipient. To change the default once the ne...
Page 77 - Sharing Picture Mail from Messaging
Press (right softkey) to display the following options: 䊳 Camera to switch to Camera mode. 䊳 Save to Wallet to save a picture to the Picture Wallet. (See “Picture Wallet”on pages 140-141.) 䊳 Upload to select Upload This or Upload All to upload a single picture or all pictures saved in Review/Share m...
Page 78 - Picture Wallet; To save a picture to the Picture Wallet:
5. Using the Navigation key, select a desired picture. 6. To expand the selected picture, press or (left softkey). 7. Press (right softkey) to display a list of options for the selected picture. To select an option, highlight it and press . 䊳 Incoming Calls to display the selected picture for all in...
Page 79 - Sharing Online Picture Mail; To share an album from online mode:; Using the Picture Mail Web Site; To access the Picture Mail Web site:; Managing Online Picture Mail From Your PCS Phone; To view your online Picture Mail from your PCS Phone:
5. Thumbnail pictures appear (up to four per screen). Use yourNavigation key to select a picture. Tip: To expand a selected picture from thumbnail to full-screen, highlight it and press (left softkey) or . Sharing Online Picture Mail 1. From the online Picture Mail InBox, select a picture you wishto...
Page 80 - To access your online Albums options from your PCS Phone:; Accessing Online Picture Mail Options From Your PCS Phone
To access your online Albums options from your PCS Phone: 1. Display the album list in the online Picture Mail menu. (See“Managing Online Picture Mail From Your PCS Phone” onpages 142-143). 2. Use your Navigation key to select an album (or InBox). 3. Press (right softkey) to display options. 4. To s...
Page 81 - Section 3
Page 82 - Section 3A; Using Voicemail; Section 3: Using PCS Service Features
Section 3A PCS Service Features: The Basics In This Section 䊳 Using Voicemail 䊳 Using Caller ID 䊳 Responding to Call Waiting 䊳 Making a Three-Way Call 䊳 Using Call Forwarding N ow that you’ve mastered your phone’s fundamentals, it’s timeto explore the calling features that enhance your PCS Service. ...
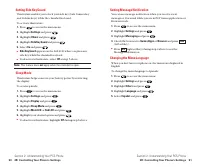
Page 83 - Retrieving Your Voicemail Messages; Using the Menu Keys on Your PCS Phone to Access Your Messages:; Setting Up Your Voicemail
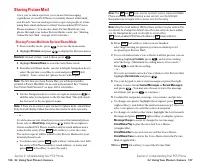
Retrieving Your Voicemail Messages You can review your messages directly from your PCS Phone orfrom any other touch-tone phone. To dial from your PCS Phone,you can either Speed Dial your voicemail or use the menu keys. Using One-Touch Message Access: 䊳 Press and hold . Follow the system prompts. Usi...
Page 84 - Voicemail Options; Using Expert Mode
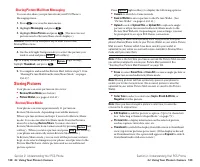
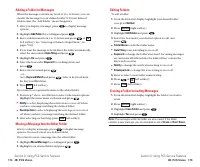
Voicemail-to-Voicemail Message Record and send a voice message to other PCS Voicemail users. 1. From the main voicemail menu, press to send a message. 2. Follow the voice prompts to enter the phone number. 3. Follow the voice prompts to record and send your voicemessage. Voicemail-to-Voicemail Messa...
Page 85 - Voicemail Menu Key; Extended Absence Greeting; Clearing the Message Icon; Voicemail
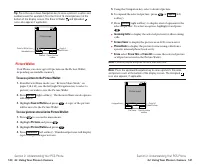
Voicemail Menu Key Listen Envelope Information Send a Reply Message Advance 8 Seconds Rewind to Start Forward Message Erase Message Callback/Place Call Save Message Send a Message Personal Options Notification Options Phone Notification Numeric Paging to a PCS Phone Return to Personal Options Menu A...
Page 86 - Making a Three-Way Call; Using Caller ID; Flash
Making a Three-Way Call With Three-Way Calling, you can talk to two people at the sametime. When using this feature, the normal airtime rates will becharged for each of the two calls. 1. Enter a number you wish to call and press . 2. Once you have established the connection, press (or press , highli...
Page 87 - Section 3B; PCS Vision; Using Call Forwarding
Section 3B PCS Vision SM In This Section 䊳 Web 䊳 Messaging 䊳 Pictures 䊳 Games 䊳 Ringers 䊳 Screen Savers 䊳 PCS Business Connection SM P CS Vision SM brings you clarity you can see and hear with always-on, advanced multimedia services. These features, including email, pictures, and games are easy to l...
Page 88 - Your User Name; Launching the Web
Your User Name When you use PCS Vision services, your User name is submittedto identify you to the enhanced Sprint Nationwide PCSNetwork. The User name is also useful as an address for email asa way to personalize Internet services, and as an online virtualidentity. A User name is typically based on...
Page 89 - Signing In and Out of PCS Vision Services
Scrolling As with other parts of your phone’s menu, you’ll have to scrollup and down to see everything on some Web sites. 䊳 Press the Navigation key up and down to scroll line by line orpress the Volume keys on the side of the phone to scroll onepage at a time. Selecting Once you’ve learned how to u...
Page 91 - Setting Up a Web Connection; Placing a Data Call
Using Special Features During a Web Call Your phone gives you the ability to use special features whileyou’re on a Web call. They are outlined below: 䊳 Call Waiting: If someone tries to reach you while you’re connected to the Web, your phone behaves like it is turnedOFF. Depending on your service, c...
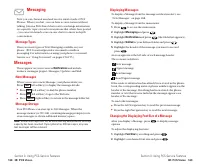
Page 92 - Displaying Messages; Changing the Displaying Font Size of a Message; Font Size; Messaging; Message Types; Messages; Notifications; New Messages
Displaying Messages To display a Message from the message notification alert, see“New Messages” on page 168. To display a Message from the main menu: 1. Press to access the main menu. 2. Highlight Messaging and press . 3. Highlight Notifications and press (the folder list appears). 4. Highlight Unfi...
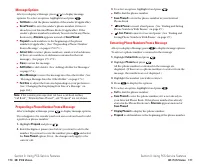
Page 93 - Extracting Phone Numbers From a Message; Message Options; Prepending a Phone Number From a Message
3. To select an option, highlight it and press . 䊳 Call to dial the phone number. 䊳 Save Phone# to store the phone number in your Internal Phone Book. 䊳 Hard Pause to insert a hard pause. (See “Dialing and Saving Phone Numbers With Pauses” on page 25.) 䊳 2-Sec. Pause to insert a 2-second pause. (See...
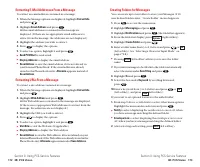
Page 94 - Creating Folders for Messages; Extracting E-Mail Addresses From a Message
Creating Folders for Messages You can create up to ten folders to store your Messages. If 10user defined folders exist, “Create Folder” menu diappears. 1. Press to access the main menu. 2. Highlight Messaging and press . 3. Highlight Notifications and press (the folder list appears). 4. From the fol...
Page 95 - Adding a Folder for Messages
Editing Folders To edit a folder: 1. From the folder list display, highlight your desired folderexcept for Unfiled . 2. Press (right softkey). 3. Highlight Edit Folder and press . 4. Select the box under your desired option to edit, and press . 䊳 Folder Name to edit the folder name. 䊳 Auto Filing to...
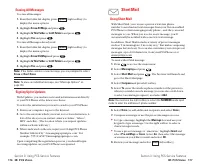
Page 96 - Short Mail; Using Short Mail; Erasing All Messages
Short Mail Using Short Mail With Short Mail, you can use a person’s wireless phone number to send instant text messages from your Vision-enabledPCS Phone to their messaging-ready phone – and they can sendmessages to you. When you receive a new message, you’llautomatically be notified with a one-way ...
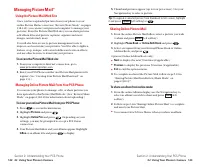
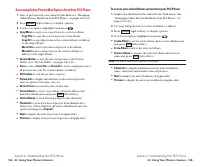
Page 97 - PCS Mail; Using PCS Mail
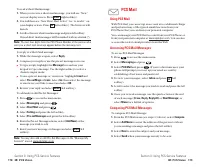
PCS Mail Using PCS Mail With PCS Mail, you can set up an account at no additional chargeand perform many of the typical email functions from your PCS Phone that you can from your personal computer. You can manage your PCS Mail Account from your PCS Phone orfrom your personal computer at www.sprintpc...
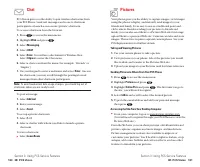
Page 98 - Pictures; Chat
Pictures Your phone gives you the ability to capture images, view imagesusing the phone’s display, and instantly send images to yourfriends and family. It’s as easy to use as a traditional point-and-click camera. Besides sending your pictures to friends andfamily, you can also send them to a Picture...
Page 100 - Games
Playing Games To play a downloaded game on your PCS Phone: 1. Press to access the main menu. 2. Highlight Downloads and press . 3. Highlight Games and press . 4 . Select the game you wish to play. 5. If applicable, a prompt will display the days remaining on the game license and ask if you want to c...
Page 101 - Ringers
Assigning Downloaded Ringers Downloaded ringers may be assigned directly from theDownloads menu and are also available through the Settings menu. To assign a downloaded ringer through the Settings menu, see“Selecting Ringer Types for Voice Calls” on page 30, “SelectingRinger Types for Voicemail” on ...
Page 102 - Screen Savers
Assigning Downloaded Screen Savers (Images) Downloaded Screen Savers may be assigned directly from the Downloads menu and are also available through the Settings menu. To assign a downloaded Screen Saver through the Settingsmenu, see “Changing the Display Screen” on page 39,“Changing the Display for...
Page 103 - PCS Vision FAQs; Personal Edition
PCS Vision FAQs How will I know when my phone is ready for PCS Vision service? Your User name (for example, [email protected]) willdisplay on your phone’s display screen. How do I sign-in for the first time? You are automatically signed in to access PCS Vision serviceswhen you turn on your phone. Ho...
Page 104 - Section 3C; PCS Voice Command; Getting Started with PCS Voice Command; Creating Your Own Address Book
Section 3C PCS Voice Command SM In This Section 䊳 Getting Started with PCS Voice Command SM 䊳 Creating Your Own Address Book 䊳 Making a Call with PCS Voice Command 䊳 Accessing Information Using PCS Voice Command W ith Sprint, the first wireless provider to offer innovative PCS Voice Command technolo...
Page 105 - Call Directory Assistance:; Making a Call With PCS Voice Command; Getting Started With PCS Voice Command; It’s Easy to Get Started; Use Voice Recordings:
䊳 Call Directory Assistance: If you don’t have a computer or Internet access handy, you can have PCS Directory Assistancelook up phone numbers for you and automatically add themto your address book. Just say “Call operator” and we’ll addtwo names and numbers to your address book for ourstandard dire...
Page 106 - Section 4
Safety Guidelines and Warranty Information Section 4
Page 107 - Section 4A; Safety; Getting the Most Out of Your Reception; Section 4: Safety Guidelines and Warranty Information
Section 4A Safety In This Section 䊳 Getting the Most Out of Your Reception 䊳 Maintaining Safe Use of and Access to Your Phone 䊳 Caring for the Battery 䊳 Acknowledging Special Precautions and the FCC Notice 䊳 Consumer Information on Wireless Phones P art of getting the most out of your PCS Phone is l...
Page 109 - Following Safety Guidelines
Turning Off Your Phone Before Flying Turn off your phone before boarding any aircraft. To preventpossible interference with aircraft systems, the U.S. FederalAviation Administration (FAA) regulations require you to havepermission from a crew member to use your phone while theplane is on the ground. ...
Page 110 - FCC Notice; Caring for the Battery; Protecting Your Battery
Acknowledging Special Precautions and theFCC Notice FCC Notice The phone may cause TV or radio interference if used in closeproximity to receiving equipment. The FCC can require you tostop using the phone if such interference cannot be eliminated. Vehicles using liquefied petroleum gas (such as prop...
Page 111 - Specific Absorption Rates (SAR) for Wireless Phones; FCC Radiofrequency Emission; Cautions
Specific Absorption Rates (SAR) for Wireless Phones The SAR is a value that corresponds to the relative amount of RFenergy absorbed in the head of a user of a wireless handset. The SAR value of a phone is the result of an extensive testing,measuring and calculation process. It does not represent how...
Page 112 - Section 4B; Manufacturer’s Warranty; Owner’s Record
Section 4B Manufacturer’s Warranty In This Section 䊳 Manufacturer’s Warranty T his section contains the manufacturer’s warranty for your PCS Phone. For information about the Terms and Conditions of your PCS Service, please see the Start Here guide included with your phone. For the most recent versio...
Page 113 - Customer Limited Warranty
This warranty does not cover customer education, instruction,installation, set up adjustments, or signal reception problems.This warranty is valid only in the United States.USE WITH ACCESSORIES NOT SUPPLIED BY SPRINT OROTHERWISE NOT EXPRESSLY AUTHORIZED BY SPRINT MAYBE DANGEROUS.SPRINT SPECIFICALLY ...
Page 114 - Index
Index 213 Index A Airplane Mode 45Answering Calls 18-19 B Backlight 38Battery Capacity 14-15Charging 16Disposal 204Installing 15Removing 15 C Call Guard 65Call History Erasing 75Making a Call From 73Options 72Saving a Phone Number From 73-74 Viewing 72 Camera Camera Mode Options 134-135Managing Pict...


 Sanyo 21VF1K Manual
 Sanyo 36TS32A Manual
 Sanyo 36UW72R Manual
 Sanyo 550 Manual
 Sanyo 2020 Manual
 Sanyo 8200 Manual
 Sanyo 85464369098000 Manual
 Sanyo ABC-VW24A Manual
 Sanyo AHX1252 Manual
 Sanyo AVL-408 Manual
 Sanyo AVM-32F4, AVM32F9 Manual
 Sanyo AVM-1309S, AVM-1901S, AVM-2509S Manual
 Sanyo AVM-2550S Manual
 Sanyo AVM-2550S, AVM-2759S Manual
 Sanyo AVM-3280G, AVM-3680G Manual
 Sanyo BC-1206 Manual
 Sanyo C1251 Manual
 Sanyo C2462R Manual
 Sanyo C2472 Manual
 Sanyo C3622 Manual