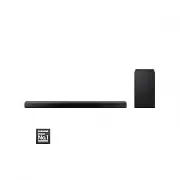
Samsung HW-Q700A - User Manual
Samsung HW-Q700A Sound Bar – User Manual, read for free online in PDF format. We hope this helps you resolve any issues you may have. If you have further questions, please contact us through the contact form.


Table of Contents:
- Page 2 – SAFETY INFORMATION; SAFETY WARNINGS
- Page 3 – WIRING THE MAIN POWER; IMPORTANT NOTICE; PRECAUTIONS
- Page 4 – CONTENTS
- Page 6 – 1 CHECKING THE COMPONENTS
- Page 7 – 2 PRODUCT OVERVIEW; Front Panel / Top Panel of the Soundbar
- Page 9 – 3 USING THE SOUNDBAR REMOTE CONTROL; How to Use the Remote Control
- Page 12 – Adjusting the Soundbar volume with a TV remote control
- Page 13 – 4 CONNECTING THE SOUNDBAR; Connecting the power and units; Manually connecting the Subwoofer
- Page 14 – ID SET; LED Indicator Lights on the Rear of Subwoofer
- Page 16 – 5 USING A WIRED CONNECTION TO THE TV; Method 1. Connecting with HDMI; Connecting the TV that supports HDMI ARC (Audio Return Channel); TV ARC
- Page 17 – Method 2. Connecting using an Optical Cable
- Page 18 – 6 USING A WIRELESS CONNECTION TO THE TV; Method 1. Connecting via Bluetooth; BT PAIRING; Disconnecting the Soundbar from the Samsung TV
- Page 20 – 7 CONNECTING AN EXTERNAL DEVICE; HDMI
- Page 22 – 8 CONNECTING A MOBILE DEVICE; What is the difference between BT READY and BT PAIRING?
- Page 24 – 9 GETTING STARTED WITH ALEXA ON AMAZON PRODUCT; Connect and use with an Amazon product (Amazon Echo)
- Page 25 – Using the Tap Sound; Setting the Tap Sound function
- Page 26 – 0 CONNECTING TO APPLE AIRPLAY 2; Connect and use with an Apple product
- Page 27 – Installation Precautions
- Page 28 – 2 INSTALLING THE; Component
- Page 29 – 3 SOFTWARE UPDATE; Auto Update; Initialisation; INIT; Security updates information
- Page 30 – 4 TROUBLESHOOTING
- Page 32 – 8 SPECIFICATIONS AND GUIDE; Specifications
FULL MANUAL
HW-Q700A
Imagine the possibilities
Thank you for purchasing this Samsung product.
To receive more complete service, please register your product at
www.samsung.com/register
"Loading the manual" means you need to wait until the file loads and becomes available for online reading. Some manuals are very large, and the time they take to appear depends on your internet speed.
Was this manual helpful?
About this manual
- Brand
- Samsung
- Model
- HW-Q700A
- Document type
- User Manual
- Category
- Sound Bar
- Language(s)
- English
- Pages
- 35
- Format
Other Manuals for Samsung HW-Q700A
Summary
ENG - 2 SAFETY INFORMATION SAFETY WARNINGS TO REDUCE THE RISK OF ELECTRIC SHOCK, DO NOT REMOVE THE COVER (OR BACK). NO USER-SERVICEABLE PARTS ARE INSIDE. REFER SERVICING TO QUALIFIED SERVICE PERSONNEL.Refer to the table below for an explanation of symbols which may be on your Samsung product. CAUTIO...
ENG - 3 WIRING THE MAIN POWER SUPPLY PLUG (UK ONLY) IMPORTANT NOTICE The mains lead on this equipment is supplied with a moulded plug incorporating a fuse. The value of the fuse is indicated on the pin face of the plug and if it requires replacing, a fuse approved to BS1362 of the same rating must b...
ENG - 4 CONTENTS 01 Checking the Components 6 02 Product Overview 7 Front Panel / Top Panel of the Soundbar . . . . . . . . . . . . . . . . . . . . . . . . . . . . . . . . . . . . . . . . . . . . . . . . . . . . . . . . . . . . . . . . . . . . . . . . . . . . . . . . . . . . . . . . .7 Bottom Panel ...
Ask a question
Related manuals
Popular Samsung Sound Bars
More Samsung Sound Bars models
 Samsung HW-Q96R User Manual
 Samsung HW-Q600A User Manual
 Samsung HW-Q600B User Manual
 Samsung HW-Q600C User Manual
 Samsung HW-Q610A User Manual
- Samsung HW-Q610C User Manual
 Samsung HW-Q700B User Manual
 Samsung HW-Q700C User Manual
- Samsung HW-Q710B User Manual
 Samsung HW-Q710C User Manual
 Samsung HW-Q800A User Manual
 Samsung HW-Q800B User Manual