Page 2 - This Document can not be used without Samsung’s authorization.; IMPORTANT SAFETY NOTICE; All rights reserved.; WARNING; Note; interior racks and plastic peripherals such as baskets and lids.; Caution; the right part name.
SAMS UNG PR OPRIET AR Y. DO NO T C OPY OR DIS TRIBUTE WITHOUT PERMIS SION SAMS UNG PR OPRIET AR Y. DO NO T C OPY OR DIS TRIBUTE WITHOUT PERMIS SION This Document can not be used without Samsung’s authorization. IMPORTANT SAFETY NOTICE Following the repair by a non-authorized service provider self-re...
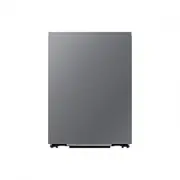
Page 4 - _ Disassembly and Reassembly; Remove 2 screws at back of ASSY COVER TOP.; ASSY COVER TOP; * Reassembly is the reverse order of disassembly.; DISASSEMBLY AND REASSEMBLY
4 _ Disassembly and Reassembly SAMS UNG PR OPRIET AR Y. DO NO T C OPY OR DIS TRIBUTE WITHOUT PERMIS SION SAMS UNG PR OPRIET AR Y. DO NO T C OPY OR DIS TRIBUTE WITHOUT PERMIS SION This Document can not be used without Samsung’s authorization. Part Figure Description ASSY COVER TOP [DISASSEMBLY] 1. Re...
Page 5 - Disassembly and Reassembly _ 5; Remove the old seal from the BRACKET SEAL TUB.; Be careful to touch the BRACKET SEAL TUB after removed; BRACKET SEAL TUB. Press seal about 20 cm (red dotted
Disassembly and Reassembly _ 5 SAMS UNG PR OPRIET AR Y. DO NO T C OPY OR DIS TRIBUTE WITHOUT PERMIS SION SAMS UNG PR OPRIET AR Y. DO NO T C OPY OR DIS TRIBUTE WITHOUT PERMIS SION This Document can not be used without Samsung’s authorization. Part Figure Description SEAL TUB PACKING [DISASSEMBLY] BRA...
Page 6 - _ Disassembly and Reassembly; Press the seal from the top corner toward remaining side.; CAUTION; Pay attention to assemble not to deform the seal tip
6 _ Disassembly and Reassembly SAMS UNG PR OPRIET AR Y. DO NO T C OPY OR DIS TRIBUTE WITHOUT PERMIS SION SAMS UNG PR OPRIET AR Y. DO NO T C OPY OR DIS TRIBUTE WITHOUT PERMIS SION This Document can not be used without Samsung’s authorization. Part Figure Description SEAL TUB PACKING [ASSEMBLY] 4. Pre...
Page 7 - Disassembly and Reassembly _ 7; Remove 4 screws at front of HOUSING; Do not do this work without safety gloves.
Disassembly and Reassembly _ 7 SAMS UNG PR OPRIET AR Y. DO NO T C OPY OR DIS TRIBUTE WITHOUT PERMIS SION SAMS UNG PR OPRIET AR Y. DO NO T C OPY OR DIS TRIBUTE WITHOUT PERMIS SION This Document can not be used without Samsung’s authorization. Part Figure Description HOUSING [DISASSEMBLY] 1. Remove 4 ...
Page 8 - _ Disassembly and Reassembly; Assemble Housing to side of Dishwasher
8 _ Disassembly and Reassembly SAMS UNG PR OPRIET AR Y. DO NO T C OPY OR DIS TRIBUTE WITHOUT PERMIS SION SAMS UNG PR OPRIET AR Y. DO NO T C OPY OR DIS TRIBUTE WITHOUT PERMIS SION This Document can not be used without Samsung’s authorization. Part Figure Description HOUSING [ASSEMBLY] 1. Assemble Hou...
Page 9 - Disassembly and Reassembly _ 9; Assemble rope at BRACKET WIRE
Disassembly and Reassembly _ 9 SAMS UNG PR OPRIET AR Y. DO NO T C OPY OR DIS TRIBUTE WITHOUT PERMIS SION SAMS UNG PR OPRIET AR Y. DO NO T C OPY OR DIS TRIBUTE WITHOUT PERMIS SION This Document can not be used without Samsung’s authorization. Part Figure Description DOOR SPRING [DISASSEMBLY] Preparat...
Page 10 - 0 _ Disassembly and Reassembly
10 _ Disassembly and Reassembly SAMS UNG PR OPRIET AR Y. DO NO T C OPY OR DIS TRIBUTE WITHOUT PERMIS SION SAMS UNG PR OPRIET AR Y. DO NO T C OPY OR DIS TRIBUTE WITHOUT PERMIS SION This Document can not be used without Samsung’s authorization. Part Figure Description ASSY DOOR [DISASSEMBLY] Preparati...
Page 11 - Disassembly and Reassembly _ 11
Disassembly and Reassembly _ 11 SAMS UNG PR OPRIET AR Y. DO NO T C OPY OR DIS TRIBUTE WITHOUT PERMIS SION SAMS UNG PR OPRIET AR Y. DO NO T C OPY OR DIS TRIBUTE WITHOUT PERMIS SION This Document can not be used without Samsung’s authorization. Part Figure Description ASSY DOOR [ASSEMBLY] 1. Insert AS...
Page 12 - 2 _ Disassembly and Reassembly; INNER
12 _ Disassembly and Reassembly SAMS UNG PR OPRIET AR Y. DO NO T C OPY OR DIS TRIBUTE WITHOUT PERMIS SION SAMS UNG PR OPRIET AR Y. DO NO T C OPY OR DIS TRIBUTE WITHOUT PERMIS SION This Document can not be used without Samsung’s authorization. Part Figure Description PANEL CONTROL / SUB PBA [DISASSEM...
Page 13 - Disassembly and Reassembly _ 13; Separate ASSY LAMP LED from DOOR OUTER; Separate wires of W-LAN MODULE and ASSY MODULE; Hook
Disassembly and Reassembly _ 13 SAMS UNG PR OPRIET AR Y. DO NO T C OPY OR DIS TRIBUTE WITHOUT PERMIS SION SAMS UNG PR OPRIET AR Y. DO NO T C OPY OR DIS TRIBUTE WITHOUT PERMIS SION This Document can not be used without Samsung’s authorization. Part Figure Description PANEL CONTROL / SUB PBA [DISASSEM...
Page 14 - 4 _ Disassembly and Reassembly; Lock hook of ASSY BUZZER; Insert ASSY LAMP LED to DOOR OUTER Lock a hook
14 _ Disassembly and Reassembly SAMS UNG PR OPRIET AR Y. DO NO T C OPY OR DIS TRIBUTE WITHOUT PERMIS SION SAMS UNG PR OPRIET AR Y. DO NO T C OPY OR DIS TRIBUTE WITHOUT PERMIS SION This Document can not be used without Samsung’s authorization. Part Figure Description PANEL CONTROL / SUB PBA [ASSEMBLY...
Page 15 - Disassembly and Reassembly _ 15; Fasten 14 screws to DOOR OUTER and DOOR INNER
Disassembly and Reassembly _ 15 SAMS UNG PR OPRIET AR Y. DO NO T C OPY OR DIS TRIBUTE WITHOUT PERMIS SION SAMS UNG PR OPRIET AR Y. DO NO T C OPY OR DIS TRIBUTE WITHOUT PERMIS SION This Document can not be used without Samsung’s authorization. Part Figure Description PANEL CONTROL / SUB PBA [ASSEMBLY...
Page 16 - 6 _ Disassembly and Reassembly; Remove the GASKET BRAKE from the CASE BRAKE
16 _ Disassembly and Reassembly SAMS UNG PR OPRIET AR Y. DO NO T C OPY OR DIS TRIBUTE WITHOUT PERMIS SION SAMS UNG PR OPRIET AR Y. DO NO T C OPY OR DIS TRIBUTE WITHOUT PERMIS SION This Document can not be used without Samsung’s authorization. Part Figure Description GASKET (ASSY CASE BRAKE) [DISASSE...
Page 17 - Disassembly and Reassembly _ 17; Remove the GASKET BRAKE from the ASSY COVER DRY.; Aseemble ASSY COVER DRY to hole of TUB.
Disassembly and Reassembly _ 17 SAMS UNG PR OPRIET AR Y. DO NO T C OPY OR DIS TRIBUTE WITHOUT PERMIS SION SAMS UNG PR OPRIET AR Y. DO NO T C OPY OR DIS TRIBUTE WITHOUT PERMIS SION This Document can not be used without Samsung’s authorization. Part Figure Description GASKET (ASSY COVER DRY) [DISASSEM...
Page 18 - 8 _ Disassembly and Reassembly; TUB; ASSY DUCT MAIN
18 _ Disassembly and Reassembly SAMS UNG PR OPRIET AR Y. DO NO T C OPY OR DIS TRIBUTE WITHOUT PERMIS SION SAMS UNG PR OPRIET AR Y. DO NO T C OPY OR DIS TRIBUTE WITHOUT PERMIS SION This Document can not be used without Samsung’s authorization. Part Figure Description ASSY DUCT MAIN [DISASSEMBLY] Prep...
Page 19 - Disassembly and Reassembly _ 19; Fine filter
Disassembly and Reassembly _ 19 SAMS UNG PR OPRIET AR Y. DO NO T C OPY OR DIS TRIBUTE WITHOUT PERMIS SION SAMS UNG PR OPRIET AR Y. DO NO T C OPY OR DIS TRIBUTE WITHOUT PERMIS SION This Document can not be used without Samsung’s authorization. 1-1-10. ASSY ROTOR/FILTER - ASSY ROTOR: DD97-00646B (DW60...
Page 20 - 0 _ Disassembly and Reassembly; Assemble COVER FILTER-BOTTOM at SUMP
20 _ Disassembly and Reassembly SAMS UNG PR OPRIET AR Y. DO NO T C OPY OR DIS TRIBUTE WITHOUT PERMIS SION SAMS UNG PR OPRIET AR Y. DO NO T C OPY OR DIS TRIBUTE WITHOUT PERMIS SION This Document can not be used without Samsung’s authorization. Part Figure Description ASSY ROTOR / FILTER [ASSEMBLY] 1....
Page 21 - Disassembly and Reassembly _ 21
Disassembly and Reassembly _ 21 SAMS UNG PR OPRIET AR Y. DO NO T C OPY OR DIS TRIBUTE WITHOUT PERMIS SION SAMS UNG PR OPRIET AR Y. DO NO T C OPY OR DIS TRIBUTE WITHOUT PERMIS SION This Document can not be used without Samsung’s authorization. Part Figure Description ASSY ROTOR / FILTER [ASSEMBLY] 8....
Page 22 - 2 _ Disassembly and Reassembly; Pull out ASSY BASKET LOWER from Dishwasher.; Front side; Tilt the ASSY PLASTIC SUPPORTOR
22 _ Disassembly and Reassembly SAMS UNG PR OPRIET AR Y. DO NO T C OPY OR DIS TRIBUTE WITHOUT PERMIS SION SAMS UNG PR OPRIET AR Y. DO NO T C OPY OR DIS TRIBUTE WITHOUT PERMIS SION This Document can not be used without Samsung’s authorization. Part Figure Description ASSY BASKET LOWER [DISASSEMBLY] 1...
Page 23 - Disassembly and Reassembly _ 23; Pull the upper side of ASSY PLASTIC SUPPORTOR to take
Disassembly and Reassembly _ 23 SAMS UNG PR OPRIET AR Y. DO NO T C OPY OR DIS TRIBUTE WITHOUT PERMIS SION SAMS UNG PR OPRIET AR Y. DO NO T C OPY OR DIS TRIBUTE WITHOUT PERMIS SION This Document can not be used without Samsung’s authorization. Part Figure Description ASSY BASKET LOWER [DISASSEMBLY] 6...
Page 24 - 4 _ Disassembly and Reassembly; Assemble ASSY ROLLER at BASKET Secure hook
24 _ Disassembly and Reassembly SAMS UNG PR OPRIET AR Y. DO NO T C OPY OR DIS TRIBUTE WITHOUT PERMIS SION SAMS UNG PR OPRIET AR Y. DO NO T C OPY OR DIS TRIBUTE WITHOUT PERMIS SION This Document can not be used without Samsung’s authorization. Part Figure Description ASSY BASKET LOWER [ASSEMBLY] 1. A...
Page 25 - Disassembly and Reassembly _ 25; Pull out ASSY BASKET MIDDLE from Dishwasher
Disassembly and Reassembly _ 25 SAMS UNG PR OPRIET AR Y. DO NO T C OPY OR DIS TRIBUTE WITHOUT PERMIS SION SAMS UNG PR OPRIET AR Y. DO NO T C OPY OR DIS TRIBUTE WITHOUT PERMIS SION This Document can not be used without Samsung’s authorization. Part Figure Description ASSY BASKET MIDDLE [DISASSEMBLY] ...
Page 26 - 6 _ Disassembly and Reassembly; Push hook with flat head driver to take off HANDLE
26 _ Disassembly and Reassembly SAMS UNG PR OPRIET AR Y. DO NO T C OPY OR DIS TRIBUTE WITHOUT PERMIS SION SAMS UNG PR OPRIET AR Y. DO NO T C OPY OR DIS TRIBUTE WITHOUT PERMIS SION This Document can not be used without Samsung’s authorization. Part Figure Description ASSY BASKET MIDDLE [DISASSEMBLY] ...
Page 27 - Disassembly and Reassembly _ 27; Assemble BRACKET RAIL and ASSY BASKET ADJUSTER at; Assemble 2 HOLDER SUPPORT CUP at BASKET
Disassembly and Reassembly _ 27 SAMS UNG PR OPRIET AR Y. DO NO T C OPY OR DIS TRIBUTE WITHOUT PERMIS SION SAMS UNG PR OPRIET AR Y. DO NO T C OPY OR DIS TRIBUTE WITHOUT PERMIS SION This Document can not be used without Samsung’s authorization. Part Figure Description ASSY BASKET MIDDLE [ASSEMBLY] 1. ...
Page 28 - 8 _ Disassembly and Reassembly; Assemble arm of ASSY DUCT MIDDLE at BASKET Arm is
28 _ Disassembly and Reassembly SAMS UNG PR OPRIET AR Y. DO NO T C OPY OR DIS TRIBUTE WITHOUT PERMIS SION SAMS UNG PR OPRIET AR Y. DO NO T C OPY OR DIS TRIBUTE WITHOUT PERMIS SION This Document can not be used without Samsung’s authorization. Part Figure Description ASSY BASKET MIDDLE [ASSEMBLY] 5 4...
Page 29 - Disassembly and Reassembly _ 29
Disassembly and Reassembly _ 29 SAMS UNG PR OPRIET AR Y. DO NO T C OPY OR DIS TRIBUTE WITHOUT PERMIS SION SAMS UNG PR OPRIET AR Y. DO NO T C OPY OR DIS TRIBUTE WITHOUT PERMIS SION This Document can not be used without Samsung’s authorization. Part Figure Description ASSY BASKET 3RD (DW60*89*/ DW60*8...
Page 30 - 0 _ Disassembly and Reassembly; Bend 5 hooks of DECORATION HANDLE-BASKET with; Tool; Be careful not to hurt from sharp edge. Must wear gloves
30 _ Disassembly and Reassembly SAMS UNG PR OPRIET AR Y. DO NO T C OPY OR DIS TRIBUTE WITHOUT PERMIS SION SAMS UNG PR OPRIET AR Y. DO NO T C OPY OR DIS TRIBUTE WITHOUT PERMIS SION This Document can not be used without Samsung’s authorization. Part Figure Description ASSY BASKET 3RD (DW60*89*/ DW60*8...
Page 31 - Disassembly and Reassembly _ 31
Disassembly and Reassembly _ 31 SAMS UNG PR OPRIET AR Y. DO NO T C OPY OR DIS TRIBUTE WITHOUT PERMIS SION SAMS UNG PR OPRIET AR Y. DO NO T C OPY OR DIS TRIBUTE WITHOUT PERMIS SION This Document can not be used without Samsung’s authorization. Part Figure Description ASSY BASKET 3RD (DW60*89*/ DW60*8...
Page 32 - 2 _ Disassembly and Reassembly; Assemble HANDLE BASKET-3RD TRAY with BASKET; Pay attention to the direction of HANDLE.; Insert ASSY BASKET 3R to the rail, and assemble HOLDER; Pay attention to the direction of the holder.
32 _ Disassembly and Reassembly SAMS UNG PR OPRIET AR Y. DO NO T C OPY OR DIS TRIBUTE WITHOUT PERMIS SION SAMS UNG PR OPRIET AR Y. DO NO T C OPY OR DIS TRIBUTE WITHOUT PERMIS SION This Document can not be used without Samsung’s authorization. Part Figure Description ASSY BASKET 3RD (DW60*89*/ DW60*8...
Page 33 - Disassembly and Reassembly _ 33; come out from the hose.
Disassembly and Reassembly _ 33 SAMS UNG PR OPRIET AR Y. DO NO T C OPY OR DIS TRIBUTE WITHOUT PERMIS SION SAMS UNG PR OPRIET AR Y. DO NO T C OPY OR DIS TRIBUTE WITHOUT PERMIS SION This Document can not be used without Samsung’s authorization. Part Figure Description GASKET (ASSY COVER DRY) [DISASSEM...
Page 34 - 4 _ Disassembly and Reassembly
34 _ Disassembly and Reassembly SAMS UNG PR OPRIET AR Y. DO NO T C OPY OR DIS TRIBUTE WITHOUT PERMIS SION SAMS UNG PR OPRIET AR Y. DO NO T C OPY OR DIS TRIBUTE WITHOUT PERMIS SION This Document can not be used without Samsung’s authorization. Part Figure Description GASKET (ASSY COVER DRY) [ASSEMBLY...
Page 35 - Disassembly and Reassembly _ 35
Disassembly and Reassembly _ 35 SAMS UNG PR OPRIET AR Y. DO NO T C OPY OR DIS TRIBUTE WITHOUT PERMIS SION SAMS UNG PR OPRIET AR Y. DO NO T C OPY OR DIS TRIBUTE WITHOUT PERMIS SION This Document can not be used without Samsung’s authorization. Part Figure Description GASKET (ASSY DUCT DRY) [DISASSEMB...
Page 36 - 6 _ Disassembly and Reassembly; Assemble ASSY DUCT DRY to Assy Tub
36 _ Disassembly and Reassembly SAMS UNG PR OPRIET AR Y. DO NO T C OPY OR DIS TRIBUTE WITHOUT PERMIS SION SAMS UNG PR OPRIET AR Y. DO NO T C OPY OR DIS TRIBUTE WITHOUT PERMIS SION This Document can not be used without Samsung’s authorization. Part Figure Description GASKET (ASSY DUCT DRY) [ASSEMBLY]...
Page 37 - Disassembly and Reassembly _ 37; -2. CHECKPOINTS AFTER FINISHING SERVICE; Check the safety device
Disassembly and Reassembly _ 37 SAMS UNG PR OPRIET AR Y. DO NO T C OPY OR DIS TRIBUTE WITHOUT PERMIS SION SAMS UNG PR OPRIET AR Y. DO NO T C OPY OR DIS TRIBUTE WITHOUT PERMIS SION This Document can not be used without Samsung’s authorization. 1-2. CHECKPOINTS AFTER FINISHING SERVICE 1. Check the saf...
Page 38 - Asia
SAMS UNG PR OPRIET AR Y. DO NO T C OPY OR DIS TRIBUTE WITHOUT PERMIS SION SAMS UNG PR OPRIET AR Y. DO NO T C OPY OR DIS TRIBUTE WITHOUT PERMIS SION © 2023 Samsung Electronics Co.,Ltd. All rights reserved. Printed in Korea GSPN (GLOBAL SERVICE PARTNER NETWORK) Area Web Site Eurpoe, CIS, Mideast &...