Page 2 - IMPORTANT SAFEGUARDS; Read all instructions.; SAVE THESE INSTRUCTIONS
IMPORTANT SAFEGUARDS When using electrical appliances, basic safety precautions should always be followed, including the following: 1. Read all instructions. 2. Do not touch hot surfaces. Use handles or knobs. 3. To protect against fire, electric shock and injury to persons do not immerse cord, plug...
Page 3 - CAUTION; corresponds with your voltage.; INSTRUCTIONS FOR THE POWER; If a long detachable power-supply cord or extension cord is used,
CAUTION This appliance is for household use only. Any servicing, other than cleaning and user maintenance, should be performed by an authorized service center. Do not immerse machine in water. To reduce the risk of fire or electric shock, do not disassemble the machine. There are no parts inside the...
Page 4 - ENGLISH
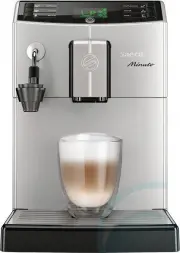
2 ENGLISH Congratulations on your purchase of a Saeco Minuto Auto-matic Milk Frother full automatic espresso machine! To fully benefi t from the support that Saeco off ers, please register your product at www.philips.com/welcome . This user manual applies to HD8762. The machine is suitable for prepa...
Page 5 - CONTENTS
3 ENGLISH CONTENTS IMPORTANT..................................................................................................... 4 Safety instructions .................................................................................................................................... 4Warning .........
Page 6 - IMPORTANT
4 ENGLISH IMPORTANT Safety instructions This machine is equipped with safety features. Nevertheless read the safety instructions carefully and only use the machi-ne as described in these instructions to avoid accidental injury or damage. Keep this user manual for future reference. The term WARNING a...
Page 8 - Caution
6 ENGLISH Caution • The machine is for household use only. It is not intended for use in environments such as staff kitchens of shops, offi ces, farms or other work environments. • Always put the machine on a fl at and stable surface. • Do not place the machine on a hot plate, directly next to a hot...
Page 9 - Compliance with standards
7 ENGLISH 7 Compliance with standards The machine complies with art.13 of the Italian Legislative Decree dated 25 July 2005, no. 151 “Implementation of the directives 2005/95/EC, 2002/96/EC and 2003/108/EC on the re-striction of the use of certain hazardous substances in electrical and electronic eq...
Page 10 - INSTALLATION; Product overview
8 INSTALLATION Product overview 30 19 14 15 18 21 20 1 2 3 4 11 12 13 5 6 7 89 10 24 27 25 28 26 29 16 31 17 22 23 32
Page 11 - General description
9 ENGLISH 9 General description 1. Grinder adjustment knob 2. Coff ee bean hopper 3. Pre-ground coff ee compartment 4. Water tank + Lid 5. Coff ee bean hopper lid 6. Control panel 7. Dispensing spout 8. Full drip tray indicator 9. Cup holder grill 10. Drip tray 11. Coff ee grounds drawer 12. Brew gr...
Page 12 - PREPARING FOR USE
10 ENGLISH PREPARING FOR USE Machine packaging The original packaging has been designed and constructed to protect the machine during transport. We recommend keeping the packaging material for possible future transport. Machine installation 1 Remove the machine from the packaging. 2 For best use, it...
Page 14 - USING THE MACHINE FOR THE FIRST TIME
12 ENGLISH 12 Switch the power button to “I” turn on the machine. The “ ” button blinks. Y ello w 13 To turn on the machine simply press the “ ” button. The control panel indicates that the circuit must be primed. USING THE MACHINE FOR THE FIRST TIME When using the machine for the fi rst time, the f...
Page 16 - Manual rinse cycle; Do not
14 ENGLISH Manual rinse cycle During this process you activate the coff ee brewing cycle and fresh water fl ows through the water circuit. This takes a few minutes. 1 Place a container under the dispensing spout. Gr een 2 Check that the machine shows this display. 3 Select the pre-ground coff ee bre...
Page 18 - Measuring and programming water hardness
16 ENGLISH Measuring and programming water hardness Measuring water hardness is very important for defi ning the frequency in which the machine has to be descaled and to install the “INTENZA+” water fi lter (for more detail on the water fi lter see next chapter). To measure the water hardness follow...
Page 19 - “INTENZA+” water fi lter installation
17 ENGLISH 17 Gr een 7 Press the “ ” button to exit the programming MENU. The machine shows this display and is ready to brew. “INTENZA+” water fi lter installation We recommend you to install the “INTENZA+” water fi lter as this prevents lime scale to build up in your machine and preserves a more i...
Page 21 - Replacing the “INTENZA+” water fi lter
19 ENGLISH 19 Y ello w Replacing the “INTENZA+” water fi lter When the “INTENZA+” water fi lter needs to be replaced with a new one, the following icon is displayed. 1 Replace the “INTENZA+” water fi lter as described in the previous chap- ter. 2 Press the “ ” button and scroll the pages by pressing...
Page 22 - ADJUSTMENTS
20 ENGLISH ADJUSTMENTS The machine allows for certain adjustments so that you can brew the best tasting coff ee possible. Saeco Adapting System Coff ee is a natural product and its characteristics may change according to its origin, blend and roast. The machine is equipped with a self-adjusting syst...
Page 24 - Adjusting the dispensing spout
22 ENGLISH Adjusting the dispensing spout The height of the dispensing spout can be adjusted to better fi t thedimensions of the cups that you wish to use. Move the dispensing spout up or down with your fi ngers to adjust its height as shown in the image. The recommended positions are:For the use of...
Page 25 - Adjusting the coff ee lenght; MEMO
23 ENGLISH 23 Adjusting the coff ee lenght The machine allows you to adjust the amount of brewed coff ee according to your taste and the size of your cups.Each time the “ ” or “ ” button is pressed, the machine brews a pre-set amount of coff ee. Each button may be individually programmed for a speci...
Page 26 - ESPRESSO AND COFFEE BREWING; Espresso and Coff ee brewing using coff ee beans
24 ENGLISH ESPRESSO AND COFFEE BREWING Before brewing coff ee, make sure that there are no warnings shown on the control panel, and that the water tank and coff ee bean hopper are fi lled. 2 To brew an espresso or a Coff ee, press the “ ” button to select the desired aroma. 3 Press the “ ” button fo...
Page 27 - Espresso and Coff ee brewing using pre-ground coff ee
25 ENGLISH 25 Espresso and Coff ee brewing using pre-ground coff ee This function allows to use pre-ground coff ee. With the pre-ground coff ee function you can only brew one coff ee at a time. 1 Press the “ ” button one or more times to select the pre-ground coff ee function. Gr een 2 Lift the pre-...
Page 28 - STEAM DISPENSING /CAPPUCCINO BREWING
26 ENGLISH STEAM DISPENSING /CAPPUCCINO BREWING Warning: Danger of scalding! Dispensing may be preceded by small jets of hot water. The Automatic Milk Frother may reach high temperatures. Never touch it with bare hands. Use the appropriate protective handle only. 1 Fill 1/3 of a container with cold ...
Page 30 - HOT WATER DISPENSING
28 ENGLISH Gr een HOT WATER DISPENSING Warning: Danger of scalding! Dispensing may be preceded by small jets of hot water. The Automatic Milk Frother may reach high temperatures: never touch it with bare hands. Use the appropriate protective handle only. Before dispensing hot water, check that the m...
Page 31 - CLEANING AND MAINTENANCE
29 ENGLISH 29 CLEANING AND MAINTENANCE Daily cleaning of the machine Caution: Timely cleaning and maintenance of your machine is very important as it prolongs the life of your machine. Your machine gets exposed to moist, coff ee and lime scale continuously!In this chapter it is described in detail w...
Page 32 - Daily cleaning of the water tank
30 ENGLISH 1 3 2 4 Insert the coff ee grounds drawer back into the drip tray and this into the machine. Note: Empty the drip tray also when the full drip tray indicator is raised. Daily cleaning of the water tank 1 Remove the small white fi lter or the “INTENZA+” water fi lter (if instal- led) from ...
Page 33 - Daily cleaning of the Automatic Milk Frother
31 ENGLISH 31 Daily cleaning of the Automatic Milk Frother It is important that you clean the Automatic Milk Frother after each use as it preserves hygiene and ensures perfect milk froth consistency. Warning: Danger of scalding! Dispensing may be preceded by small jets of hot water. 2 Place an empty...
Page 34 - Weekly cleaning of the machine
32 ENGLISH Weekly cleaning of the machine 1 Clean the seat of the drip tray. 2 Clean the pre-ground coff ee compartment with the cleaning brush. Weekly cleaning of the brew group The brew group should be cleaned every time the coff ee bean hopper is fi lled or at least once a week. 1 Turn off the ma...
Page 35 - Do not use detergent/soap to clean the brew group.
33 ENGLISH 33 3 To remove the brew group, press the «PUSH» button and pull it by the handle. 5 Thoroughly wash the brew group with fresh, lukewarm water and carefully clean the upper fi lter. Caution: Do not use detergent/soap to clean the brew group. 6 Let the brew group air-dry thoroughly. 7 Thoro...
Page 37 - Monthly cleaning of the Automatic Milk Frother
35 ENGLISH 35 Monthly cleaning of the Automatic Milk Frother Every month you need to perform a more thorough cleaning of the Auto-matic Milk Frother using the “Saeco Milk Circuit Cleaner”. You can purchase separately the “Saeco Milk Circuit Cleaner”. Please refer to the maintenance product page in t...
Page 38 - Never drink the solution dispensed during the procedure.
36 ENGLISH Gr een 7 The following icon will be displayed during the dispensing. When the solution has been completely dispensed, press the “ ” button to stop dispensing. Note: After 3 minutes the steam dispensing will stop. Push “ ” button to dispense again. Warning: Never drink the solution dispens...
Page 39 - Warning: The tube could be hot if the machine has recently been used.
37 ENGLISH 37 Gr een Y ello w 11 Press the “ ” button to dispense steam. 12 The following icon may be displayed during the preheating time requi- red by the machine. 13 The following icon will be displayed during the dispensing. When the water has been completely dispensed, press the “ ” button to s...
Page 42 - Monthly lubrication of the brew group
40 ENGLISH Monthly lubrication of the brew group Lubricate the brew group after approximately 500 cups of coff ee or once a month. You can purchase the grease for the brew group separately to lubricate the brew group. Please refer to the maintenance products page in this user manual for further deta...
Page 43 - Monthly cleaning of the brew group with “Coff ee Oil Remover”
41 ENGLISH 41 3 Insert the brew group in its seat until it locks into place. (see “Weekly Cleaning of the Brew Group” chapter). 4 Close the service door and insert the drip tray and the coff ee grounds drawer. Monthly cleaning of the brew group with “Coff ee Oil Remover” Besides weekly cleaning, we ...
Page 45 - Monthly cleaning of the coff ee bean hopper
43 ENGLISH 43 Gr een 12 After rinsing the brew group, insert it again in its seat until it locks into place (see “Weekly cleaning of the brew group” chapter). Insert the drip tray and the coff ee grounds drawer. Close the service door. 13 Press the “ ” button to select the pre-ground coff ee functio...
Page 46 - DESCALING; CALC CLEAN
44 ENGLISH DESCALING The descaling process takes approx. 35 minutes. Lime scale builds up inside the machine during use. It needs to be remo-ved regularly as it may clog the water and coff ee circuit of your machine. The machine tells you when descaling is needed. If the machine display shows the CA...
Page 50 - PROGRAMMING; Coff ee temperature
48 ENGLISH PROGRAMMING You can adjust the machine functions to your personal preference by accessing the program menu. The following parameters can be adjusted Coff ee temperature This function allows you to adjust the coff ee brewing temperature. Y ello w Y ello w Y ello w Y ello w Y ello w Y ello ...
Page 51 - Factory settings; How to program your machine
49 ENGLISH 49 Y ello w Gr een Y ello w Y ello w Factory settings This function allows you to reset all factory values. How to program your machine In this example, it is shown how to program the display contrast. Proceed in the same way to program the other functions. The programming menu can only b...
Page 53 - MEANING OF THE DISPLAY SYMBOLS
51 ENGLISH 51 MEANING OF THE DISPLAY SYMBOLS This machine is equipped with a colour-coded system to make your under-standing of the display signals easier.The icons are colour-coded according to the traffi c light principle. Ready Signals (Green Colour) The machine is ready to brew products. The mac...
Page 56 - TROUBLESHOOTING
54 ENGLISH TROUBLESHOOTING This chapter summarizes the most common problems you could en-counter with your machine. If you are unable to solve the problem with the information below, visit www.philips.com/support for a list of frequently asked questions or contact the Philips Saeco hotline in your c...
Page 58 - ENERGY SAVING
56 ENGLISH ENERGY SAVING Stand-by The Saeco full automatic espresso machine is designed for energy saving- proven by the Class A energy label. After 30 minutes of inactivity the machine turns off automatically (unless you have diff erently programmed the stand-by time). If a product has been brewed ...
Page 59 - TECHNICAL SPECIFICATION
57 ENGLISH 57 TECHNICAL SPECIFICATION The manufacturer reserves the right to make changes to the technical specifi cations of the product Nominal Voltage - Power Rating - Power Supply See label on the inside of the service door Housing material Thermoplastic material Size (w x h x d) 215 x 330 x 429...
Page 60 - ORDERING MAINTENANCE PRODUCTS
58 ENGLISH ORDERING MAINTENANCE PRODUCTS For cleaning and descaling, use Saeco maintenance products only. You can purchase these at the Philips online shop at www.shop.philips.com/service , your local dealer or at authorised service centers. If you have any diffi culties obtaining maintenance produc...