Page 2 - Table of Contents; Installation Manual
Accessories . ...................................................04 " . Indoor Unit Parts ....................................... 07 # . Indoor Unit Installation Instructions . ..... 0 Safety Precautions . ....................................05 Outdoor Unit Installation ............................
Page 3 - Page 3; Refrigerant Piping Connection
e Page 3 f Refrigerant Piping Connection . .....................23 A. Notes on Pipe Length and Elevation ............. 23 B. Refrigerant Piping Connection Instructions .. 24 Wiring . ............................................... 26 " . Outdoor Unit Wiring ................... 26 # . Indoor Unit...
Page 4 - Page 4; Accessories; Optional accessories; There are two types of remote controls: wired and wireless.
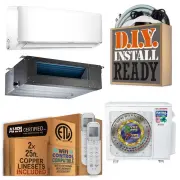
e Page 4 f Accessories 1 The air conditioning system comes with the following accessories. Use all of the installation parts and accessories to install the air conditioner. Improper installation may result in water leakage, electrical shock and fire, or equipment failure. Connecting wire for display...
Page 5 - Page 5; Safety Precautions; Read Safety Precautions; WARNING
e Page 5 f Safety Precautions 2 Read Safety Precautions C efore Installation Incorrect installation due to ignoring instructions can cause serious damage or injury. The seriousness of potential damage or injuries is classified as either a WARNING or B CAUTION. WARNING • Carefully read the T afety Q ...
Page 6 - Page 6; Installation Overview
e Page 6 f Installation Overview 3 Unit Installation Overview L N 1 2 3 4 5 MC MC 6 7 Install the indoor unit (Page 7) INSTALLATION ORDER Install the outdoor unit (Page 18) Install the drainpipe (Page 21) Evacuate the refrigeration system (Page 30) Connect the wires (Page 26) Connect the refrigerant...
Page 7 - Page 7; Indoor Unit Installation; Air inlet
e Page 7 f Indoor Unit Installation 4 Indoor Unit Installation Indoor Unit Parts Fig. 4.1 Air inlet Air outlet Air filter (on some models) Drain hose Electric control cabinet Refrigerant connecting pipe Safety Precautions WARNING • Securely install the indoor unit on a structure that can sustain its...
Page 8 - Page 8; Step 2: Hang indoor unit
e Page 8 f Indoor Unit Installation Fig. 4.3 Step 2: Hang indoor unit 1. Please refer to the following diagrams to locate the four positioning screw bolt holes on the ceiling. Be sure to mark the paces where you will drill ceiling hook holes. Air outlet dimensions ( B pplicable to 18-36K series only...
Page 9 - Page 9; Original concrete bricks; Wood; New concrete bricks; CAUTION; OE
e Page 9 f Indoor Unit Installation Cut off the roof beam.Strengthen the point at which the cutwas made. Consolidate the roof beam. Fig. 4.6 Fig. 4.7 Original concrete bricks Use embedding screw bold, crock and stick harness. (Refer to Fig. 4 6) Steel roof beam structure Install and use the supporti...
Page 10 - Step 3: Duct and accessories installation
e Page 10 f Indoor Unit Installation Fig. 4.10 NOTE: 1. Do not put the connecting duct weight on the indoor unit. When connecting the duct, use anonflammable canvas tie-in to preventvibrating. Insulation foam must be wrapped outside theduct to avoid condensat JPO . An internal duct VOEFSMBZFS can be...
Page 11 - Step 5: Adjust the air inlet direction; Step 6: Fresh air duct installation; Step 7: Motor and drain pump maintenance; Pump maint
e Page 11 f Indoor Unit Installation Step 5: Adjust the air inlet direction ( G rom rear side to under side) 1. Take off UIF ventilation panel and flange, UIFO cut off the staples at UIF side rail. 2. Stick the attached seal sponge JO the indicated place in the following figure, then change the moun...
Page 12 - (middle static pressure
e Page 12 f Indoor Unit Installation Fan performancesStatic pressure curve (middle static pressure duct) Code 0 Code 1 Code 2 Code 3 Code 4 Ex te rnal s ta Ɵ c pressure i n. WG (Pa) Air volume CFM (m3/h) Limit High Middle Low Rated Point 176 235 294 353 412 (300) (400) (500) (600) (700) 0.08 (20) 0....
Page 18 - Outdoor Unit Installation; Outdoor Unit Installation Instructions; VTU; DO NOT; XJMMCF; Step 2: Install outdoor unit; JO
Outdoor Unit Installation Outdoor Unit Installation Instructions Step 1: Select installation location. The outdoor unit should be installed in the location that meets the following requirements: Place the outdoor unit as close to the indoor unit as possible. Ensure that there is enough room for ...
Page 19 - BOE
>120 cm/47 JO Air P utlet H D W > 30cm/11.8 JO Air inlet Air inlet Air inlet Air inlet (Wall or obstacle) > 30cm/11.8 JO > 30 cm / 11.8 JO > 30cm/11.8 JO Table 5.1: Length Specifications of Split Type Outdoor Unit (unit: mm/in) Table 5.2: Length Specifications of Vertical Discharge Ou...
Page 20 - GPS
NOTE: The minimum distance between the outdoor unit and UIF walls described in the installation guide does not apply to airtight rooms. Be sure to keep the unit unobstructed in at least two of the three directions (M, N, P) (See Fig. 5.10) M N P 30 cm/11.8 JO from back wall 60 cm/23.6 JO on right 60...
Page 21 - Drainpipe installation for units with a pump; NOTE ON DRAINPIPE INSTALLATION; Drainpipe Installation
Fig. 6.3 (7.9 JO ) < 20 cm (21.7 JO ) < 55 cm Lean over 1/50 1 - 1.5 m (39 - 59 JO ) Drainpipe installation for units with a pump Ceiling 0 - 75 mm (3 JO ) NOTE ON DRAINPIPE INSTALLATION The drainpipe is used to drain water away fromthe unit. Improper installation may cause unitand property da...
Page 22 - OFXMZCVJMUIPVTFTU; Units without a pump
Units with a pump Drainage test Check that the drainpipe is unhindered. *O OFXMZCVJMUIPVTFTU his test should be performed before the ceiling is paved. Units without a pump 1. Remove the test cover. Fill the water pan with 2 liters of water. Turn on the unit in COOLING mode. You willhear the drain pu...
Page 23 - Refrigerant Piping with Twin Indoor Units
Refrigerant Piping Connection Safety Precautions WARNING • All field piping must be completed by a licensed technician and must comply with local and national regulations. • • When the air conditioner is installed in a small room, measures must be taken toprevent the refrigerant concentration inthe ...
Page 24 - Gas side; Model
Table 7.2 Permitted length Piping length Total piping length 18K+18K 30m/98 GU L+Max (L1, L2) 24K+24K30K+30K 50m/164 GU (farthest distance from the line pipe branch) 15m/49 GU L1, L2 (farthest distance from the line pipe branch) 10m/32.8 GU L1-L2 Drop height Drop height between indoor and outdoor un...
Page 25 - Table 7.5: PIPING EXTENSION BEYOND FLARE FORM; Step 4: Connect pipes; NOTE ON MINIMUM BEND RADIUS
5. Clamp UIF flare form on the end of the pipe. The end of the pipe must extend beyond the flare form. Flare form Pipe Fig. 7.5 Place UIF flaring tool onto the form. Turn the handle of the flaring tool clockwise until the pipe is fully flared. Flare the pipe in accordance with the dimensions shown i...
Page 26 - Rated Current of
TAKE NOTE OF FUSE SPECIFICATIONS The air conditioner’s printed circuit board (PCB) is designed with a fuse that provides overcurrent protection. The specifications of the fuse are printed on the circuit board & xamples of such are T5A/250VAC and T10A/250VAC. Wiring Safety Precautions WARNING • D...
Page 27 - Indoor Unit Wiring; BM
C Using wire strippers, strip the rubber jacket from both ends of the signal cable to reveal approximately 15 cm (5.9 JO ) of wire. D Strip the insulation from the ends. E Using a wire crimper, crimp u-lugs on the ends. NOTE: When connecting the wires, strictly follow the wiring diagram found inside...
Page 28 - Power Specifications; Indoor Power Supply Specifications
Power Specifications Wiring e Page 28 f Indoor Power Supply Specifications MODEL (Btu/h) d 18K 19K 24K 25K 36K 37K 48K 49K 60K POWER PHASE 1 Phase 1 Phase 1 Phase 1 Phase 1 Phase FREQUENCY AND VOLT 208-240V 208-240V 208-240V 208-240V 208-240V CIRCUIT BREAKER/ FUSE (A) 25/20 32/25 50/40 70/55 70/60 M...
Page 30 - Air Evacuation
e Page 30 f Air Evacuation Air Evacuation Safety Precautions CAUTION system. • Use a vacuum pump with a gauge reading lower than -0.1MPa and an air dischargecapacity above 40 L/min. • The outdoor unit does not need to be vacuumed. DO NOT open the outdoor unit’s gas and liquid stop valves. • Ensure t...
Page 31 - Note; Liquid Side Diameter
e Page 31 f Air Evacuation Note P n Adding Refrigerant CAUTION • Refrigerant charging must be performed after wiring, vacuuming, and the leak testing.• D D DO O O N N NO O OTTT exceed the maximum allowable quantity of refrigerant or overcharge the system. Doing so can damage the unit or impact it’s ...
Page 32 - Before Test Run; BSF; Test Run Instructions; UIBU; Test Run
e Page 32 f Test Run Before Test Run A test run must be performed after the entire system has been completely installed. Confirm the following points before performing the test: B Indoor and outdoor units are properlyinstalled. C Piping and wiring are properly connected. D No obstacles BSF near the ...
Page 34 - DUCTLESS INVERTER; SPLIT AIR CONDITIONER; »USER’S MANUAL«; SLIM DUCT TYPE; • Read this manual carefully before
MULTI-ZONE DUCTLESS INVERTER SPLIT AIR CONDITIONER WITH HEAT PUMP »USER’S MANUAL« SLIM DUCT TYPE INDOOR UNIT IMPORTANT NOTE: • Read this manual carefully before installing or operating your new air conditioning unit. Make sure to save this manual for future reference.
Page 35 - able of Contents; Owner’s Manual; SAFETY
Indoor Unit Parts and Major Functions .......... 05 Manual Operations .................................................... 07 T able of Contents Owner’s Manual SAFETY FIRST Safety Precautions .................................................... 04 1 2 3
Page 36 - Care and Maintenance; b. How to Clean the Air Filter; Troubleshooting; b. Troubleshooting Tips
Page 3 Care and Maintenance ............................. 08 a. Unit Maintenance ....................................... 08 b. How to Clean the Air Filter ....................... 08 c. Repairing Refrigerant Leaks ...................... 09 d. Preparation for Periods of Non-use ........ 09 Trouble...
Page 37 - Safety P
Page 4 Thank you for purchasing this air conditioner. This manual will provide you with information on how to operate, maintain, and troubleshoot your air conditioner. Following the instructions will ensure the proper function and extended lifespan of your unit. Please pay attention to the follo...
Page 38 - Indoor Unit Parts And Major Functions; Unit Parts; Operating Conditions; Drain hose
Page 5 Indoor Unit Parts And Major Functions 2 Unit Parts Air inlet Air outlet Fig. 2.1 Operating Conditions Use the system under the following temperatures for safe and effective operation. If the air conditioner is used under different conditions, it may malfunction or become less efficient. I...
Page 40 - Manual Operations; been misplaced or is out of batteries.
Page 7 Manual Operations 3 Manual Operations This display panel on the indoor unit can be used to operate the unit in case the remote control has been misplaced or is out of batteries. Fig. 3.1 • MANUAL button: This button selects the mode in the following order: AUTO, FORCED COOL, OFF. • FORCED...
Page 41 - e And Maintenance
Page 8 Care And Maintenance Safety P r ecautions • Contact an authorized service technician for repair or maintenance. Improper repair and maintenance may cause water leakage, electrical shock, or fire, and may void your warranty. • DO NOT substitute a blown fuse with a higher or lower amperage ...
Page 43 - CAUTIONS; oblem; oubleshooting
Page 10 Troubleshooting CAUTIONS If one of the following conditions occurs, switch off the power supply immediately and contact your dealer for further assistance. • The operation light continues to flash rapidly after the unit has been restarted. • The remote control buttons do not work. • The ...
Page 45 - Err; EC
Page 12 Troubleshooting Err or Codes Number Cause The number of flashes per second Timer indicator Err or Code 1 Indoor EEPROM (Electrically Erasable Programmable Read-Only Memory) error 1 Off E0 2 Indoor and outdoor unit communication malfunction 2 Off E 1 3 Indoor fan speed malfunction 4 Off E3...