Page 3 - Table of contents
1 Table of contents 1 Safety Information 3 1.1 Equipment Approval Information 3 1.1.1 Notification to the Local Telephone Company 3 1.1.2 Rights of the Phone Company 4 1.2 Interference Information 4 1.3 Hearing Aid Compatibility (HAC) 5 1.4 FCC RF Radiation Exposure Statement 5 2 Important 5 2.1 Pow...
Page 4 - Advanced settings; Technical data
2 Table of contents 9.3 Change the Display Language 22 9.4 Select the Display Wallpaper 22 9.5 Select the Color Theme 22 9.6 Set the Display Contrast 23 9.7 Set the Backlight Time 23 9.8 Deactivate/Activate Auto Hang-Up 23 10 Advanced settings 24 10.1 Registration 24 10.2 Unregister 24 11 Technical ...
Page 5 - Safety; Telephone Company
3 Safety Information 1 Safety Information 1.1 Equipment Approval Information Your telephone equipment is approved for connection to the public switched telephone network and is in compliance with parts 15 and 68, FCC Rules and Regulations and the Technical Requirements for Telephone Terminal Equipme...
Page 6 - Company
4 Safety Information 1.1.2 Rights of the Phone Company Should your equipment cause trouble on your line, which may harm the telephone network, the telephone company shall, where practicable, notify you that temporary discontinuance of service may be required. Where prior notice is not practicable an...
Page 7 - Impor tant
5 Impor tant • Connect the telecommunications equipment to an outlet on a circuit different from that to which the receiving antenna is connected. If these measures do not eliminate the interference, please consult your dealer or an experienced radio / television technician for additional suggestion...
Page 8 - Power requirements; Warning
6 Impor tant Users should ensure for their own protection that the electrical ground connections of the power utility, telephone lines and internal metallic water pipe systems, if present, are connected together. This precaution may be particularly important in rural areas.CAUTION: Users should not ...
Page 9 - Recycle your batteries
7 The RBRC ® seal • Battery life may be shortened in low temperature conditions. 2.2 Electric, Magnetic and Electromagnetic Fields (“EMF”) 1. Philips Royal Electronics manufactures and sells many consumer-oriented products, which usually, as with any electronic apparatus, have the ability to emit an...
Page 10 - Service Centers
8 The RBRC ® seal is part of its commitment to protecting our environment and conserving natural resources.RBRC ® is a registered trademark of Rechargeable Battery Recycling Corporation. 3.1 Service Centers US service centerPhilips Accessories & Computer Peripherals North America1881 Route 46 We...
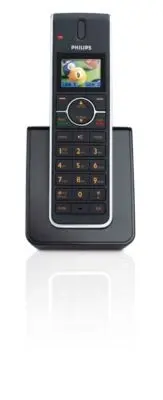
Page 12 - Your phone
10 Your phone 4 Your phone Congratulations on your purchase and welcome to Philips! This manual only explains part of the functions of your handset. For details on other functions, refer to the manual provided with the base station. To fully benefit from the support that Philips offers, register you...
Page 14 - Menu key
12 Your phone station, this key works with the default line when making or answering external calls.During a call: Activate the flash function.In other modes: Dial the selected number in the Phonebook, Redial list, or Call log. When used with the dual-line SE659 base station, works with the default ...
Page 15 - Mute key
13 Your phone When used with the SE650/655 base station during call log display: Toggles area code and long distance display on/off. O Mute key s When off hook: Deactivate/activate the microphone. P Call transfer key & Intercom key i In idle mode: Initiate an internal call.During a call: Short p...
Page 17 - Getting star ted
15 Getting star ted 5 Getting star ted Be sure to charge the handset for at least 24 hours before using it for the first time. 5.1 Connect the charger 1 Place the charger near a power outlet. 2 Connect the power cable to the connector on the charger. 3 Connect the other end of the power cable to the...
Page 18 - Install the batteries
16 Getting star ted way to power down the charger is to unplug the power adaptor from the power outlet. Therefore, ensure that the power outlet is easily accessible.The power adaptor must be connected correctly, as incorrect connection could damage the unit. 5.2 Install the batteries Always use the ...
Page 19 - Install optional headset; Registering the handset; Note
17 Registration 1 To remove the belt clip, simply pull the clip away from the handset. 2 To attach the belt clip to your handset, fit the tabs on the belt clip into the slots at the back of the handset and push into place. 5.5 Install optional headset Your handset may be used with an optional headse...
Page 20 - Using the Handset
18 Using the Handset 3 On the handset, press m , scroll n to Advanced Set and press o Select . 4 Scroll n to Register and press o Select . 5 Enter the PIN when prompted and press o OK to confirm. Registering… is displayed on the screen.• Upon successful registration, a validation tone is emitted and...
Page 21 - Using the Intercom
19 Using the Intercom and Conference Calling 8 Using the Intercom and Conference Calling 8.1 Using the Intercom The intercom feature allows you to make free internal calls, transfer external calls from one handset to another and use the conference option. With the SE658/SE659, you can also make inte...
Page 23 - Personal settings; Danger
21 Per sonal settings 9 Personal settings 9.1 Change the Handset Name You can name the handset and display the handset name in idle mode. The default handset name is Philips. 1 Press m in idle mode, scroll n to Personal Set and press o Select . 2 Handset Name is highlighted. Press o Select . 3 The l...
Page 26 - 0 Advanced settings
24 Advanced settings / Technical data 10 Advanced settings 10.1 Registration Please refer to section 6.1 on how to register the handset. 10.2 Unregister 1 Press m in idle mode, scroll n to Advanced Set and press o Select . 2 Scroll n to Unregister and press o Select . 3 Enter the PIN when prompted a...