Page 3 - Contents; English
English Contents Introduction_______________________________________________________ 6 General description_______________________________________________ 6 What do the icons on my appliance handle mean?_____________ 7 What does the icon on my Quick Clean Pod mean?_____________ 9 How do I charge my a...
Page 4 - Pulsing
15 Cleaning brush16 Length settings17 Click-on beard styler attachment18 Comb for beard styler attachment19 Attachment holder20 Click-on cleansing brush attachment21 Click-on nose trimmer attachmentNote: The accessories supplied may vary fordifferent products. The box shows the accessoriesthat have ...
Page 6 - The appliance is charging.; Icon; How do I charge my appliance?; Charging with the supply unit; Make sure that the appliance is switched off.
Icon Behavior Meaning Bottom lightflashing orange The battery is almost empty (see 'How doI charge my appliance?'). Lights flashing insequence The appliance is charging. Lights upcontinuously The appliance is fully charged. What does the icon on my Quick Clean Podmean? Icon Behavior Meaning Becomes ...
Page 7 - Charging in the charging stand (specific models only); Make sure the appliance is switched off.; Specific models only:; The light ring on the
2 Insert the small plug into the appliance and putthe supply unit in the wall socket.- While the appliance is in quick charge mode, the lights of the battery status indicator lightup one after the other. After approximately 5minutes, the bottom light of the batterystatus indicator flashes. The batte...
Page 8 - SkinIQ
- As the appliance continues to charge, the light ring becomes brighter and rotatesslower. - When the appliance is fully charged, the light ring lights up fully and stops rotating. 4 After charging, remove the supply unit from thewall socket and pull the small plug out of thecharging stand. 'Unplug ...
Page 9 - Shaving; Switch on the appliance.
start with the guided shave to enhance yourshaving experience.- Correct handling of your appliance will contribute to the best shaving result. - Follow the advice obtained from the synchronized shaves and the personalizedprograms. Shaving You can use this appliance either wet or dry, oreven under th...
Page 10 - SkinIQ motion guidance:; When you have; Skin adaptation period; Cleaning reminder
3 Use the narrow sides of the shaving unit toshave in hard-to-reach areas such as alongyour jawline and under your nose. 4 Switch off and clean the appliance after eachuse.Note: Make sure you rinse all foam or shavinggel off the appliance. SkinIQ motion guidance: When you have finished shaving you r...
Page 11 - Synchronize your shaves
- Clean the appliance and attachments after each use to prevent clogging and damage (see'How do I clean my appliance and theattachments?'). - Clean the shaving heads thoroughly once a month or when the appliance does not shaveas well as it used to (see 'Thorough cleaning'). Synchronize your shaves T...
Page 12 - You can also use the trimmer under your nose.; Using the click-on attachments
4 You can also use the trimmer under your nose. 5 Switch off the appliance and clean the trimmerafter each use to prevent clogging and damage(see 'How do I clean my appliance and theattachments?'). 6 Close the trimmer. Using the click-on attachments Note: The accessories supplied may vary fordiffere...
Page 14 - Trimming ear hair
Using the nose/ear trimmer attachment You can use the nose/ear trimmer attachment totrim your nose and/or ear hair. Trimming nose hair Make sure both the nose/ear trimmer attachmentand nasal passages are clean before trimming. 1 Twist the shaving head or other attachment toremove it from the handle ...
Page 15 - cm into your ear channel, as this could; Using the cleansing brush attachment; Place the cleansing brush on your cheek.
Do not insert the trimming head more than0.5 cm into your ear channel, as this could damage the eardrum. 4 Slowly turn the trimming head around toremove all unwanted hairs from your outer earchannel. 5 Switch off the appliance and clean theattachment after use. Using the cleansing brush attachment...
Page 16 - Storage and travel; shaver to protect it from dirt accumulation.; Travel lock
20 sec. 7 After approx. 20 seconds, move the applianceto your other cheek and start cleansing this partof your face. 20 sec. 8 After approx. 20 seconds, move the applianceto your forehead and start cleansing this part ofyour face. Gently move the brush head from leftto right.We advise you to not ove...
Page 17 - Deactivating the travel lock; Cleaning the shaver under the tap; Switch on the shaver.
3 sec. Press the on/off button for 3 seconds to use thetravel lock mode. When the travel lock is activated, the travel locksymbol flashes.Note: Bluetooth is switched off when the travellock is activated. Deactivating the travel lock Press the on/off button for 3 seconds. Once the travel lock is deac...
Page 18 - Thorough cleaning
3 Switch off the shaver. Press the release buttonto open the shaving unit. 4 Rinse the hair chamber under a warm tap. 5 Rinse the shaving head holder under a warmtap. 6 Carefully shake off excess water and let theshaving head holder air-dry completely. 7 Close the shaving unit. Thorough cleaning We ...
Page 19 - Cleaning the pop-up trimmer
2 Press the release buttons on the shaving unitand pull the shaving head holder off theshaving unit. 3 Rinse the hair chamber and shaving headholder under the tap. 4 Remove the shaving heads. For detailedinstructions, see 'How do I replace the shavingheads?.'Note: Do not clean more than one cutter a...
Page 20 - After cleaning, switch off the appliance.; Cleaning the click-on attachments
1 Make sure that the appliance is switched offand disconnected from the wall socket. 2 Push the trimmer release slide down to openthe pop-up trimmer. 3 Switch on the appliance and rinse the pop-uptrimmer with warm water. 4 After cleaning, switch off the appliance. 5 Carefully shake off excess water ...
Page 21 - How do I use the Quick Clean Pod?; Preparing the Quick Clean Pod for use
3 Clean the parts thoroughly with warm water.Use soap only on the cleansing brushattachment.Tip: If rinsing the nose/ear trimmer attachmentunder the tap is not sufficient, press theattachment onto handle and immerse thetrimming head in a glass with warm water for afew minutes. Then switch on the app...
Page 22 - Using the Quick Clean Pod
3 Lift the tab on the seal and pull it by the cornerto remove the seal from the Quick Clean PodCartridge. 4 Press the small circular piece on the handle ofthe Quick Clean Pod Cartridge to break thesnap hook on the handle. 5 Place the Quick Clean Pod Cartridge into theQuick Clean Pod. 6 Put the top o...
Page 23 - Replacing the Quick Clean Pod Cartridge; Frequency of use
Clean Pod (see 'How do I clean my appliance andthe attachments?'). Always shake excess water off the shaver beforeyou place it in the Quick Clean Pod. 1 Place the shaver upside down into the QuickClean Pod. The shaver automatically detectsthat it is in the Quick Clean Pod. 2 Switch on the shaver to ...
Page 25 - Pair the shaver and smartphone; More information is available at
shave data to be synced later so you don't need totake your smartphone with you when you shave.The first few times you switch on the shaver, thenotification symbol flashes if no connection isestablished with a smartphone. 3 sec. You can switch off Bluetooth on your shaver byactivating the travel loc...
Page 26 - Notification symbol; Unpair your smartphone:
3 Switch on the shaver. 4 Open the app and follow the instructions tostart the pairing process. 5 Once paired, the shaver and app connectautomatically when the app is open andBluetooth on your phone is switched on. Notification symbol The shaver is equipped with a notification symbol.The notificatio...
Page 27 - How do I replace the shaving heads?; Replacing the shaving heads; Switch off the shaver.
How do I replace the shaving heads? For maximum shaving performance, we advise youto replace the shaving heads every two years. Replace damaged shaving heads immediately.Always replace the shaving heads with originalPhilips shaving heads (see 'Ordering accessories'). Replacing the shaving heads 1 Sw...
Page 28 - - Each retaining ring has two recesses that fit; Ordering accessories; To buy accessories or spare parts, visit
2 1 6 Place the retaining rings back onto the shavingheads and turn them clockwise to reattach theretaining ring. - Each retaining ring has two recesses that fit exactly into the projections of the shaving headholder. Turn the ring clockwise until your hear aclick to indicate that the ring is fixed....
Page 29 - Troubleshooting; Shaver; Problem
- CC12 Philips Quick Clean Pod Cartridge 2-pack- CC13 Philips Quick Clean Pod Cartridge 3-pack- CC16 Philips Quick Clean Pod Cartridge 6-packNote: The availability of the accessories may differby country. Troubleshooting This chapter summarizes the most commonproblems you could encounter with the ap...
Page 30 - meter of your shaver to
Problem Possible cause Solution Make sure that yoursmartphone is withinone meter of your shaver to enable a Bluetoothconnection. Make sure your shaver ischarged. I want to usethe shaverwithout theapp. You do not have to connectyour shaver with yoursmartphone before eachshave. To get personalizedsh...
Page 31 - Philips Quick Clean Pod
Problem Possible cause Solution Hairs or dirtobstruct theshaving heads. Clean the shaving headsthoroughly. Water isleaking fromthe bottom ofthe appliance. During cleaning,water may collectbetween the innerbody and the outershell of theappliance. This is normal and notdangerous because allelectronics...
Page 33 - All rights reserved
© 2020 Koninklijke Philips N.V. All rights reserved 3000.057.198 3 .1 (14/8/2020) >75 % recycled paper>75 % papier recyclé
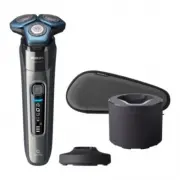


 Philips S7782/50 Quick Guide
 Philips S7783/55 User Manual
 Philips S7783/59 User Manual
 Philips S7786/50 User Manual
 Philips S7786/55 User Manual
 Philips S7786/59 User Manual
 Philips S7882/54 Quick Guide
 Philips S7882/55 Quick Guide
 Philips S7885/50 Quick Guide
 Philips S7885/55 Quick Guide
 Philips S7885/63 Quick Guide
 Philips S7885/85 User Manual